

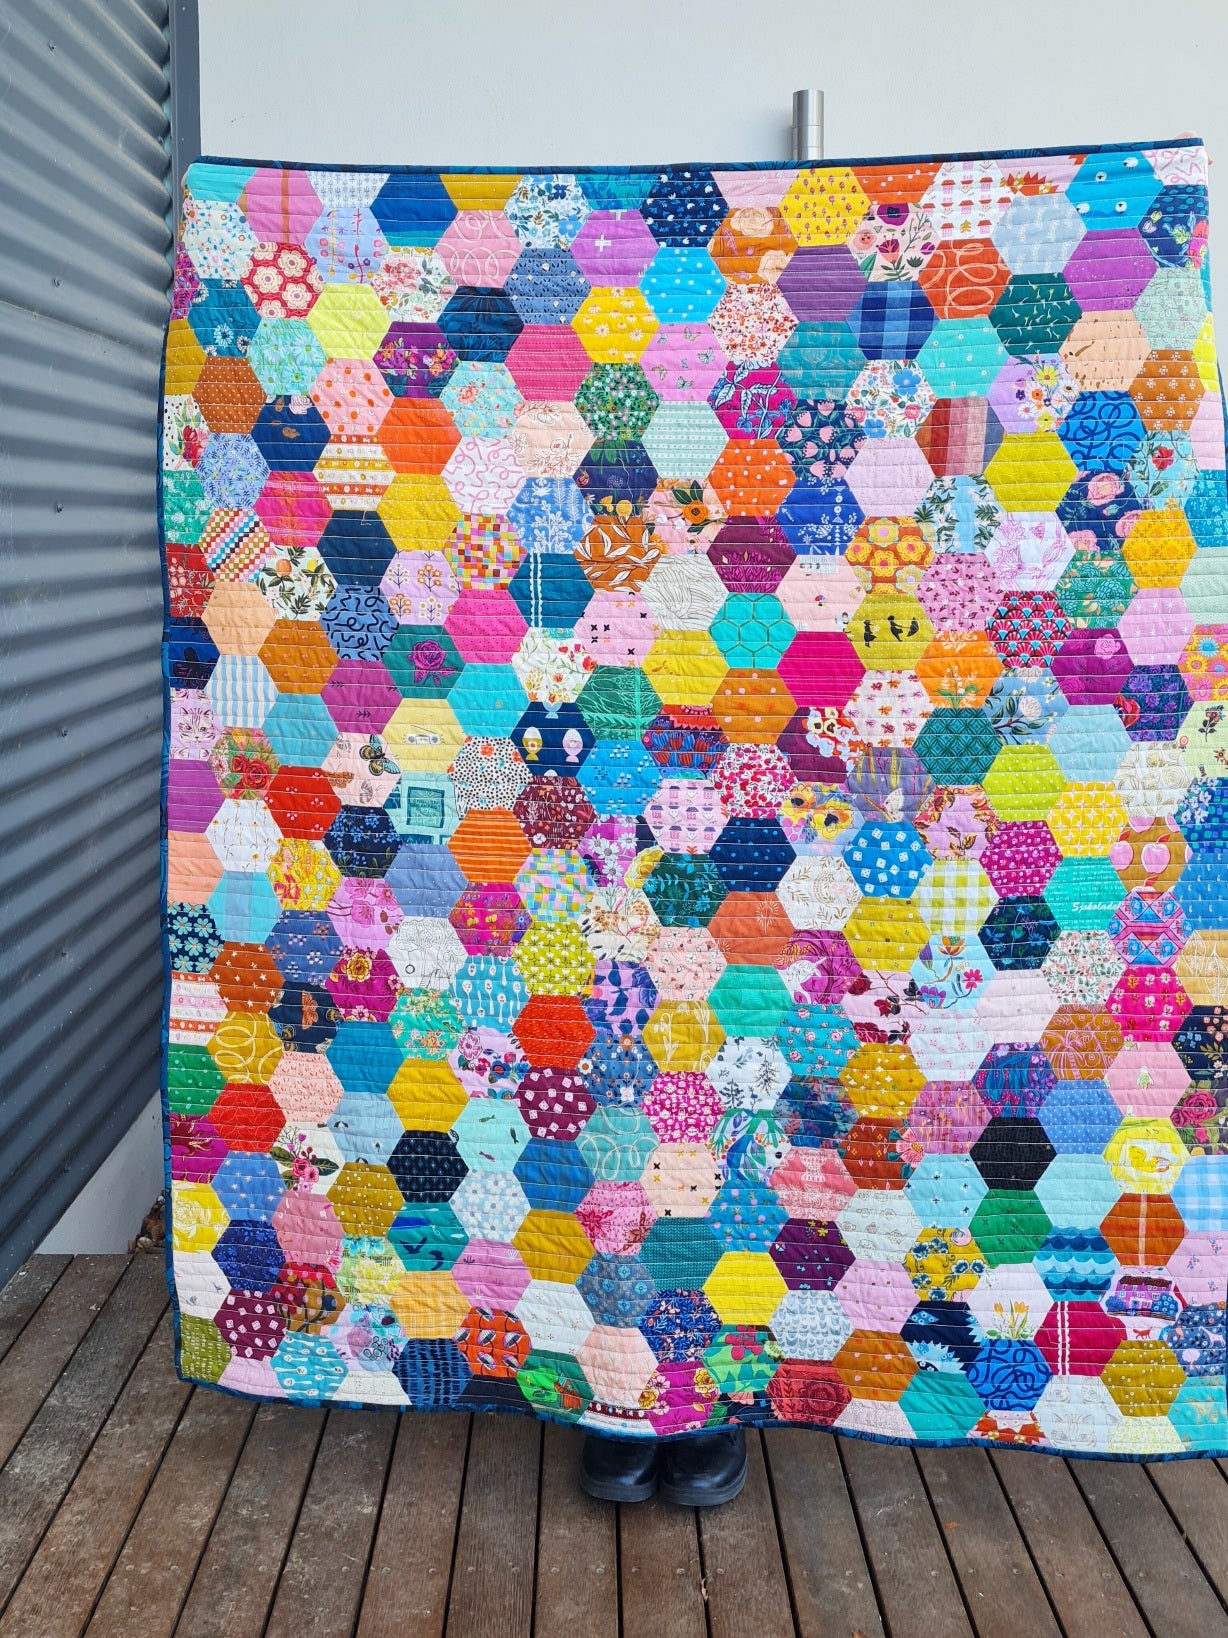
Secret Garden Quilt - A Free EPP Quilt Pattern

My first Secret Garden Hexie Quilt was made during the early pandemic lockdowns with my kids. They desperately wanted a puppy, and so we made a deal. “Help me make a simple hexie quilt from start to finish, with videos and explanations for each step, and we'll use the money from selling the kits to buy a puppy.” It turned out to be a wonderful project to do together to keep us from going crazy. There's nothing like having something to work towards in times of uncertainty!
If you want every detail of this quilt broken down, with videos and tips for working with kids, you can find those original posts here. We used an alternate construction method and finished at a smaller size to make it easier for children to handle and manage.


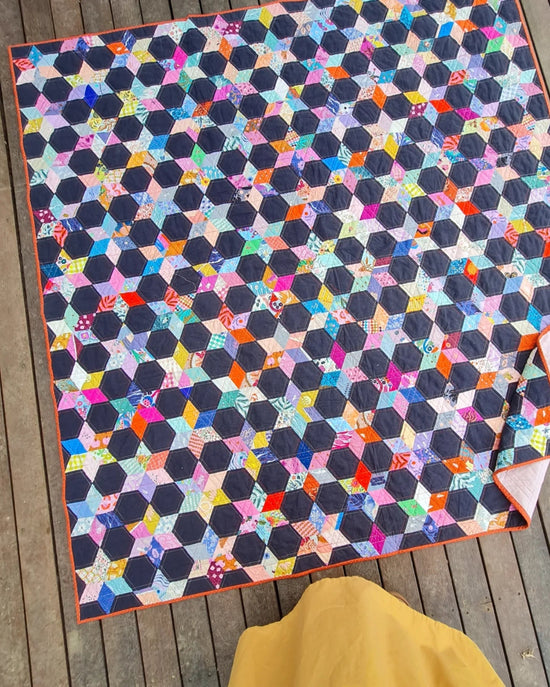
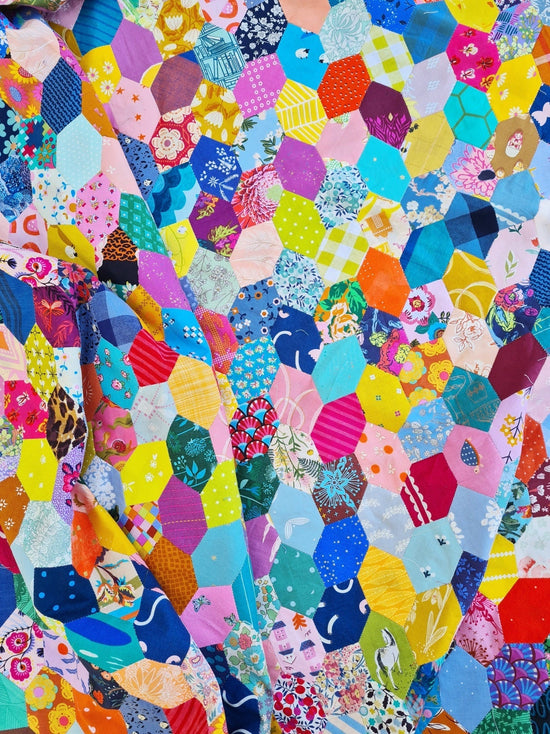
I've made this Secret Garden lots of times since lockdowns. I made an ‘I Spy’ version for a new baby boy, a scrappy version with all of my lawn scraps, with a scrumptious flannel backing, but I wanted to make it bigger, and with a more traditional construction for those of you who prefer their quilts lap sized rather than baby sized. I used a Big Box of 2" Hexagons and dug through my scraps for both the front and the back. I just love how rich and happy it is!
Secret Garden is a free, beginner friendly English Paper Pieced (EPP) quilt pattern. It's a garden of hexagons that never needs to be watered or weeded. It just gets sewn up once, and stays lovely forever. (You can read why I tend to choose quilting over gardening for this reason here.) So, it's with great joy that Secret Garden is joining my collection of free English paper pieced (EPP) patterns!
(If you need some help to get started with EPP, I've created a collection of beginner friendly tutorials to get you started here.)
Finished Quilt Size: 50" x 59"
Supplies
ENGLISH PAPER PIECES (PURCHASE OR DOWNLOAD BELOW)
- (289) 2" hexagons/ (1) Big Box of 2" Hexagons
- Sub cut (8) 2" hexagons in half from point to point to create (16) 2" half hexagons
FABRIC REQUIREMENTS
- Hexagons: (37) 4 ¼" width of fabric (WOF) strips OR 4 ½ yards OR (19) fat quarters (FQs) OR (289) 4 ½" square scraps
- Binding: ½ yard
- Backing: 3 ½ yards
ADDITIONAL SUPPLIES
- Batting 58" x 67"
- Rotary cutter/mat/ruler
- Embroidery scissors
- Hand-sewing needles (Bohin Milliners, size 9)
- 50-weight thread (Aurifil)
- Craft glue stick and/or Clover Wonder Clips for basting (see basting tutorial here)
- Sewing machine
- Iron

CUTTING INSTRUCTIONS
Fabric scraps:
- Cut the scraps 3/8" larger on all sides around the paper piece templates.
Yardage:
- For hexagons: Using the hexagon paper pieces as a guide, cut (281) hexagons, leaving a 3/8" seam allowance on all sides.
- For half hexagons: Using the leftover strips from the hexagons, cut (16) half hexagons, leaving a 3/8" seam allowance on all sides.*
*Alternatively, you could baste extra whole hexagons and use them in the place of half hexagons. You would simply trim off the excess fabric at the end.
Binding: Cut (6) 2 ½" width of fabric (WOF) strips.
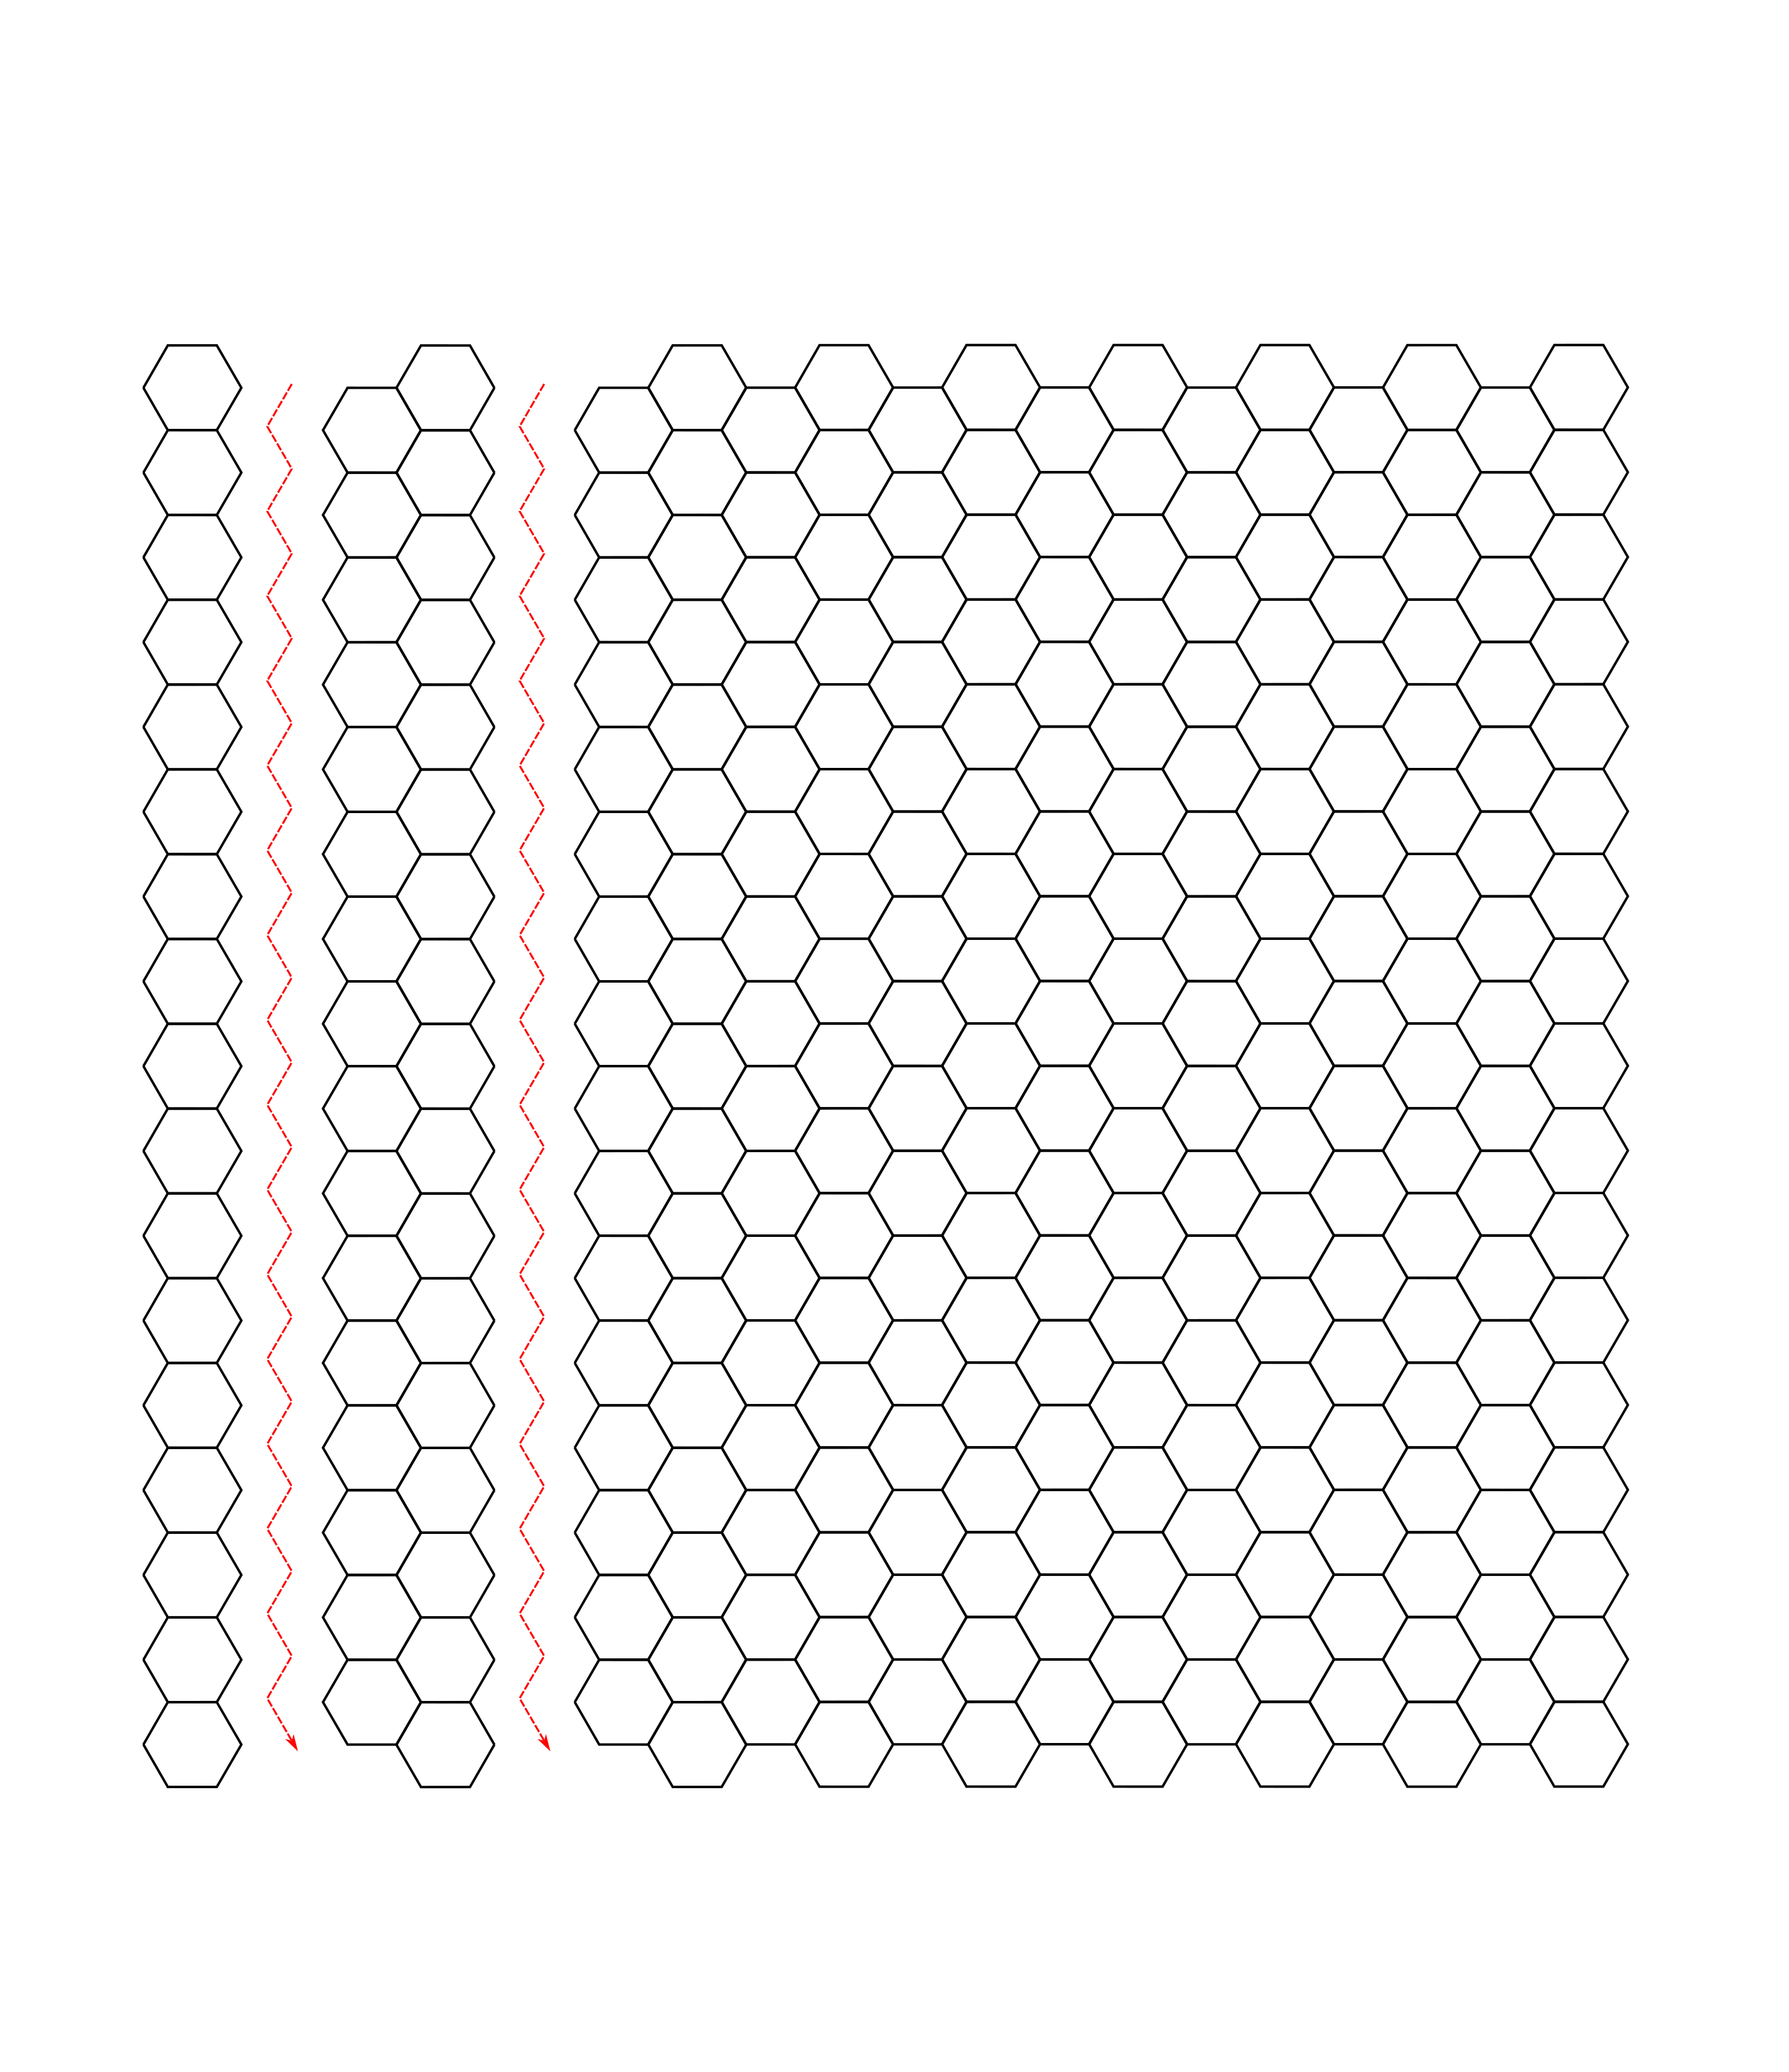
Stitching the Rows
1. Prepare all of your shapes by basting the fabric to the paper.
2. To create the rows, stitch hexagons together, right sides together, into rows as shown in the diagram. To create Row A, stitch 17 whole hexagons together, as shown in the figure on the left. Make 9 of Row A.
3. To create Row B, stitch 16 whole hexagons together, as shown in the figure on the right. Make 8 of Row B.

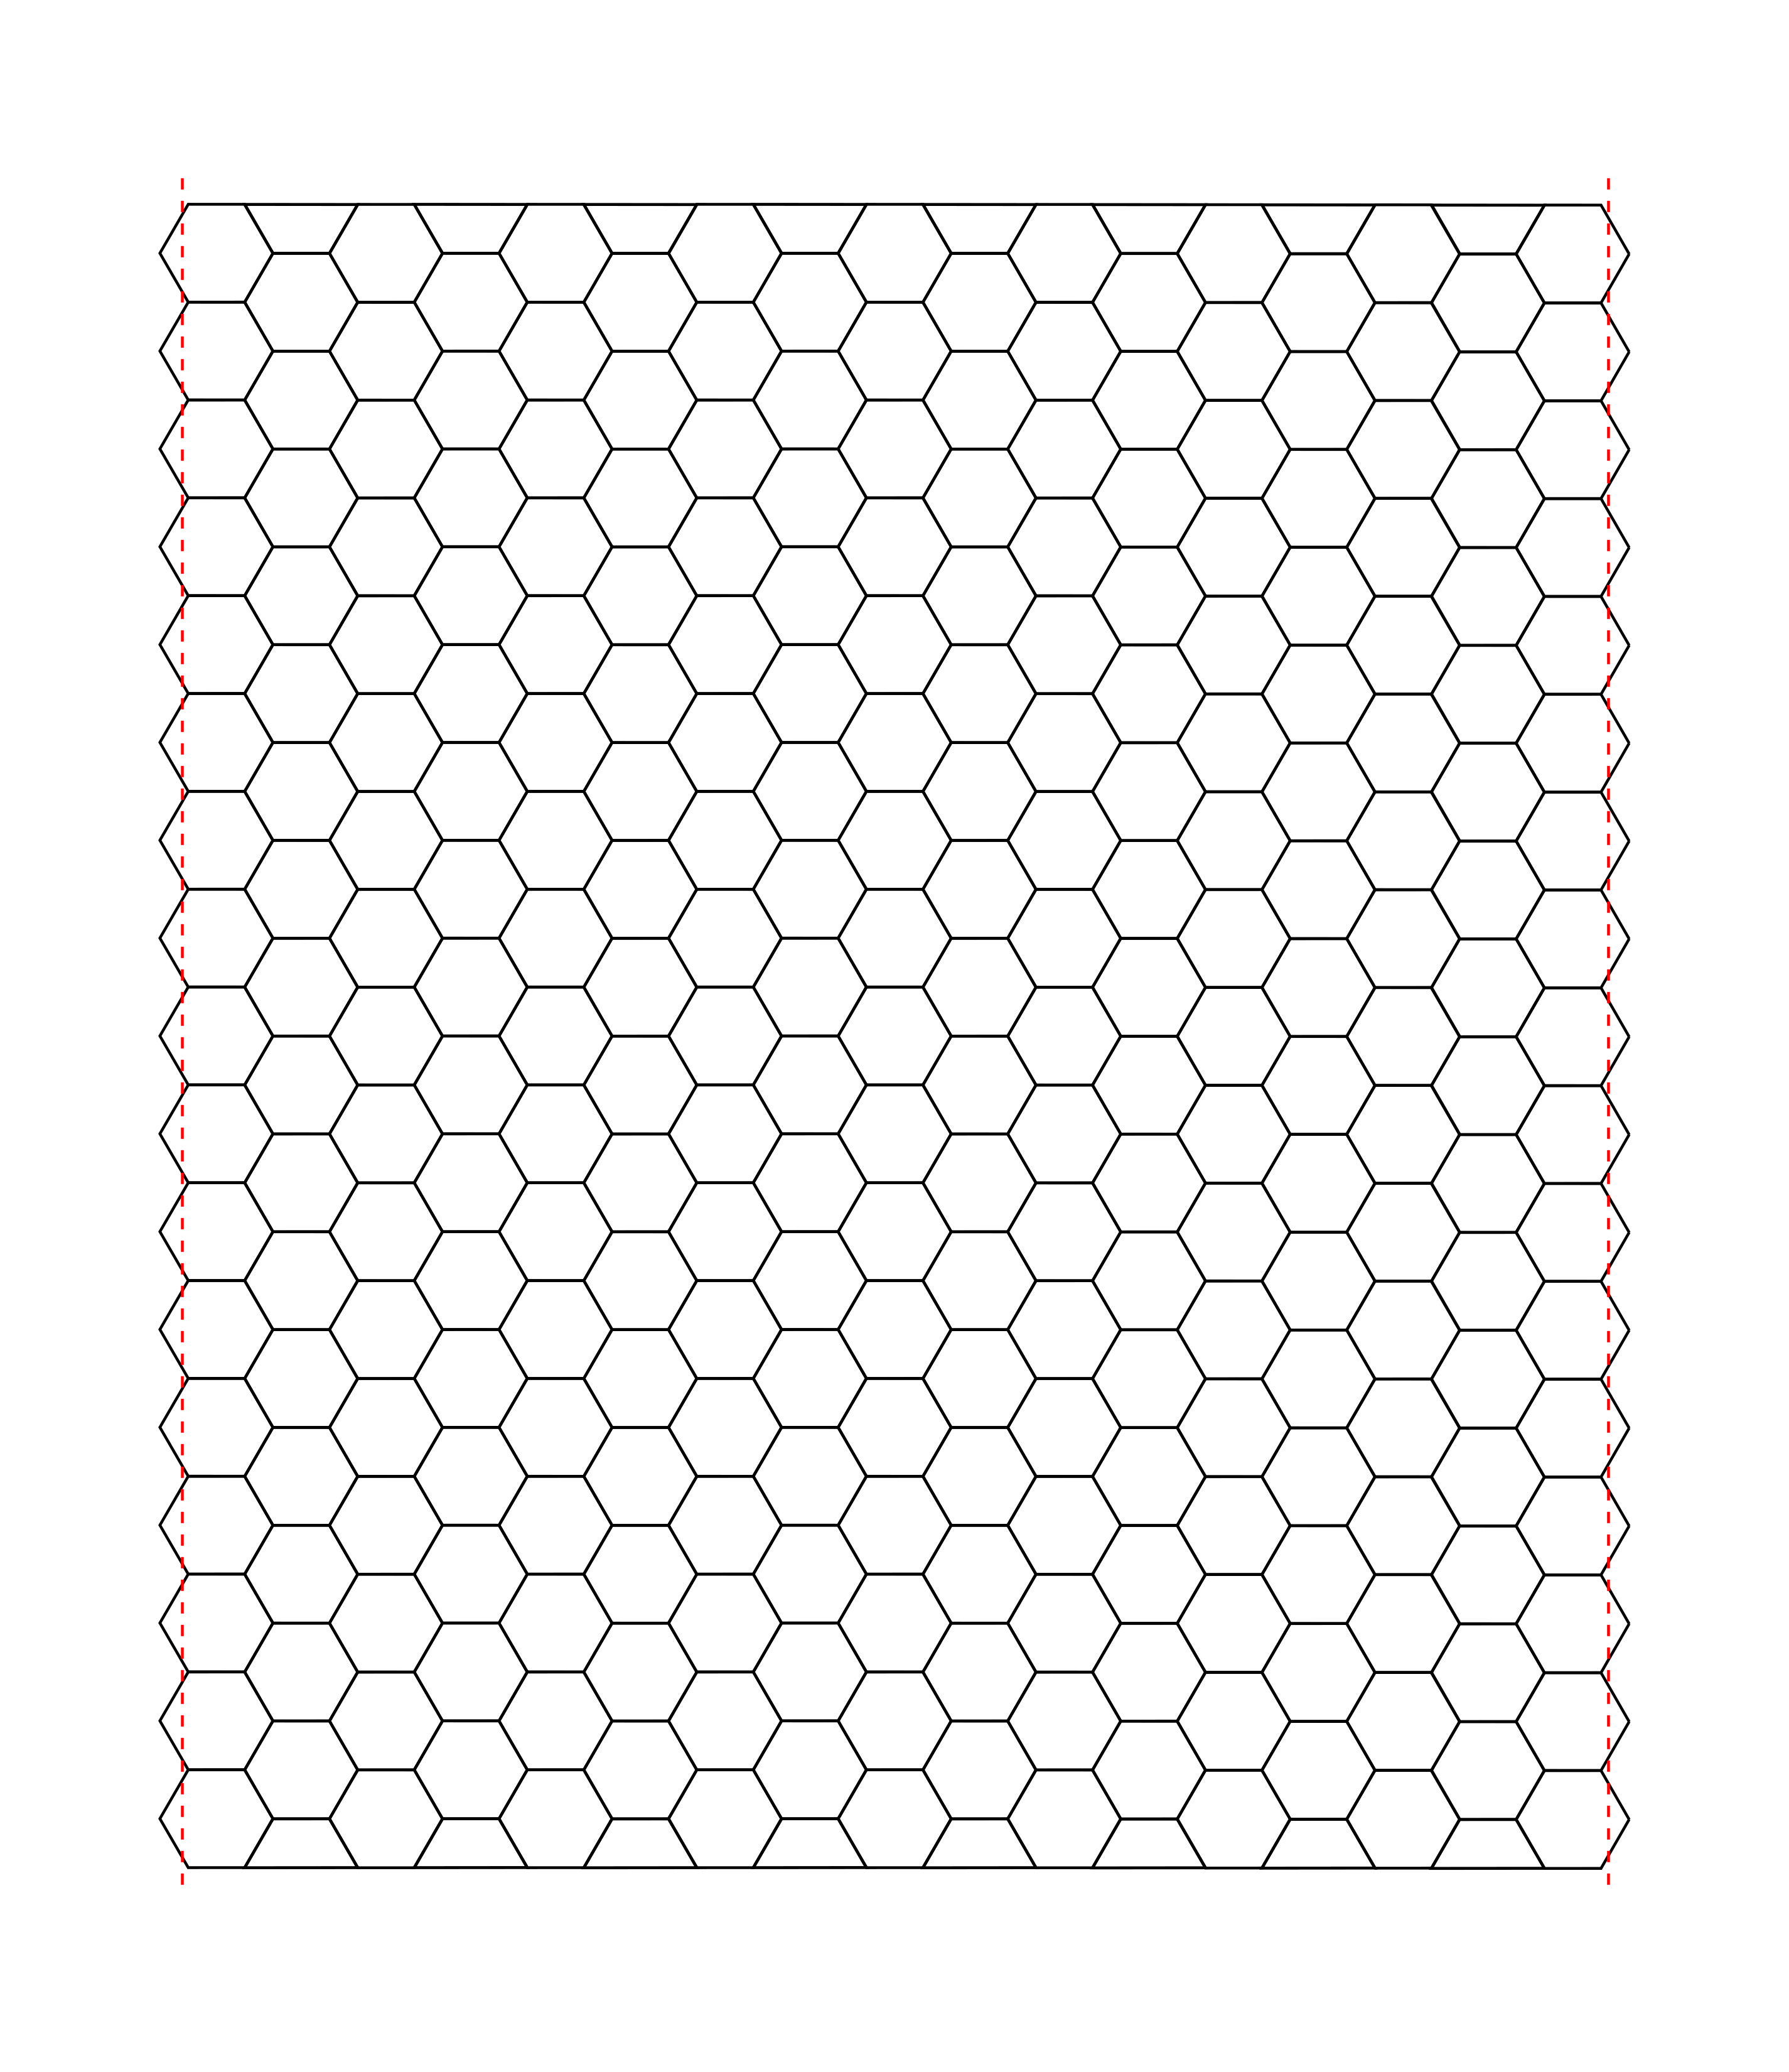
Stitching the Quilt Top
4. Lay out your rows A-B-A-B-A-B-A-B-A-B-A-B-A-B-A-B-A. Take a photo on your phone so you can remember what order you want to sew them together.
5. You can sew the rows together into pairs first, or just add one at a time to the quilt top. Either way, take surrounded papers out as you go to make the quilt top much easier to manage.
6. Sew the half hexagons into the gaps at the top and bottom of the quilt. (I like saving these bits till last because they create an extra opportunity to spread colours out and create balance with quiet or loud fabrics.)
Note! You could also sew whole hexagons into these gaps if you have leftovers that didn't make it into the original layout. These will be trimmed later.
7. Once the quilt top is complete, remove any remaining papers, and press the quilt top flat. Press all the internal seams back in place.
Tip! Hold your quilt top up in front of a window to easily see any hidden papers left in the quilt top!
8. Open out the seam allowance of the outside edge pieces and press in place.

FINISHING
9. Layer the backing (wrong side up), batting, and quilt top (right side up). Baste the layers together. Quilt as desired. The featured quilt was machine quilted with straight lines across the quilt.
10. Trim the excess quilt top, batting, and backing ¼" beyond the seam line where the papers were. This will trim the points off of the hexagons on the left and right of the quilt top, and any whole hexagons at the top and bottom of the quilt top.
11. Sew the binding strips together end to end using diagonal seams. Press the binding in half wrong sides together.
12. Leaving an 8" tail of binding, sew the binding to the quilt through all layers, matching all raw edges. Miter corners. Stop approximately 12" from where you started. Lay both loose ends of binding flat along quilt edge. Where these two loose ends meet, fold them back on themselves and press to form a crease. Using this crease as your stitching line, sew the two open ends of the binding together right sides together. Trim seam to ¼ " and press open. Finish sewing the binding to quilt.
13. Turn the binding to the back of quilt and stitch in place.

Ready to make this free EPP quilt pattern?
Click below to have the FREE printable Secret Garden colouring sheet and printable paper pieces delivered right to your inbox!
Save yourself hours of cutting and 73 sheets of paper by buying the shapes pre-cut below!


Hi Caitlin,
Thank you so much for your comment on our blog! And, thank you for catching that error! You are absolutely right and it should be (19) FQs. We have updated the pattern above thanks to you! Happiest of stitching to you!
Your fabric requirements are off… with 10 fat quarters I can only get 16 – 4 1/2 in squares which is 160 hexagons.
Hi Nikkie,
Thanks so much for your comment on the blog! In English paper piecing, all shapes are measured along the length of one side, so while 2" hexagons are 4" across, hopefully, each side measures 2". If so, then you’ve got the right size! I hope that helps clarify!
Hey just a quick question. I printed out the template but the hexagons are 4” across not two inches… the little 1inch square is right… am I suppose to use 4inch hexagons?
Thank you for these lovely patterns. I was interested to make quilts with my sewing machine. Since I read your blog I‘m all in for EPP. This is so meditative. I never thought that I could make a quilt without a machine. Waiting for more inspiration from you.
Leave a comment