

How to Finish an English Paper Pieced Quilt
When you finish a machine pieced quilt top, moving onto basting and quilting is fairly straight forward. You've probably pressed your quilt as you go, and your quilt top always has a straight edge! English Paper Pieced quilts have a few extra steps. These can seem a little daunting - even I have a quilt ladder full of finished tops ready to finish, but if you break it down into these following steps, you'll be sure to finish your quilt in no time.
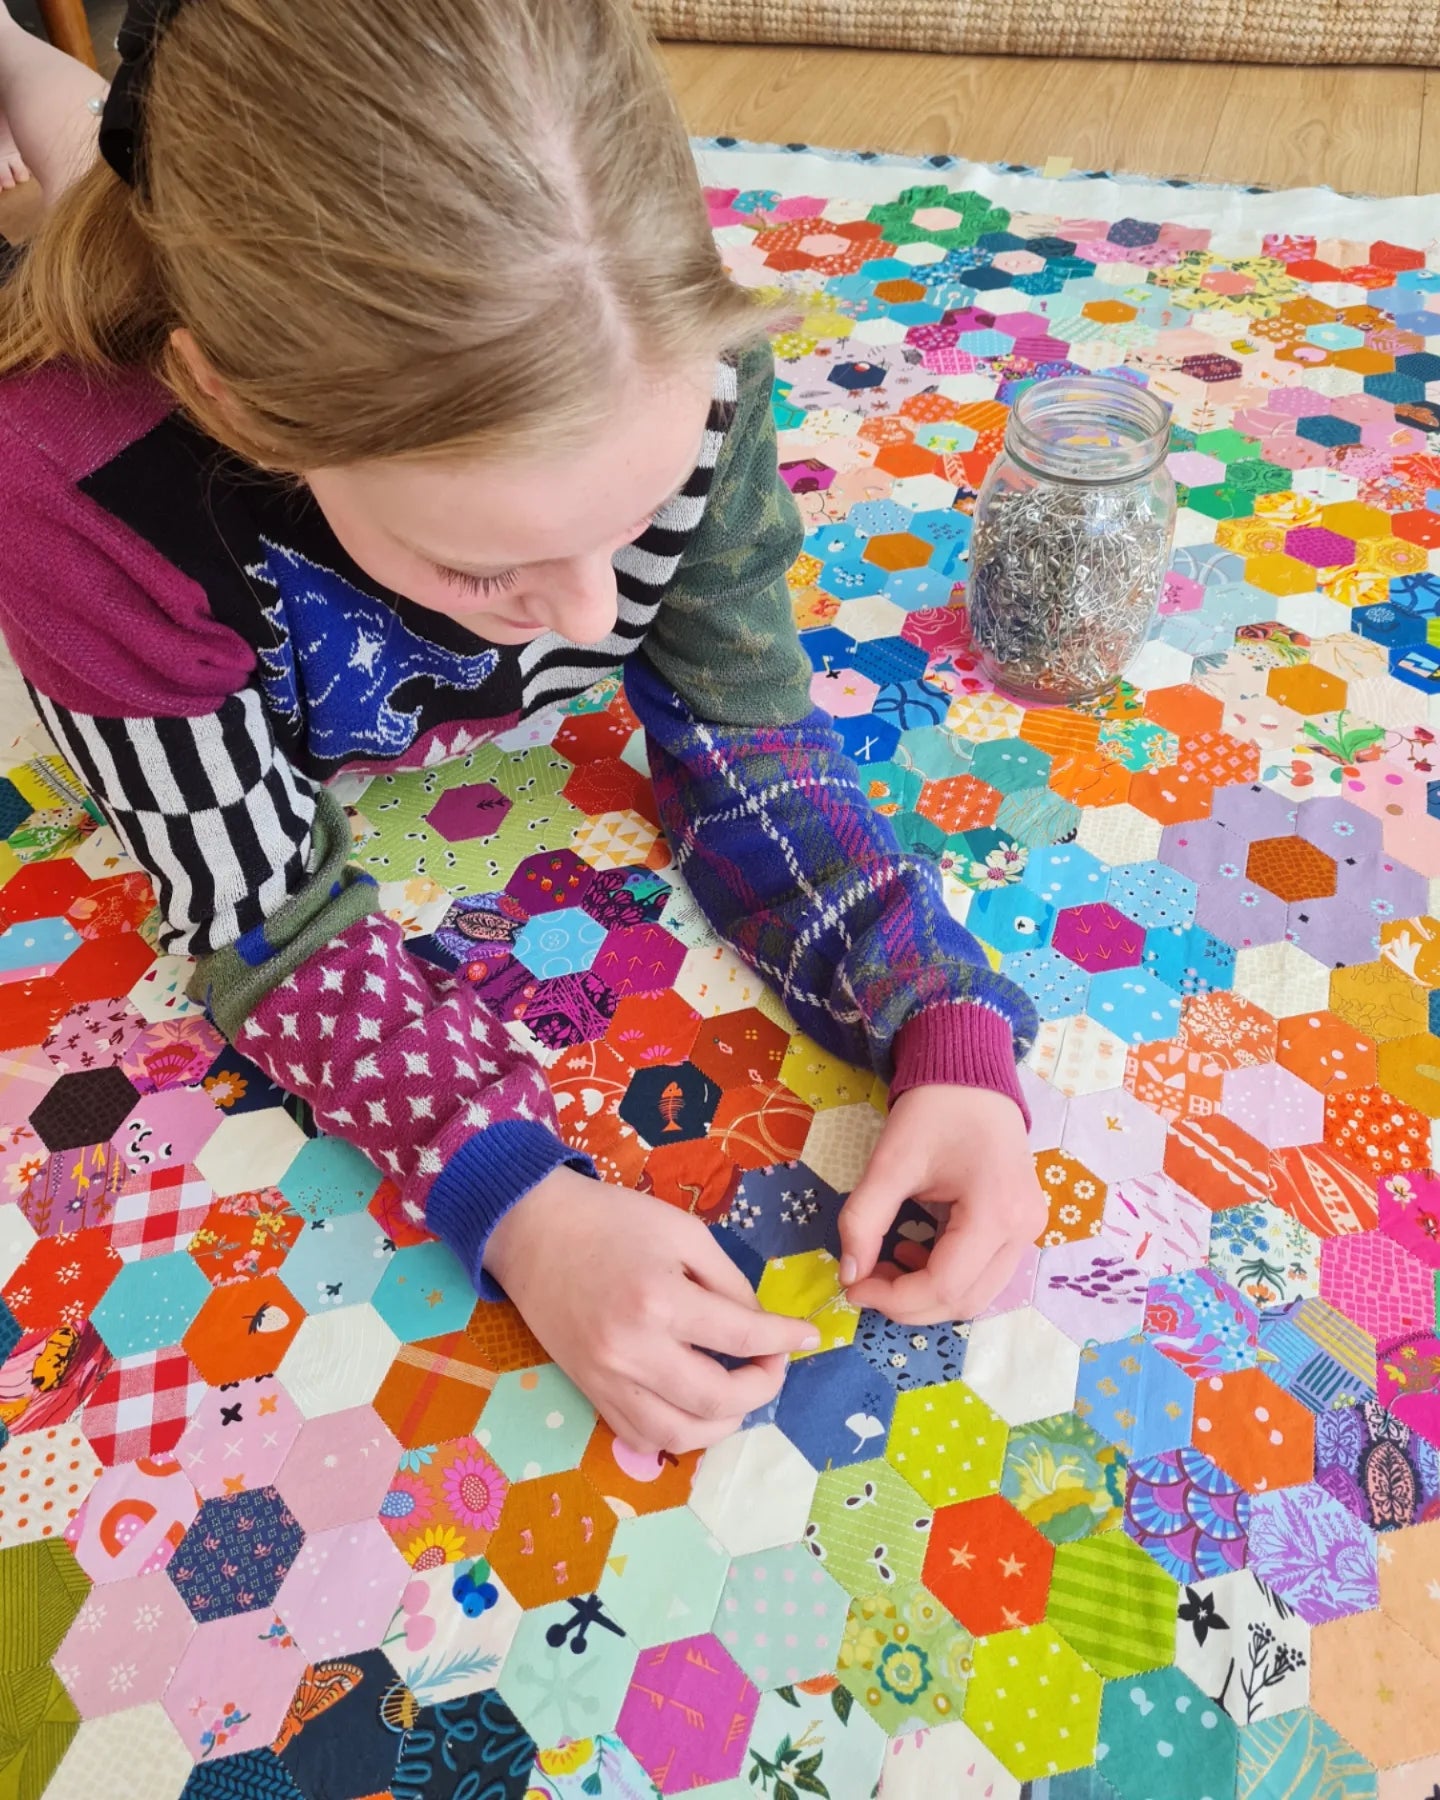
1. Take all the English Paper Pieces out.
Job number one is papers. I always recommend taking papers out as you go, especially as you're sewing rows together. It makes it SO much easier to wrangle your quilt and match up your seams if it's not so stiff and heavy. Once your rows are all sewn up, and any last edge pieces sewn in, give your quilt top one last go over. I've found it best to do this row by row, so that you don't accidentally miss a section.
Keep a special eye out for small pieces like the 1" diamonds in Ice Cream Soda. The seam allowance folded over the piece at the back can hide the paper completely!
TIP! I recommend getting some helpers to hold up your quilt top to a window to let the light shine through it. You'll see any leftover papers by the shadow they create.

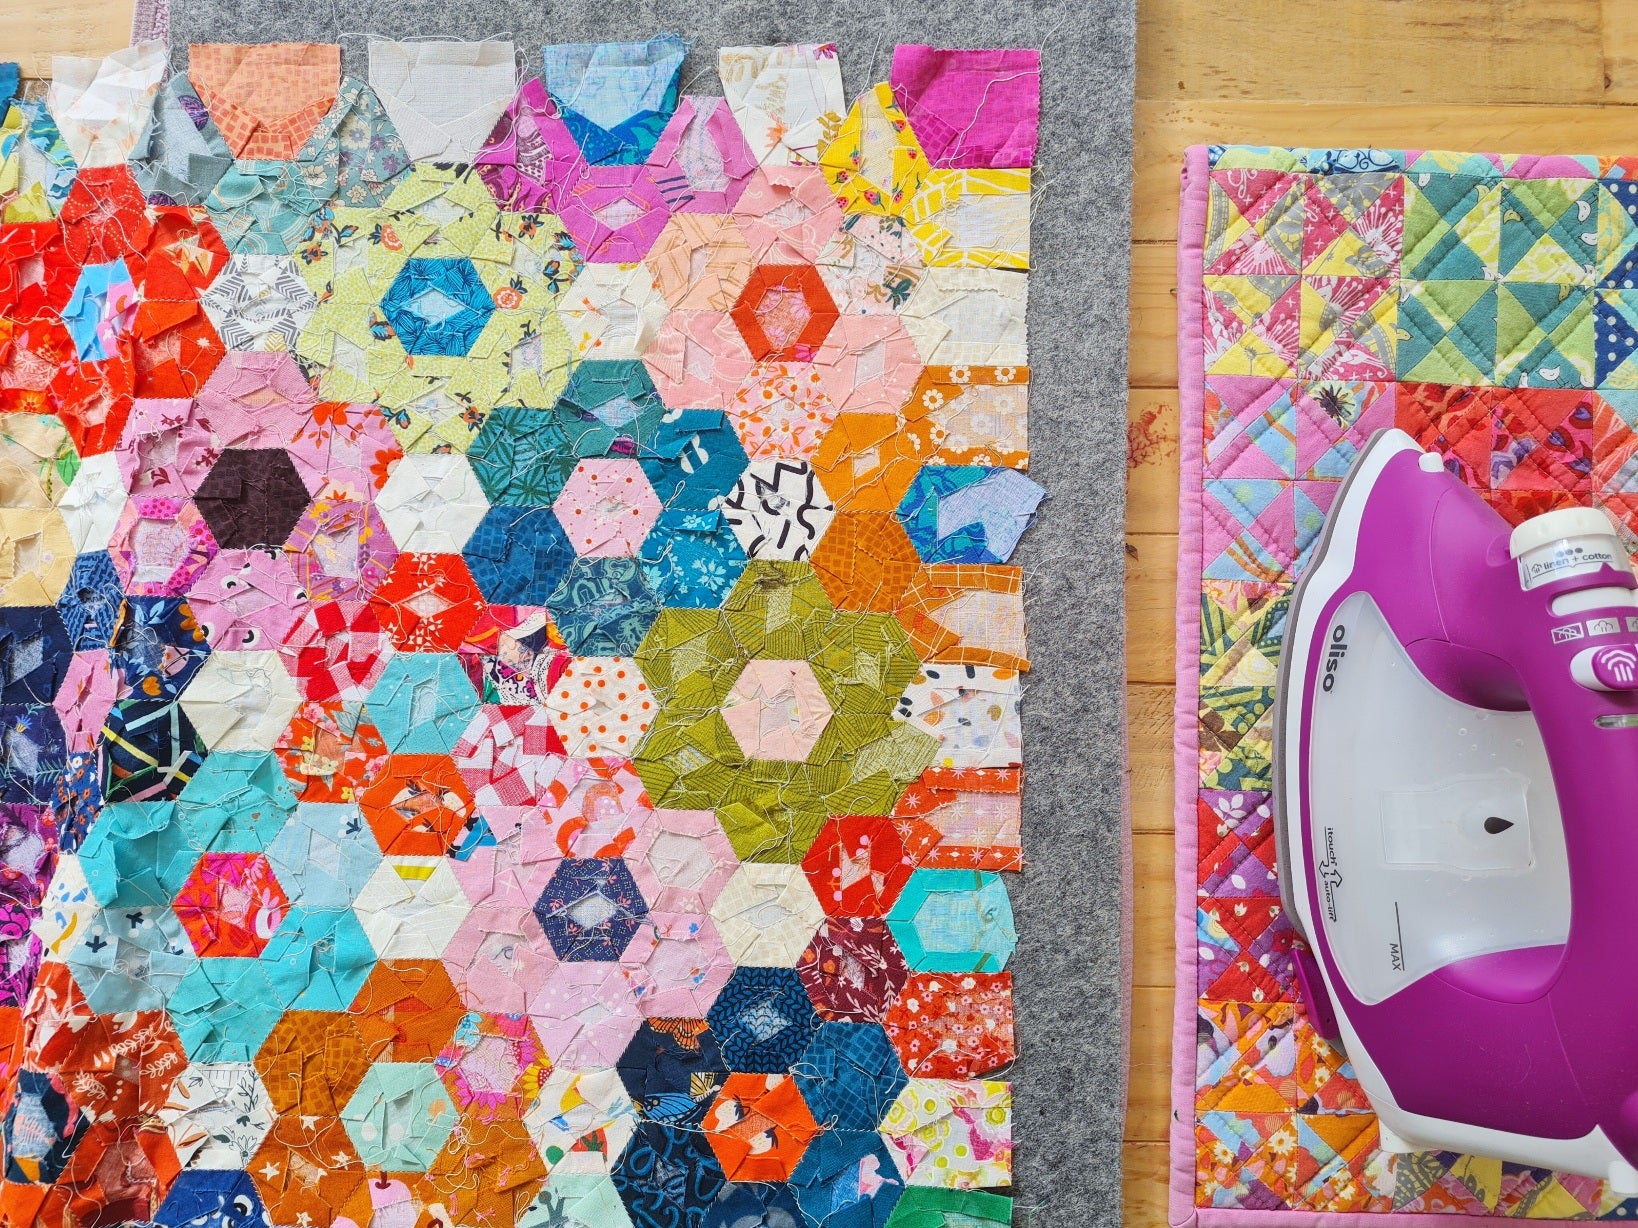
2. Press your quilt top.
After you finish your English Paper Pieced quilt top, you need to press all of your seams back in place. Because you don't need to press as you go like with machine sewn patchwork, it's good to lean into this step and take your time. I highly recommend some motivating music, ironing in front of a favourite movie, or putting a story on in your headphones!
Tip! If you don't like doing it all in one go at the end, take your papers out of the centre of each block as you go, and then give them a press. You can also take this approach as you add each row to your quilt.
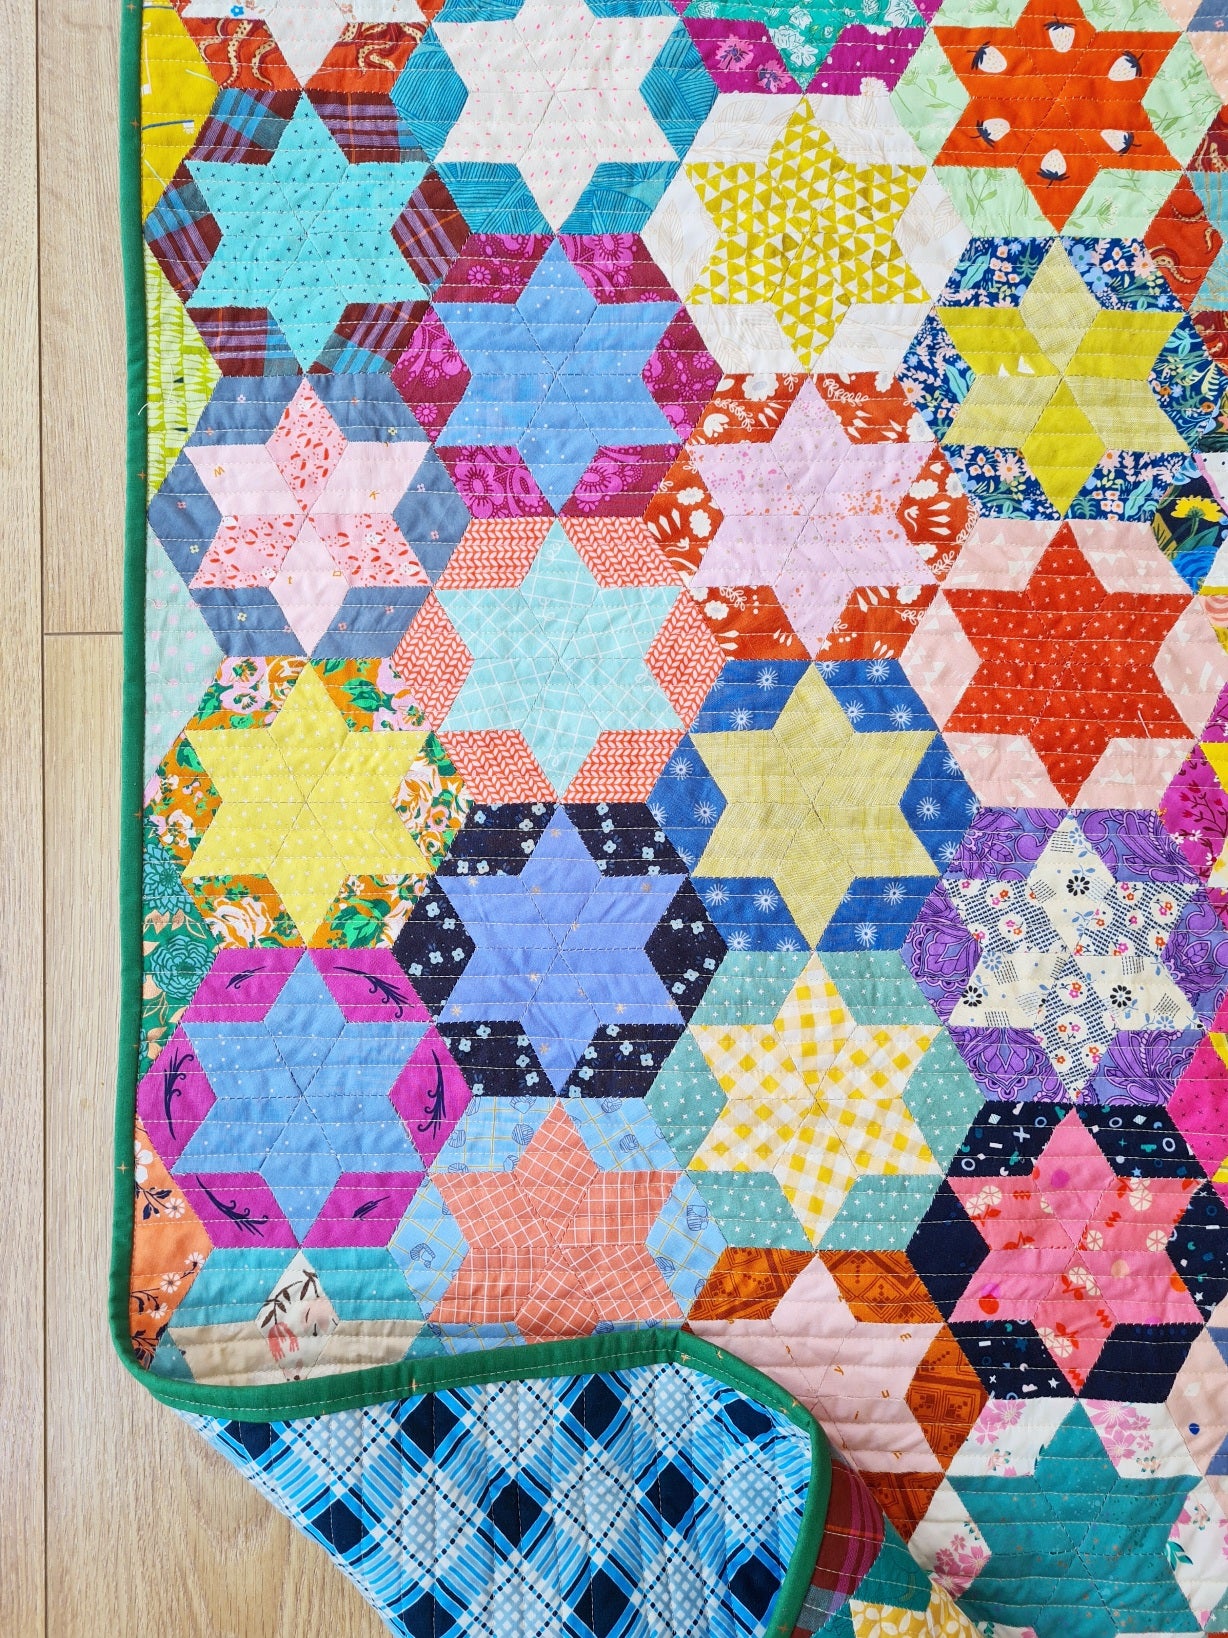
As you come to the edge of your quilt top, you need to press all the seams around the perimeter of the quilt top open and out flat. In the photo below, my edges are all straight because I happened to use square pieces of fabric basted around my hexagons. With many English paper pieced quilts, this won't be the case, but the same rule still applies. Where the seam faces the outside edge of the quilt, press the seam open and out flat. This will creates a seam allowance for squaring off your quilt and sewing your binding.
3. Make your backing.
I've broken this step down into smaller steps to help explain the process.
a) Work out your backing: Knowing how to work out how much backing you need is great if you're not working off a pattern that includes it in the fabric requirements, or if you've adjusted the quilt to make it bigger or smaller.
I usually use regular width of fabric quilting cotton (around 44" wide) for my backing. I work out how much I need by measuring the narrowest width of my quilt, adding 8" (4" allowance on each side), and then doubling it so I have enough length. I then divide this number by 36 (inches in a yard) to see how many yards I need.
For example, if my quilt is 55" x 65":
55 + 8 = 63
63 x 2 = 126
126/36 = 3.5
If you're buying fabric based on this number, I would always get a little more to allow for any mistakes made while cutting!
b) Make your backing: If you're just using the one print for backing, and you know you've got the right amount, you can just cut your length in half (i.e if I'm going by the example above, then I'd cut the 126" piece into 2 pieces, each 63" long) and sew them together along the selvedge. I don't even trim the selvedge in most cases, unless the backing is light and the selvedge is dark, or the backing is soft or fine, and the selvedge feels thicker and noticeable. (See the diagram below.)

For my example quilt, I've now made a backing that is 63" x approximately 88" long. Rather than measuring the point where I need to trim it, I usually lay it out on the floor, lay the quilt top over it, and cut the excess with scissors.
If I'm making a quilt back from large pieces in stash, then I lay the quilt top out first, and lay the pieces over it, arranging them in a way that is simple to sew together. I always keep in mind to allow 4" on each side as I'm designing my backing, unless of course, I have a piece that is just short that I really want to use. In those cases, I like to still have at least 2" overhang.
Press your backing once made. (I tend to press all seams one way rather than open because it's QUICK!)
c) Cut your wadding/batting: I use Legacy brand cotton wadding on a bolt with 10 yards on it. When I cut my wadding, I unroll the bolt over the quilt top on the floor, again in the direction of the narrowest width. This wadding is wide enough for a queen, so I always have excess for throw sized quilts. Cutting it off the bolt along the width of the quilt creates the least waste.

4. Baste your quilt sandwich.
a) Tape your backing to the floor. I use masking tape (paper tape) to fix my quilt back right side down to the floor. It needs to be taut and wrinkle-free, but not stretched out of shape. I use at least 3 pieces of tape on each edge, and 1 in each corner.
b) Next, lay out your wadding. Because wadding sticks nicely to fabric, I always find this easiest if I have someone on the other end to hold it out with me and lay it down. Otherwise, billow it up and then lay it down as if you're making a bed with a flat sheet. If you have big creases as you're flattening it out, lift an edge and pull a little rather than trying to push the crease out.
c) Next lay out your quilt top. Starting in the centre, flatten out any creases so that it lies flat and even.
d) Baste the quilt sandwich. Put a basting pin through all three layers until you hit your hard floor, then push the pin back up, and close it. I usually pin 3-4" apart. I find it quite quick if I choose a shape or part of a block that has a good spread across the quilt and pin in those - saves making decisions as you go!
Note: I use basting pins for basting. I used to use 505 spray, but perhaps like machine sewing vs EPP, I found that even though it was quicker, it took way more effort and I didn't enjoy it. Add the environmental factors of spray cans thrown out, and the cost, and pins eventually won out. If you have teenagers who are always looking for ways to make extra pocket money like mine, I highly recommend using those too!

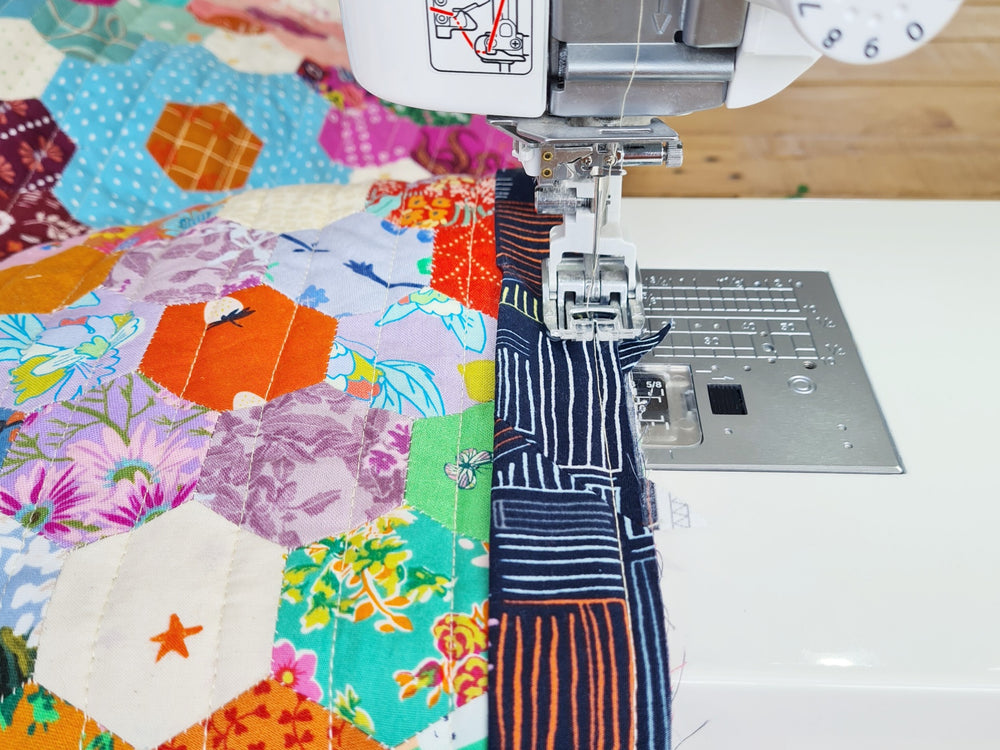
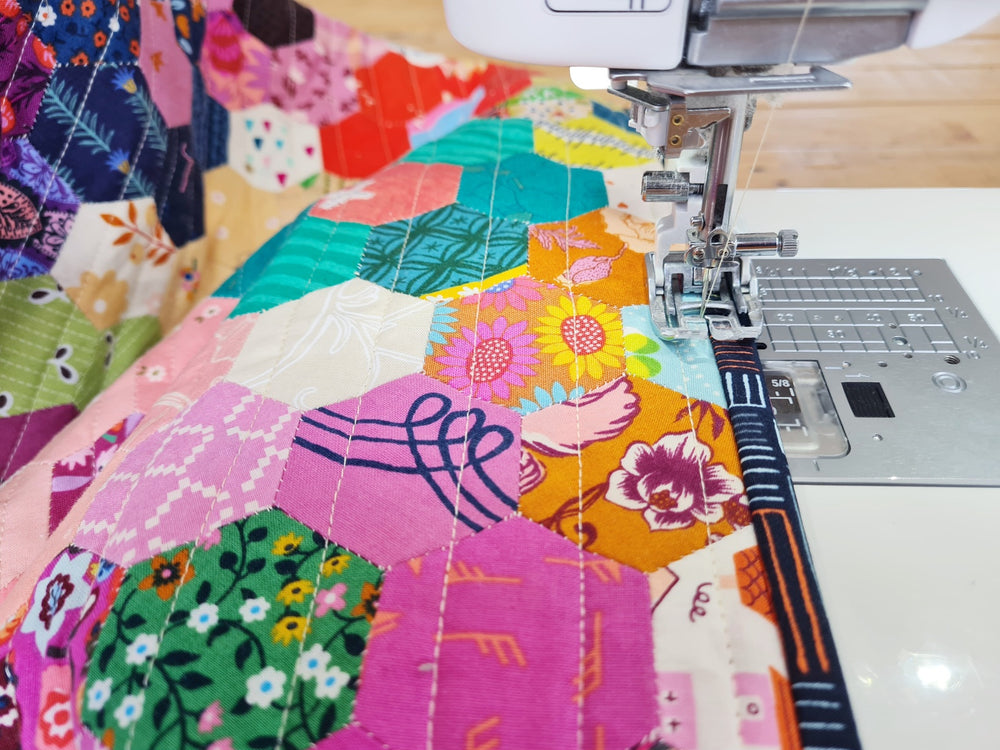
5. Quilting your quilt!
My favourite quilting is straight line quilting on my machine. I have a Janome 6700P which has a special built-in walking foot which I LOVE! If you want to mark your lines, you can use a Hera Marker (a molded plastic tool you can use with a quilt ruler to mark creases on your quilt sandwich), but I tend to use my seams as a guide. My walking foot edge is ½" from the needle, and there's a little window in the foot that's ¼" from the needle. I use both of these, traveling along a seam line, to get straight lines on my quilt.
Tip! If you make a quilting plan before you baste, sometimes this can help guide where you put your pins - if you put them out of the way of the quilting lines, you won't have to stop and start as much.
I also enjoy hand quilting. It's much slower, but it also can be easier on your back and shoulders than wrangling a quilt through a machine. I made a little video of my hand quilting here. And, Lisa from Stitching the Journey, has a very thorough Hand Quilting tutorial series here.
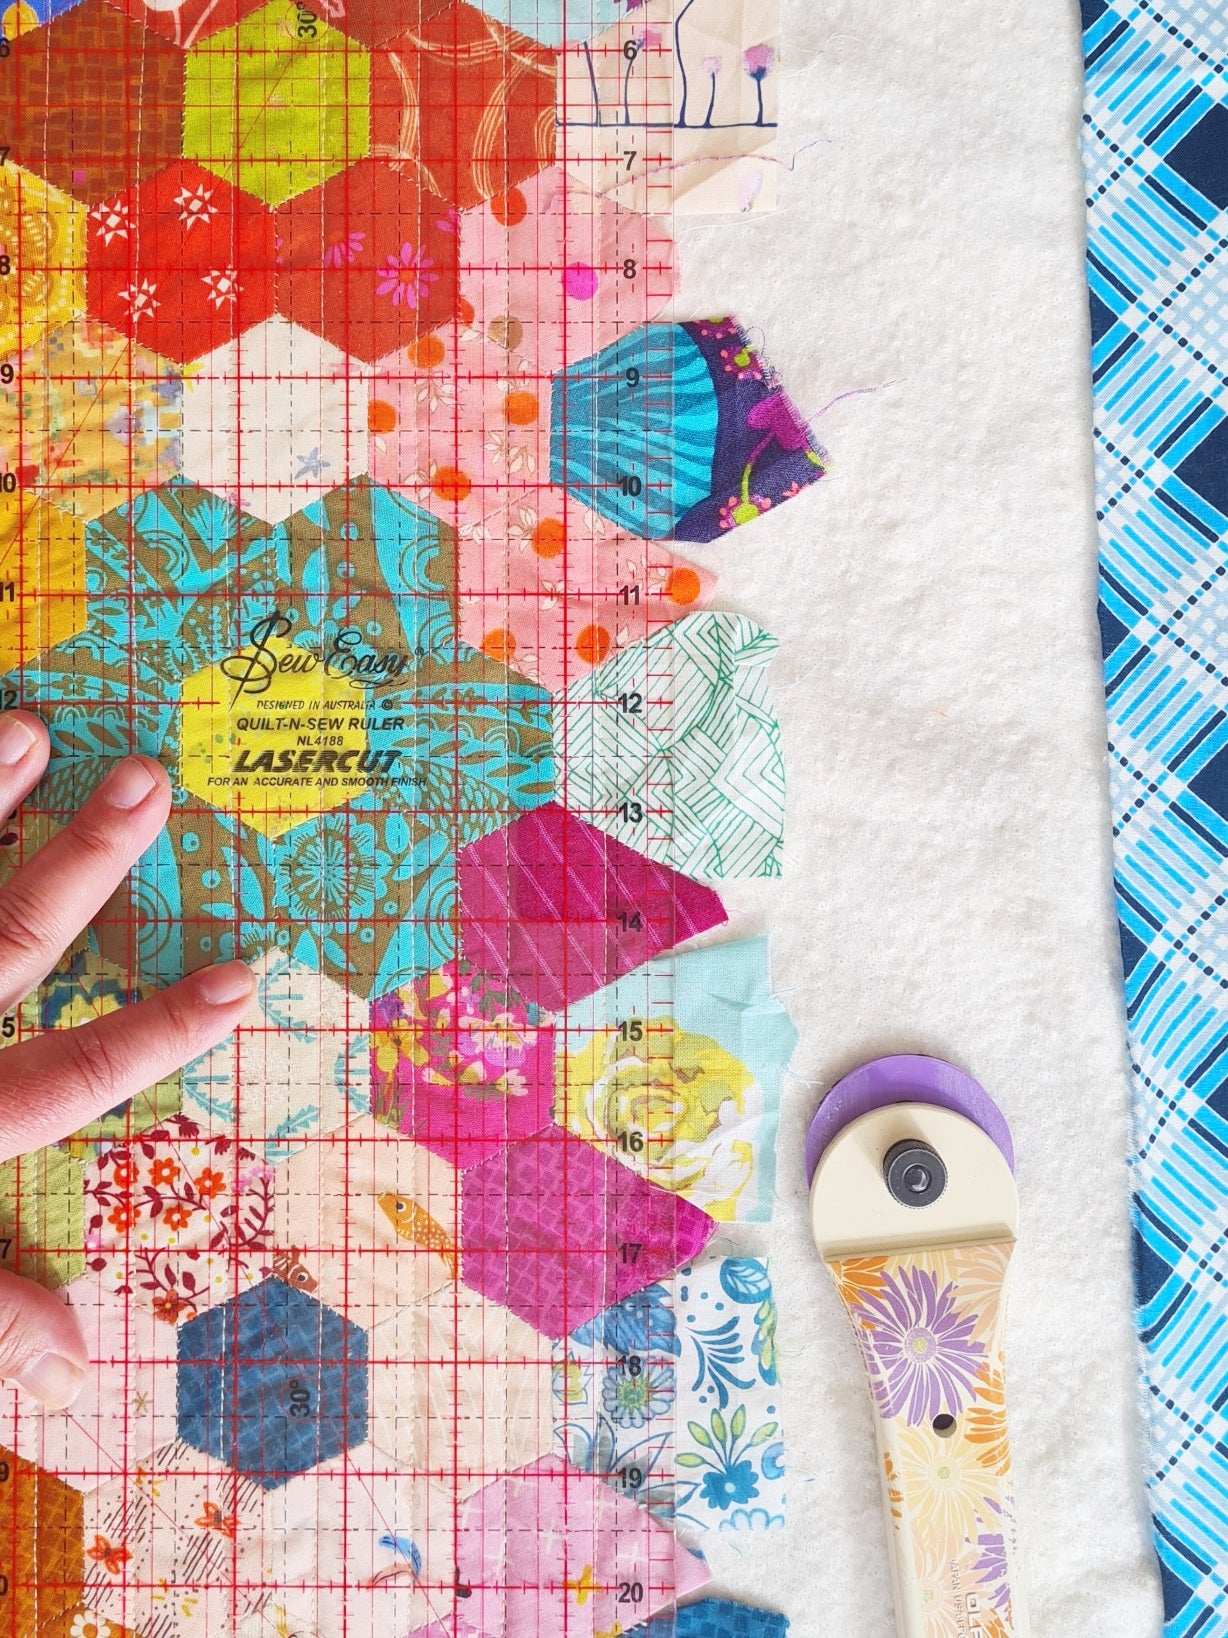
6. Trim your quilt layers.
Trimming an EPP quilt to be ready for binding can feel a little trickier to work out than a machine pieced quilt that always has straight edges and a ¼" seam allowance. In many of my EPP kits, I include half shapes or edge pieces so your quilt top finishes mostly straight, but even in this case, you finish with a larger seam allowance than machine sewn blocks.
In some quilts, I find it makes more sense to just use the regular shape at the edges and trim the excess. I took this route with my Spring Whimsy quilt above. I already had a stash of basted 1" hexagons, so it was quicker to add them in around the edges, rather than cut hexagon papers in half and baste them.
The trick to knowing where to trim is to find the knot that marks the end of a seam, and cut a straight line ¼" from that. Sometimes, like with my quilt above, that knot is repeated in a straight line and is easy to work from. Sometimes the knots zig zag down the edge of the quilt (a good example of this is my Boston Ivy Quilt - check out the trimming instructions in this free pattern to see what I mean). In this case, you need to find the innermost edge knots.
I find it best to work at my dining table for this job because the table holds more of the quilt than my cutting table. Flatten the quilt out on your cutting mat and make sure your edge is sitting straight and not skewed. Once you find these end knots, place your ruler over the quilt and line up the knots with the ¼" line. Carefully trim the quilt layers with your rotary cutter.
With English paper pieced quilts, this trimming sometimes goes through seams. Because of this, I always bind my quilt immediately after trimming. If you don't plan to do that yet, either hold off trimming, or sew around the edge of the quilt to keep the edge pieces and seams in place.
7. Bind your quilt!
Now you're ready to bind your quilt just like you bind a machine pieced quilt! Quilt binding is made from 2 ½" strips which are sewn end to end with a diagonal seam, and then pressed in half lengthwise, wrong sides together. The binding is usually sewn to the front of the quilt, with all the raw edges lined up, and then folded over the back and stitched in place. I do this by stitching in the ditch at the front. Many hand sew. Here are some great tutorials which go into lots of detail and give you options for a finish that suits you.
- Brittany of Lo and Behold Stitchery has a great tutorial called How to Machine Bind Your Quilt. She shows you in detail how to make the actual binding strips and machine sew them to your quilt. (She has a bonus post sharing how to hand sew the binding down with big hand quilted stitches.)
- Rachel Hauser of Stitched in Color has a Zigzag Binding Tutorial that also walks you through how to cut your strips, and attach them to your quilt, but uses a zigzag stitch to machine sew the binding down.
- If you like video tutorials, Jenny Doan of Missouri Star Quilt Company has a great machine binding tutorial on YouTube here.
- Lastly, Emma Jones of Vintage Sewing Box has a lovely YouTube tutorial sharing how to attach the binding by machine, but then shares 5 different techniques for sewing your binding down by hand.
You finished an English paper pieced quilt!
If you enjoyed this tutorial, check out my “EPP for Beginners” page for lots more helpful tips and tricks. Click the button below to have a look!


Hi Dorene,
Thanks so much for your comment on the Tales of Cloth blog! We know exactly the dilemma you’re describing; it’s a bit of a hazard with edge blocks. However, you can usually “catch” the edge in the binding at the end and it shouldn’t be too much trouble if you can’t get the stitches out. You don’t need to undo all of them, but do take care in the future to try not to grab the seam allowance, even though it happens to all of us! I hope that helps clarify!
Hi Jodi,
I finally finished my Cherish quilt top and I was ready your instructions about pressing all the seams around the perimeter open and out flat. That makes sense however when I sewed the pieces together, the perimeter seam allowance fabrics are caught in the stitching. I can’t get them out flat without damaging the fabric. Any suggestions on how to solve this issue? Do I have to rip out all the stitches on the perimeter and re-sew all of them :-( Hopefully my question is understandable.
Hi Whitney,
Thanks so much for your comment on the blog! We can completely understand the idea of wanting to keep the hexagon edges, but we never do on our hexie quilts. The amount trimmed off is very minimal and the finishing becomes the same as any patchwork quilt in the process. That being said, we have seen it done by other quilters across the internet, so you might do a quick Google or Pinterest search to see what you might find since we’re not experienced in the process. However you choose to finish the quilt, well done on finishing your first EPP quilt! We’re sure it is going to be well loved no matter what. Happy finishing!
It’s my first EPP top, grandmothers flower garden, and I want to keep the hexi edges instead of cutting it in a straight line. Is this insane? How would I do it?
Hi Corissa,
Thanks so much for your comment on the Tales of Cloth blog! With regards to the glue, you don’t need to worry about it as long as you are using washable glue. It should come out over time in the wash. And, if it’s any comfort, we’ve all even left a paper or two in our EPP quilts and it softens with the wash over time. Hope that helps and happy stitching!
Leave a comment