

Glass Beads Mini Quilt - A Free EPP Quilt Pattern
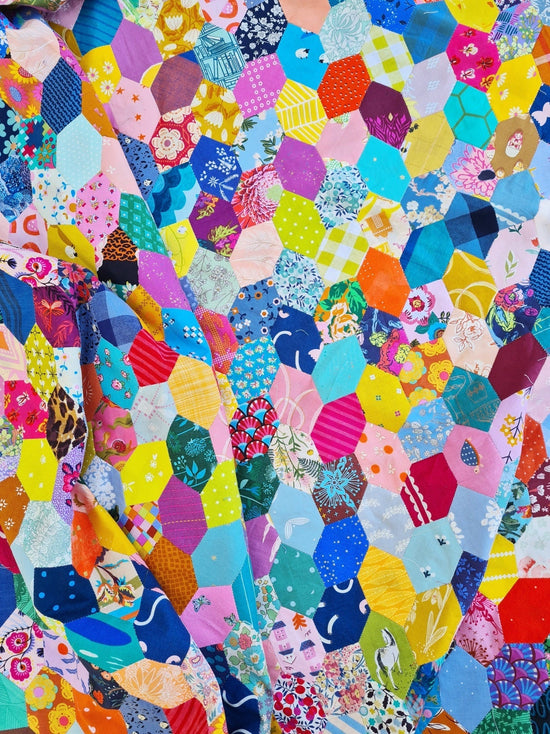
I made this Glass Beads mini quilt just after we started making our own paper templates to sell. After only having used hexagons and diamonds in my English Paper Piecing, I was suddenly and completely enamoured by all the different patterns that emerged when you played with different shapes and how they tiled together. It felt like digging for treasure!
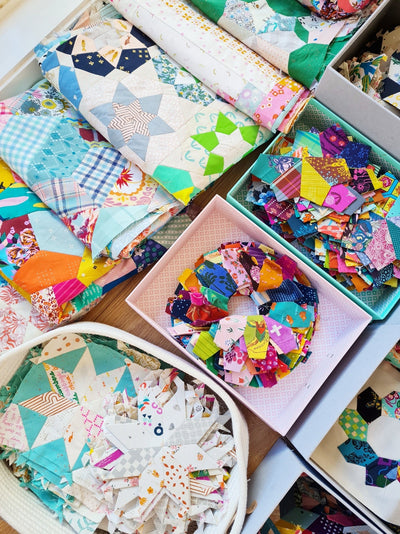
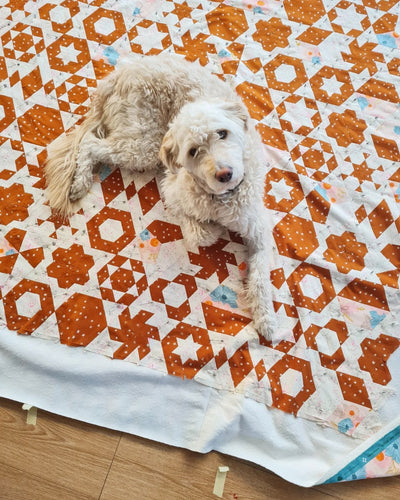
I don't often make mini quilts, and so I only have a little collection, but I love how they all look together in my sewing room corner, don't you? They're a great way to try out an idea without too much commitment, and to easily show your work in contrast to all my finished quilts folded up in my quilt cupboard.

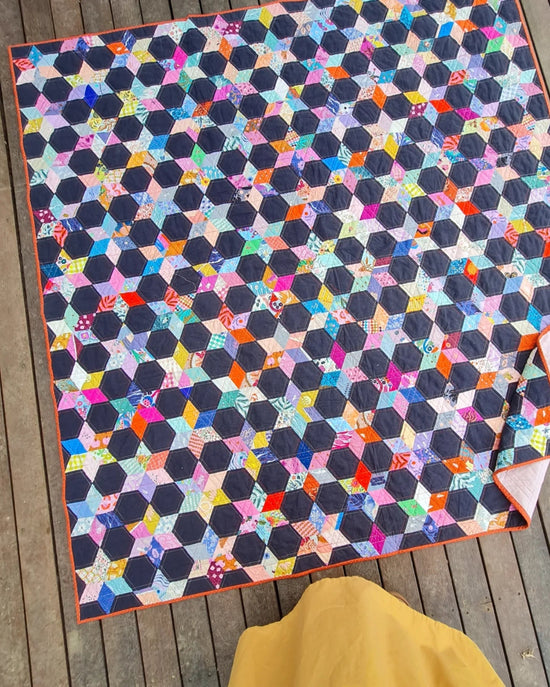
Glass Beads is a free, English paper pieced (EPP) mini quilt pattern, perfect for beginners. Ideal for rummaging through your scrap bins or shopping your stash, it has all of the satisfaction of a scrappy quilt, but with the speed of a quick finish. Yes, please! I'm delighted it's joining my collection of free English paper pieced (EPP) patterns!
(If you need some help to get started with EPP, I've created a collection of beginner friendly tutorials to get you started here.)
Finished Quilt Size: 24" x 27"

Supplies
ENGLISH PAPER PIECES (download below)
(144) 2" Crowns
(39) 2" 6-point Diamonds
(78) Kites
FABRIC
Colored 2" Crowns:
- (36) 2 ½" x 14” strips OR (12) 2 ½" WOF strips OR (144) 2 ½" x 4" scraps
Background Fabric:
For 2" Diamonds: (3) 2 ½" WOF strips OR (39) 2 ½" x 3 ½" scraps
For Kites: (2) 1 ¾” WOF strips
Binding: ¼ yard
Backing: 1 yard

ADDITIONAL SUPPLIES
- 32" x 35" batting
- Rotary cutter/mat/ruler
- Embroidery scissors
- Hand-sewing needles (Bohin Milliners, size 9)
- 50-weight thread (Aurifil)
- Craft glue stick and/or Clover Wonder Clips for basting (see basting tutorial here)
- Sewing machine
- Iron
CUTTING INSTRUCTIONS
Colored 2" Crowns:
- Fabric scraps: Cut the scraps 3/8" larger on all sides for all paper templates.
- Yardage: Orient the crowns on the 2 ½" strip with the longest edges parallel to the strip in alternating orientations. Cut between the paper templates ensuring a 3/8" seam allowance for each shape. Cut (144) colored crowns from the fabric strips.
Note! I cut crowns in sets of 4 from each fabric to create the featured mini quilt.
Background Fabric:
- For 2" Diamonds: Using the diamond paper templates as a guide, cut 39 diamonds, allowing for a 3/8" seam allowance around each piece.
- For Kites: Using the kite paper template as a guide, cut (78) Kites, allowing for a 3/8” seam allowance around each piece.
Binding:
- Cut (3) 2 ½" WOF strips.

STITCHING THE Glass Bead Blocks
1. Prepare all the pieces for the quilt by basting the fabric to the paper templates.
2. Take 4 crowns basted with the same fabric. Stitch the short sides of 2 crowns together into a crescent as shown in the diagram. Sew the other 2 crowns together in the same manner.

3. Next, stitch the long side of a kite, oriented with the narrow point down, along the short, right side at the top of the crescent, as shown in the diagram.
4. Without breaking the thread, continue along the next edge of the crown, and attach a diamond. Continue stitching the diamond to the next crown along the adjacent seam.
5. Without breaking the thread, attach another kite, oriented with the narrow point up, to the lower section of the crescent.

6. Take the second, matching crescent from step 2, and match up the top, short edge to the kite at the top of the block. Sew each edge until the second crescent is attached to the first. This completes Glass Bead block.

7. Make 33 complete Glass Bead Blocks.
8. To make the half blocks from the leftover crowns, stitch 6 crescents, as shown in the first diagram for step 2.
9. Repeat steps 3-5 to attach 2 kites and a diamond, which will be the left and right edges of the mini quilt.

STITCHING THE ROWS
10. The quilt is sewn together in horizontal rows of Glass Bead blocks. Lay out 6 rows to create a pleasing arrangement of colours and label them or take a photo to remember. Each odd row will have 6 complete blocks. The even rows contain 5 complete blocks and a half block at each end.
11. Stitch all the blocks together into 3 odd rows and 3 even rows.

ASSEMBLING THE QUILT TOP
12. Stitch the rows together one at a time, and remove the papers, if desired, once a row is completely surrounded. Doing so as you go makes the quilt a bit lighter to handle for sewing subsequent rows, but you can wait until the quilt is completed before removing papers if desired.
13. Once the quilt is complete, remove any remaining papers and press the quilt top flat.
Note! The easiest way to finish this mini quilt is to trim the top and bottom as I direct below. But if you can't stand cutting so much off, you could trace the crevices to draft your own triangle shapes and sew them to the top and bottom, or applique a strip of fabric to the top and bottom of the pathwork and then just trim the sides after quilting.

FINISHING
14. Open out the seam allowance of the outside edge pieces and press open and away from the quilt top.
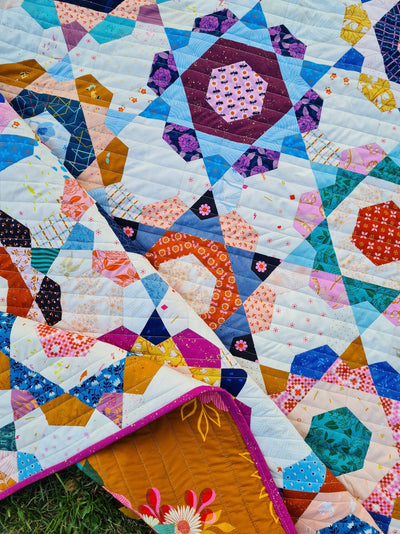
15. Layer the backing (wrong side up), batting, and quilt top (right side up). Baste the layers together. Quilt as desired. The featured quilt was quilted in straight, vertical lines through the points of the diamonds.
16. Trim the quilt top, batting, and backing to ¼" away from where the papers have been around the perimeter of the mini quilt as shown in the diagram. This step will trim the kites and diamonds on the left and right sides, and clip the points at the top and bottom of the mini quilt.


17. Sew the binding strips together end to end using diagonal seams. Press the binding in half wrong sides together.
18. Leaving an 8" tail of binding, sew the binding to the quilt through all layers, matching all raw edges. Miter corners. Stop approximately 12" from where you started. Lay both loose ends of binding flat along quilt edge. Where these two loose ends meet, fold them back on themselves and press to form a crease. Using this crease as your stitching line, sew the two open ends of the binding together right sides together. Trim seam to 1/4" and press open. Finish sewing binding to quilt.
19. Turn the binding to the back of quilt and stitch in place.

Ready to make this free EPP quilt pattern?
Click the button below to have the FREE printable paper templates and colouring sheet delivered right to your inbox!


I just stumbled upon your blog and I must say, I’m thoroughly enjoying it. Your quilts are absolutely stunning. As someone who is new to EPP, I appreciate you providing free patterns that are not only beautiful but also a pattern a quilter would want to complete. Thank you for that. I also appreciate the beginner information you’ve shared. I am starting the Glass Beads Mini Quilt and am hoping to start working on the ice cream soda quilt. I absolutely love it and I hope I’m smart enough to make it. LOL
Jodi, just wanted to take a second and tell you what a treat these patterns are! I am a disabled 77 year old who discovered EPP with your site — ice cream soda, Alexandria, Mandolin, Hexie Harvest. I always order happily when my checking account says yes, and in between I am able to keep learning and keep having fun. Thank you so much for your generousity! Elizabeth in Jacksonville, Florida
Thank you for the free quilt. This will be my first EPP.
Thank you so much for this pattern. I tried and enjoyed EPP years ago and finished a cushion-sized piece. I never continued with it because I look at all of the beautiful quilts out in ‘quiltworld’ and I don’t really think that I have the patience to sit down and complete a quilt-sized project. However, your pieces are larger and seem to go together easily, so I might try to complete this smaller project. :)
Thank you!
Leave a comment