

Bon Bon Quilt - A Free EPP Quilt Pattern
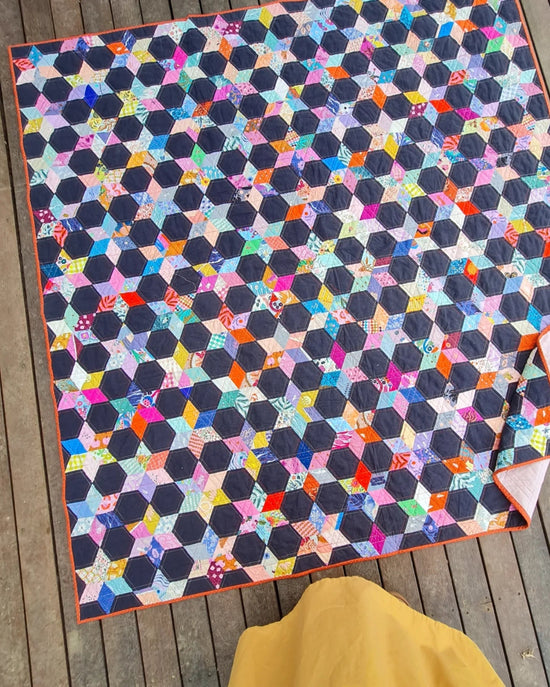
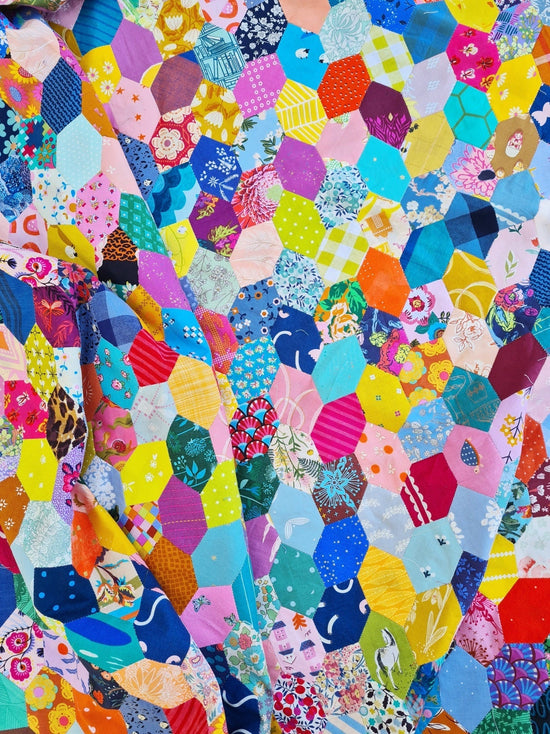
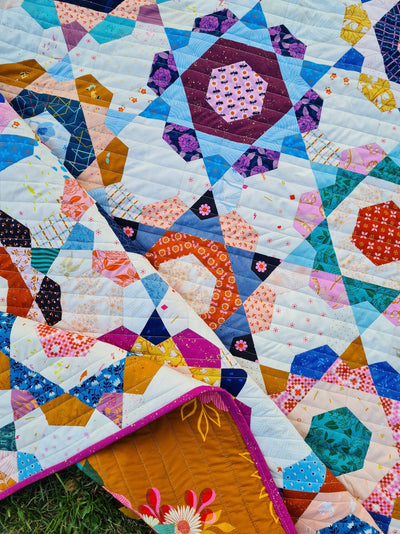
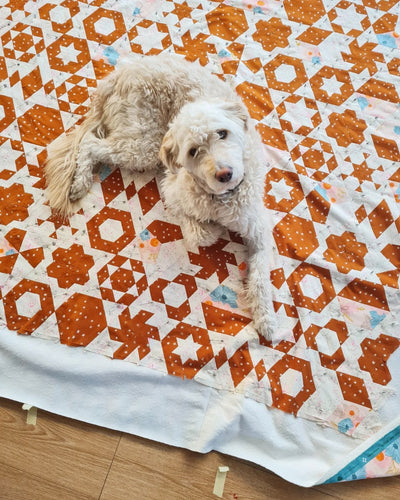
I made Bon Bon with a couple of 5" charm packs from Free Spirit, back when Tula Pink released her Stripes and Dots. You make lovely, simple flowers by stitching the half hexagons around the large centre, but once sewn together, a whole new interlocking pattern emerges. It gives this quilt a lot of scope for playing with the focus. Make each flower a single colour to give them more attention, or keep it scrappy and play with quilting.

Bon Bon quilt is a free, super simple EPP quilt pattern, perfect for beginners. Take classic hexagons and vary them in size or cut them in half for a gorgeous modern design! I'm delighted it's joining my collection of free English paper pieced (EPP) patterns!
(If you need some help to get started with EPP, I've created a collection of beginner friendly tutorials to get you started here.)
Finished Quilt Size: 40" X 49"

Supplies
ENGLISH PAPER PIECES (download below)
(226) 1 ½" Half Hexagons
(62) 1 ½" Hexagons
(32) 3” Hexagons
(6) 3” Half Hexagons
(30) Edge Triangles
FABRIC
Colored 1 ½" Half Hexagons:
- (18) 2” WOF strips of assorted saturated prints (feel free to use jelly roll strips - there'll just be bigger seam allowance) OR (210) 2" x 3 ½" scraps
Background Fabric: 2 ¼ yards needed
For 1 ½" Hexagons: (6) 3 ½" WOF strips
For 1 ½" Half Hexagons: (2) 2" WOF strips
For 3" Hexagons and 3" Half Hexagons: (7) 6" WOF strips
For Edge Triangles: (2) 1 ½" WOF strips
Binding: ½ yard
Backing: 1 ½ yards for backing (if you’re OK with less overhang) or 3 ½ yards if prefer to play it safe and have 4” overhang on each edge (before quilting)

ADDITIONAL SUPPLIES
- 48" x 57" batting
- Rotary cutter/mat/ruler
- Embroidery scissors
- Hand-sewing needles (Bohin Milliners, size 9)
- 50-weight thread (Aurifil)
- Craft glue stick and/or Clover Wonder Clips for basting (see basting tutorial here)
- Sewing machine
- Iron
CUTTING INSTRUCTIONS
Colored 1 ½" Half Hexagons:
- Fabric scraps: Cut the scraps 3/8" larger on all sides for all paper templates.
- Yardage: Orient the half hexagons on the 2" strip with the long edges parallel to the strip in alternating orientations. Cut between the paper templates ensuring a 3/8" seam allowance for each shape. Cut (210) colored half hexagons from the fabric strips.

Background Fabric:
- For 1 ½" Half Hexagons: Follow the same instructions as the colored half hexagons to cut (16) half hexagons from the fabric strips.
- For 1 ½" Hexagons: Cut the 3 ½" strips into (62) 3 ½" squares.
- For 3" Hexagons: Cut the 6" strips into (32) rectangles measuring 6" x 6 ½".
- For 3" Half Hexagons: Use the leftover fabric from cutting the 3" hexagons to cut (6) half hexagons.
- For Edge triangles: Orient the edge triangles on the 1 ½" strip with the long edges parallel to the strip in alternating orientations. Cut between the paper templates ensuring a 3/8" seam allowance for each shape. Cut (30) edge triangles from the fabric strips.
Binding:
- Cut (5) 2 ½" WOF strips.
STITCHING THE FLOWERS
1. Prepare all the pieces for the quilt by basting the fabric to the paper templates.
2. Stitch the coloured 1 ½" half hexagons around the 3" background hexagons, as shown in figure 1 in the diagram below. Make 32 whole flowers.
3. Similarly, stitch 3 coloured 1 ½" half hexagons to the short edges of the 3" background half hexagons to make 6 half flower blocks, as shown in figure 2 in the diagram below.

STITCHING THE ROWS
4. The quilt is sewn together in horizontal rows of flower blocks. Each odd row will have 5 complete flowers. The even rows contain 4 complete blocks and a half flower block at each end.
Lay out 7 rows to create a pleasing arrangement of colours and label them or take a photo to remember. Be sure the background hexagons are oriented with a point at the top when laying them out.
5. Sew a 1 ½” background hexagon into the top and bottom right-hand crevices of each flower as shown in figure 3 above, except for the 4 full flower blocks down the right-hand side of the quilt.
Then sew a 1 ½” background hexagon to the top and bottom right-hand crevice of the 3 half flower blocks down the left-hand side of the quilt.
6. To begin a row, stitch one (full or half) flower block to the one next to it. Stitch all the blocks together in rows. You should have 4 rows of 5 whole flower blocks, and 3 rows that begin and end with a half flower block with 4 flowers in between. See diagram for reference.

ASSEMBLING THE QUILT TOP
7. Stitch the rows to each other one at a time, and remove the papers, if desired, once a row is completely surrounded. Doing so as you go makes the quilt a bit lighter to handle for sewing subsequent rows, but you can wait until the quilt is completed before removing papers, if desired.
8. Fill any gaps along both sides with 1 ½” background half hexagons, and along the top and bottom with edge triangles.
9. Once the quilt is complete, remove any remaining papers and press the quilt top flat.

FINISHING
10. Open out the seam allowance of the outside edge pieces and press open and away from the quilt top.
11. Layer the backing (wrong side up), batting, and quilt top (right side up). Baste the layers together. Quilt as desired. The featured quilt was quilted in diagonal lines through the points of the background hexagons.
12. Sew the binding strips together end to end using diagonal seams. Press the binding in half wrong sides together.
13. Leaving an 8" tail of binding, sew the binding to the quilt through all layers, matching all raw edges. Miter corners. Stop approximately 12" from where you started. Lay both loose ends of binding flat along quilt edge. Where these two loose ends meet, fold them back on themselves and press to form a crease. Using this crease as your stitching line, sew the two open ends of the binding together right sides together. Trim seam to 1/4" and press open. Finish sewing binding to quilt.
14. Turn the binding to the back of quilt and stitch in place.

Ready to make this free EPP quilt pattern?
Click the button below to have the FREE printable paper templates and colouring sheet delivered right to your inbox!


Wow, I love this. Your designs are wonderful and your instructions so clear. Thanks!!!
Love this pattern, which I found at Pinterest and now realise is from you 😊. I am now working on my second version, however in another scale (hexagons 2 inches) as I only had the picture to work from. The first version dark hexagons and scrappy pentals and now grey hexagons with one fabric surrounding each hexagon and then placed in rainbow 🌈 formation. I can’t wait to jump into one of your other patterns – I have the Cherish quilt pattern waiting for me. And thanks for all the free patterns 🙏
love this site!! your ideas are so good…thank you
Leave a comment