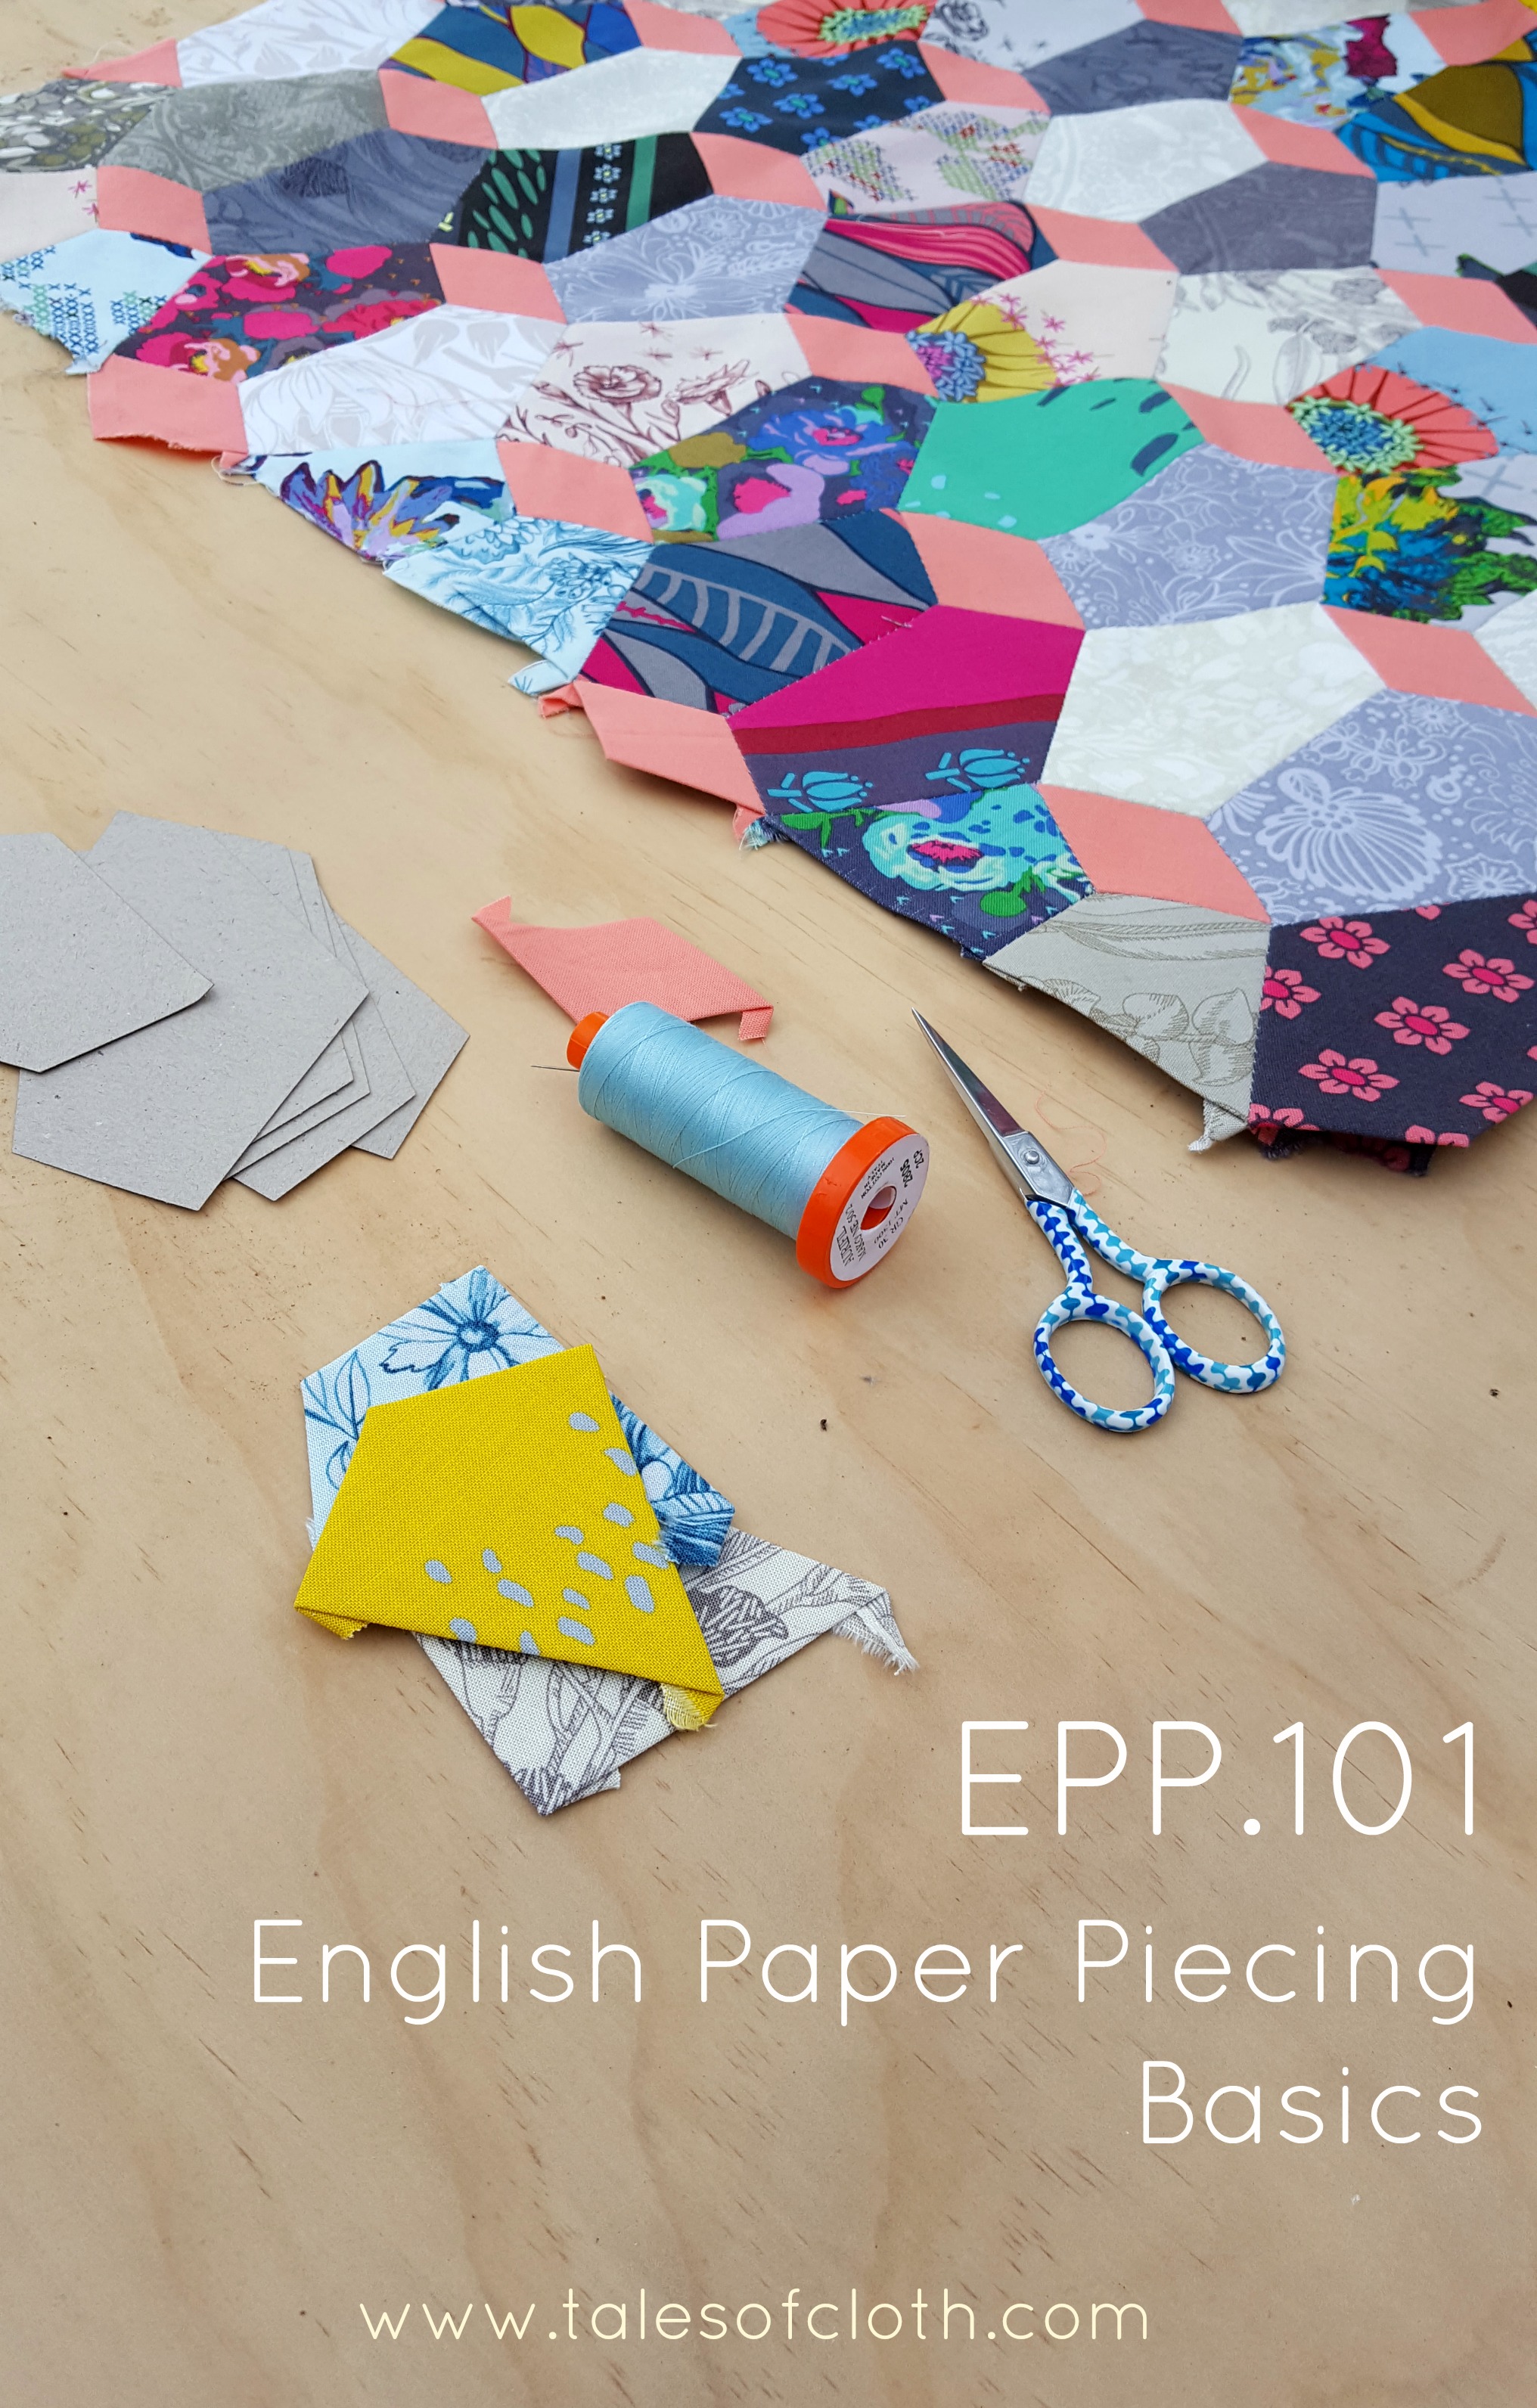
EPP.101 - Planning and Stitching
Before we talk about stitching today, I wanted to thank everyone for your comments on my last EPP.101 post! I loved hearing from everyone, especially those who thread baste. When you do something for a while, you pick up tricks to make it quicker and more effective. There were great ideas and compelling arguments on the thread basting side of the debate, and I feel so thankful to have them here on my site for when people come to learn about English Paper Piecing. Thank you! If you have stitching and construction tips today, I'd love to hear from you!
Ok, now that you know how to baste your shapes, I'm going to talk about planning your quilt, and then stitching it together. I'll show you the stitch I use, give you some tips on construction which will make your process quicker, and show you how I wrangle those papers.
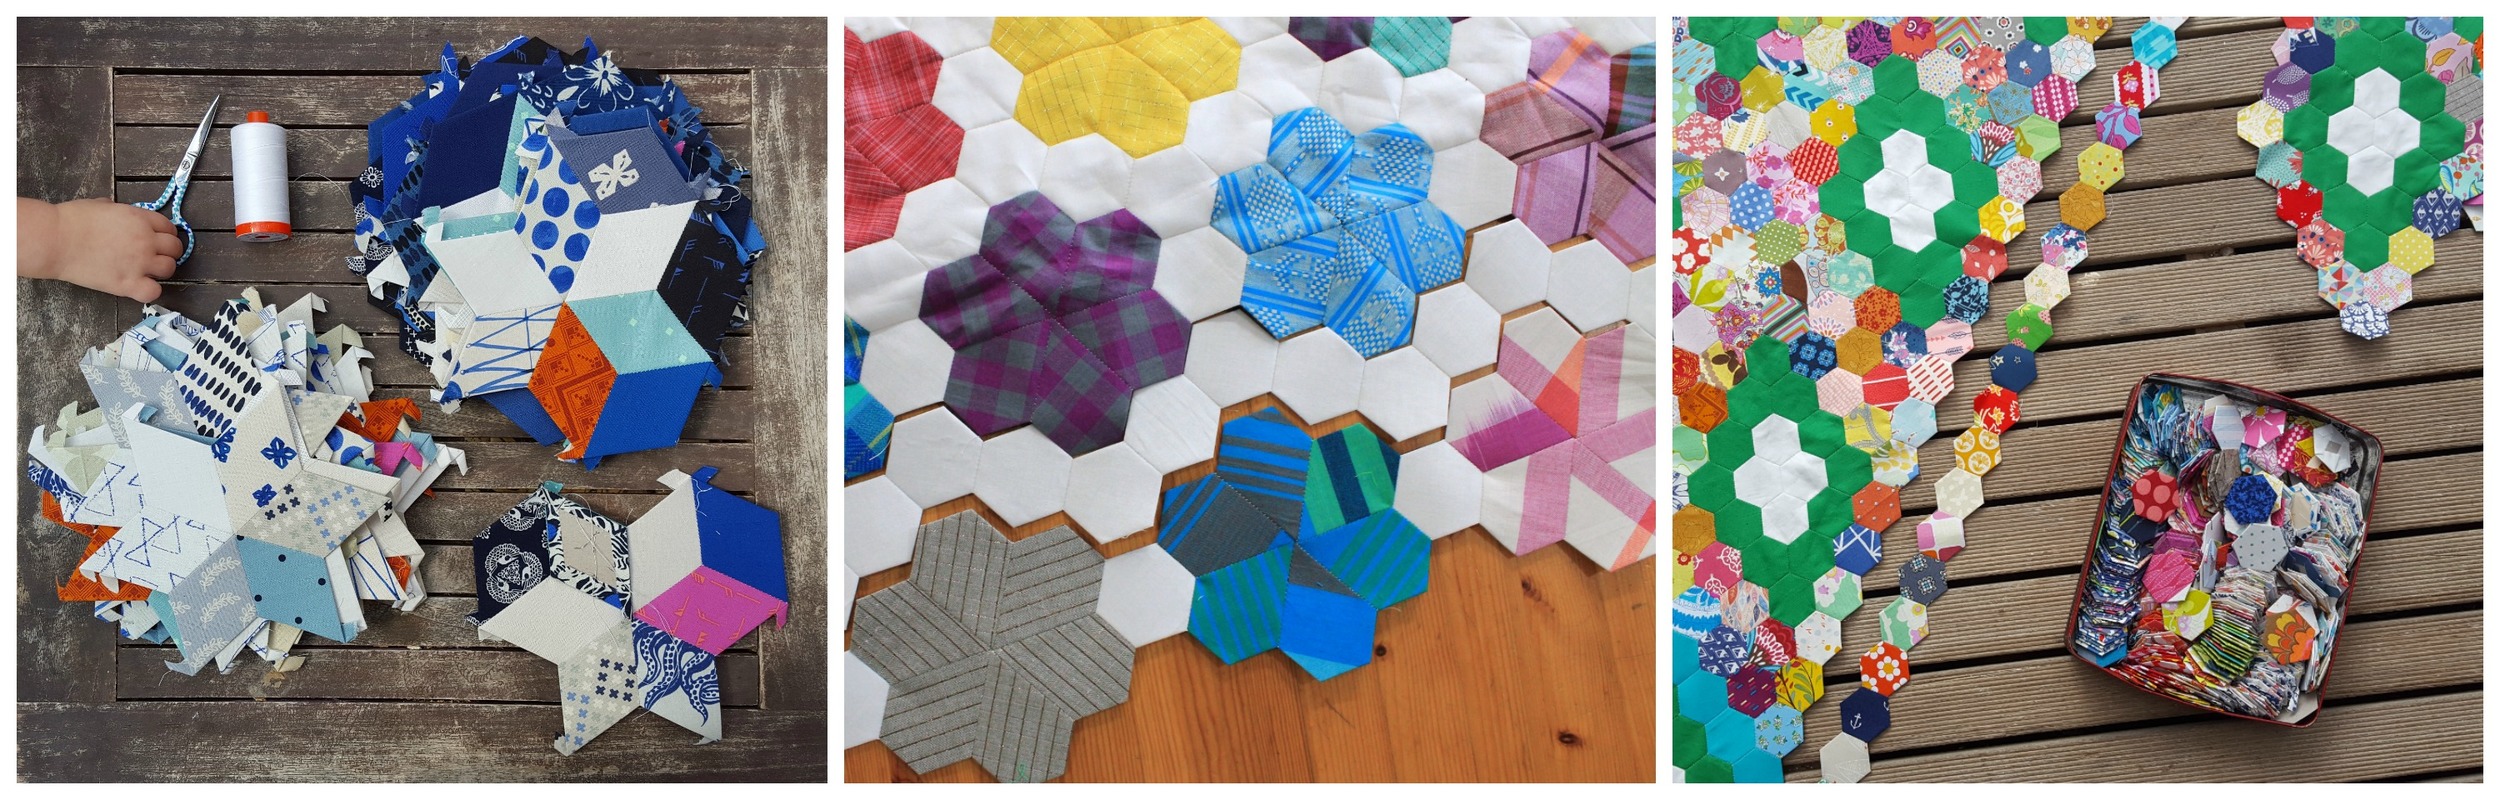
I find English Paper Piecing more enjoyable, efficient, and portable when I can work in small units or blocks and then join those blocks together. In the first two quilts above, I made stars or flowers first, and then thought about the best way to stitch those units together. For my Flock of Stars Quilt, I added a blue diamond to three sides, and then they nestled in together to make rows, and then those rows nestled in together, like a puzzle. I joined my Pinwheel Posy flowers together with a single white hexagon, and then made a separate row of hexies above and below. If I made it again, I would add that row to the top of each flower row, to keep my units smaller as long as possible, rather than mostly working on the large quilt top.
For my Clover Quilt, I made 24 white hexie crosses, then surrounded them with the Kona Clover. I discovered way too late that it was even more efficient to stitch the green hexies into two little half borders, and then do the same with the scrappy border. I was adding one hexagon at a time to the block. It probably doesn't make a ton of difference, but I found more flow with the method shown above. Sometimes it just takes some trial and error, or diving right in and new ways coming to you as you go. I'm now stitching these hexie blocks into diagonal rows and stitching those rows together.
Your chosen method of construction will affect how many pieces you need, and whether you baste all your papers first, or baste a little at a time, and then reuse your templates. My clover quilt suits reusing hexagons because you could surround each white hexie cross with green, then take out the middle hexies. Then you could border a few with scrappy hexies and take out the green border.
Also, as much as I like the idea of completely finishing one stage before moving on the next, I usually chop and change depending on my mood. I find a little variety and a good construction method go a long way to keeping me stitching.
Diamond Mine, the quilt we're focusing on for this tutorial series, is best constructed straight into rows, with all pieces basted beforehand.
For this 40" x 48" quilt I'm using:
204 (three packets) 3" Third Hexagons
104 (one packet) 1.5" 6-point Diamonds
(24) 1.5" Kites
Hot Tip! I simply cut 12 third hexies and 10 diamonds in half with my rotary cutter and ruler! These pieces are for around the edges and using half shapes minimises fabric waste.
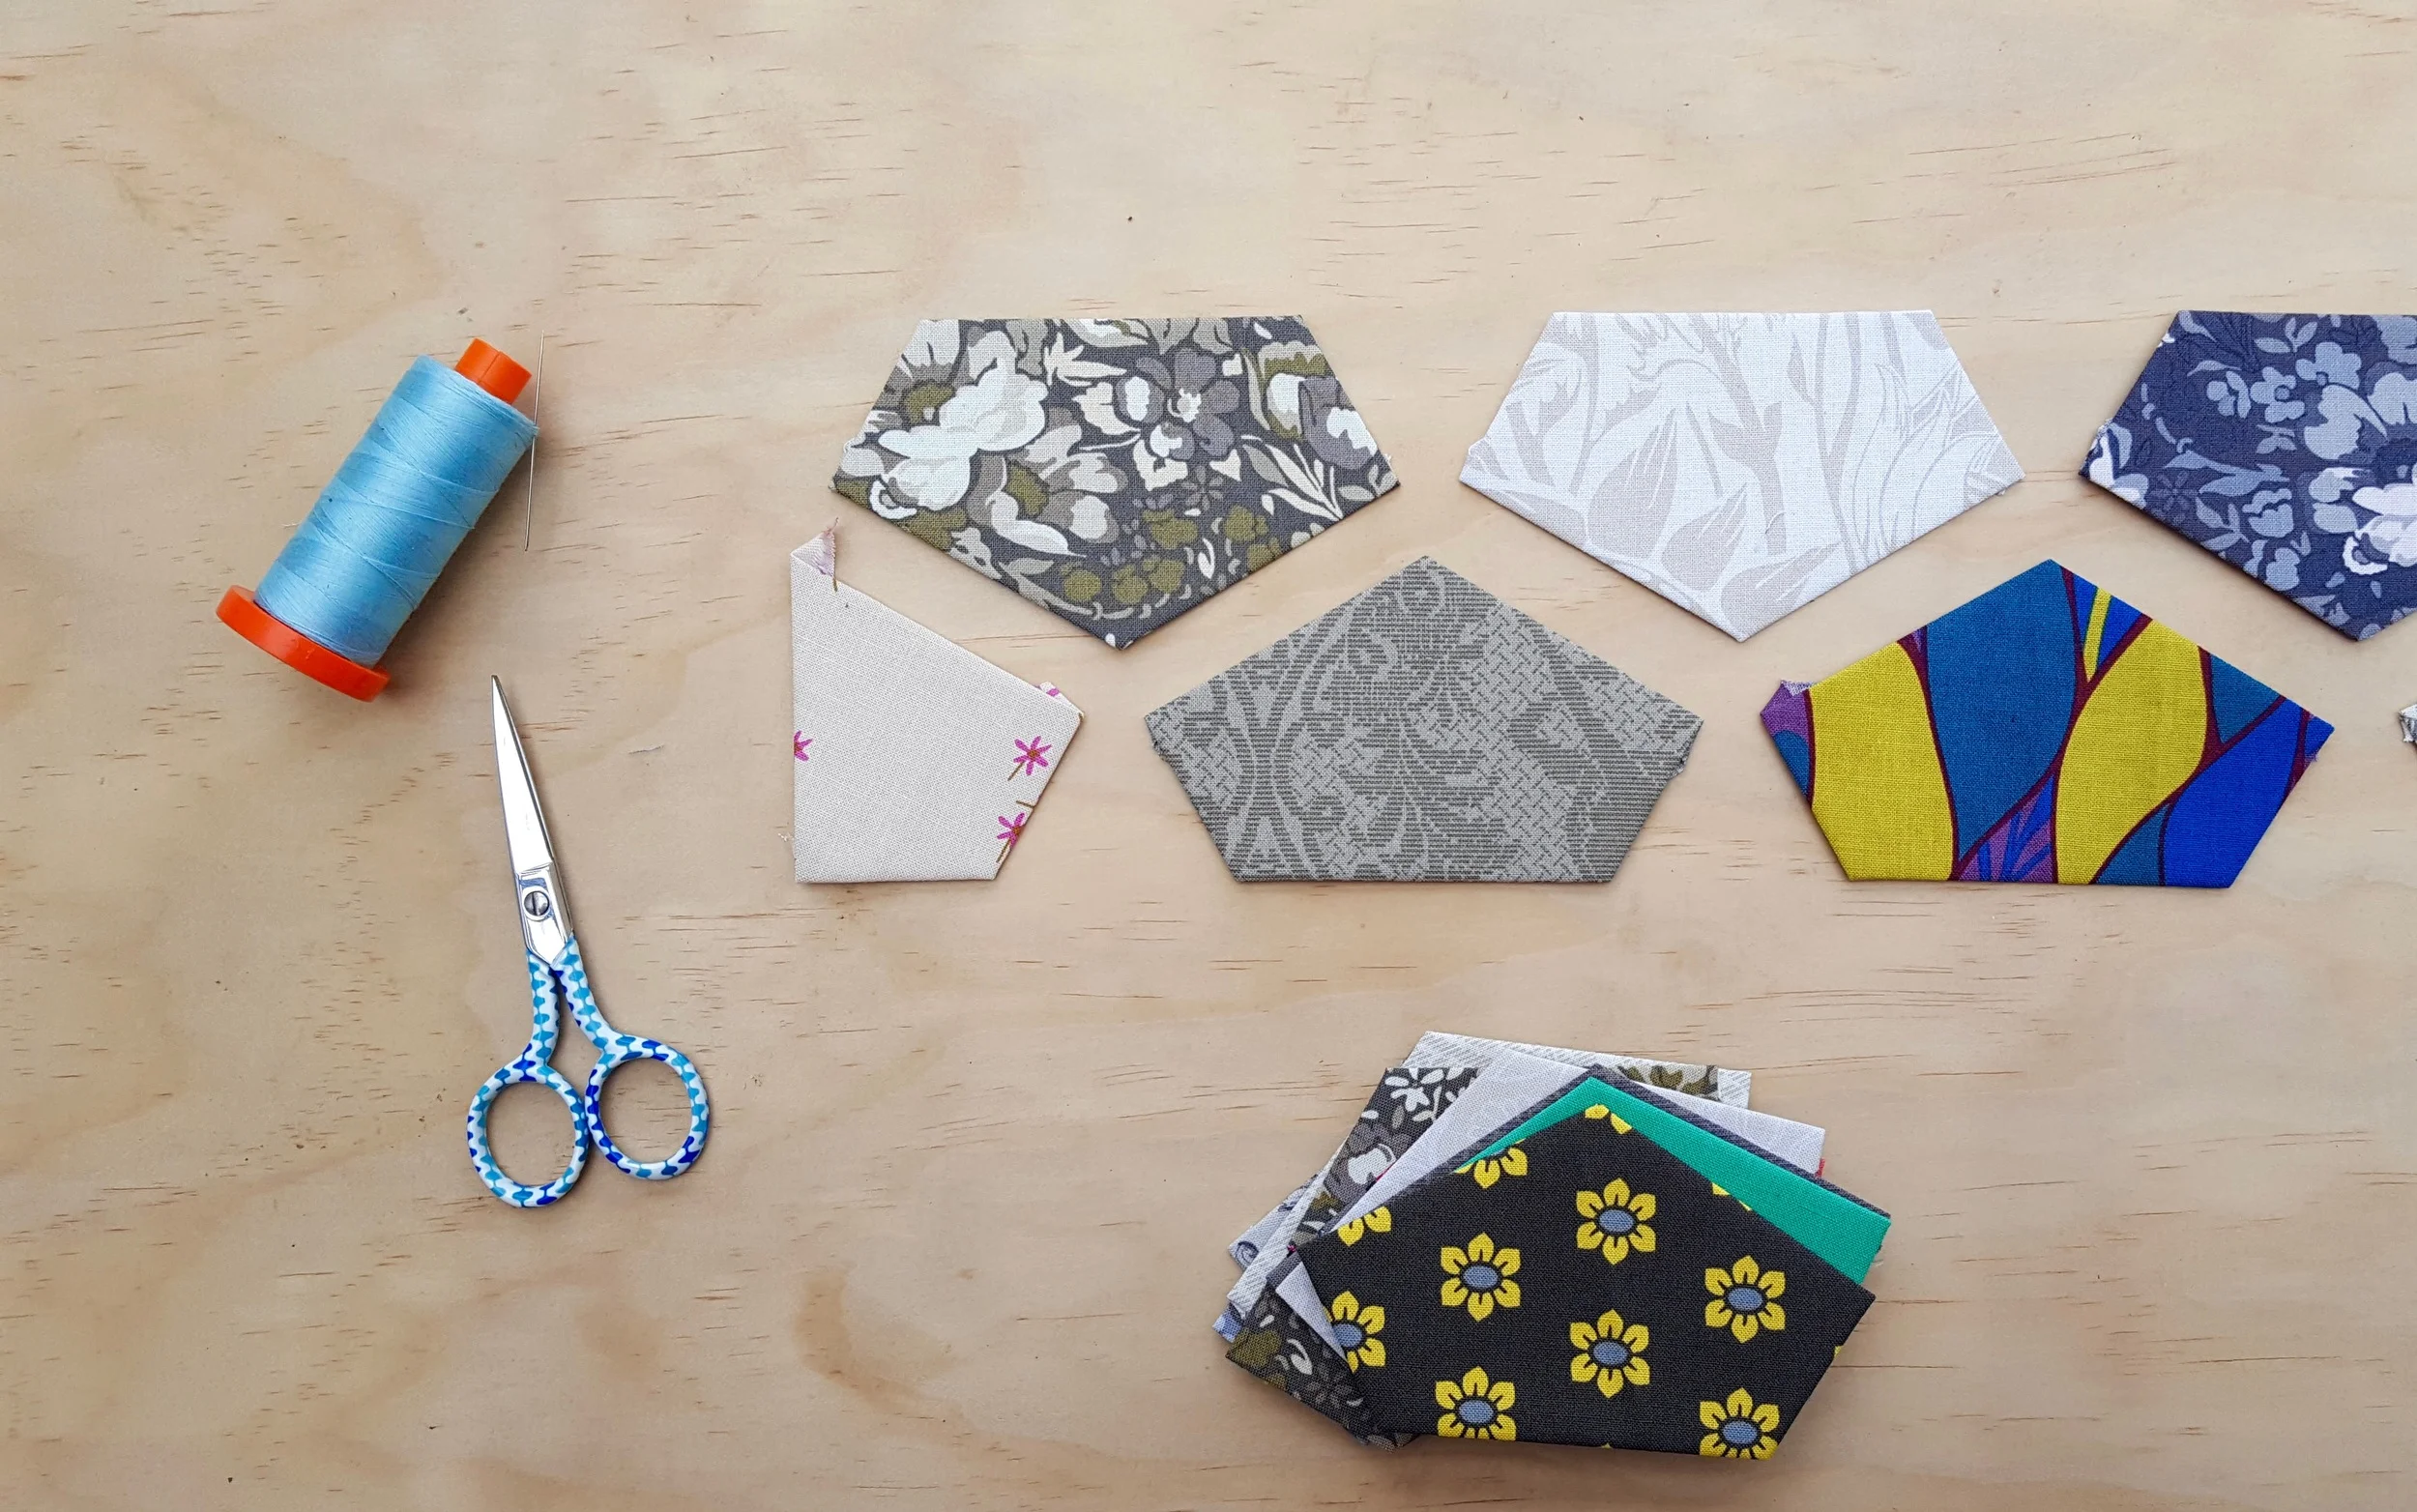
I began stitching third hexagons into rows at random for this quilt until I realised I was using all my favourites first! So then I took the time to lay out my rows, spread out the greys and blacks so that they weren't concentrated in one section of the quilt, and snapped a photo to use as my pattern. I then collected each row into a pile, much like you might with machine sewing, and stitched the remaining third hexagons into rows. This turned out to be quicker in the end, because I wasn't choosing each piece to add, one at a time.
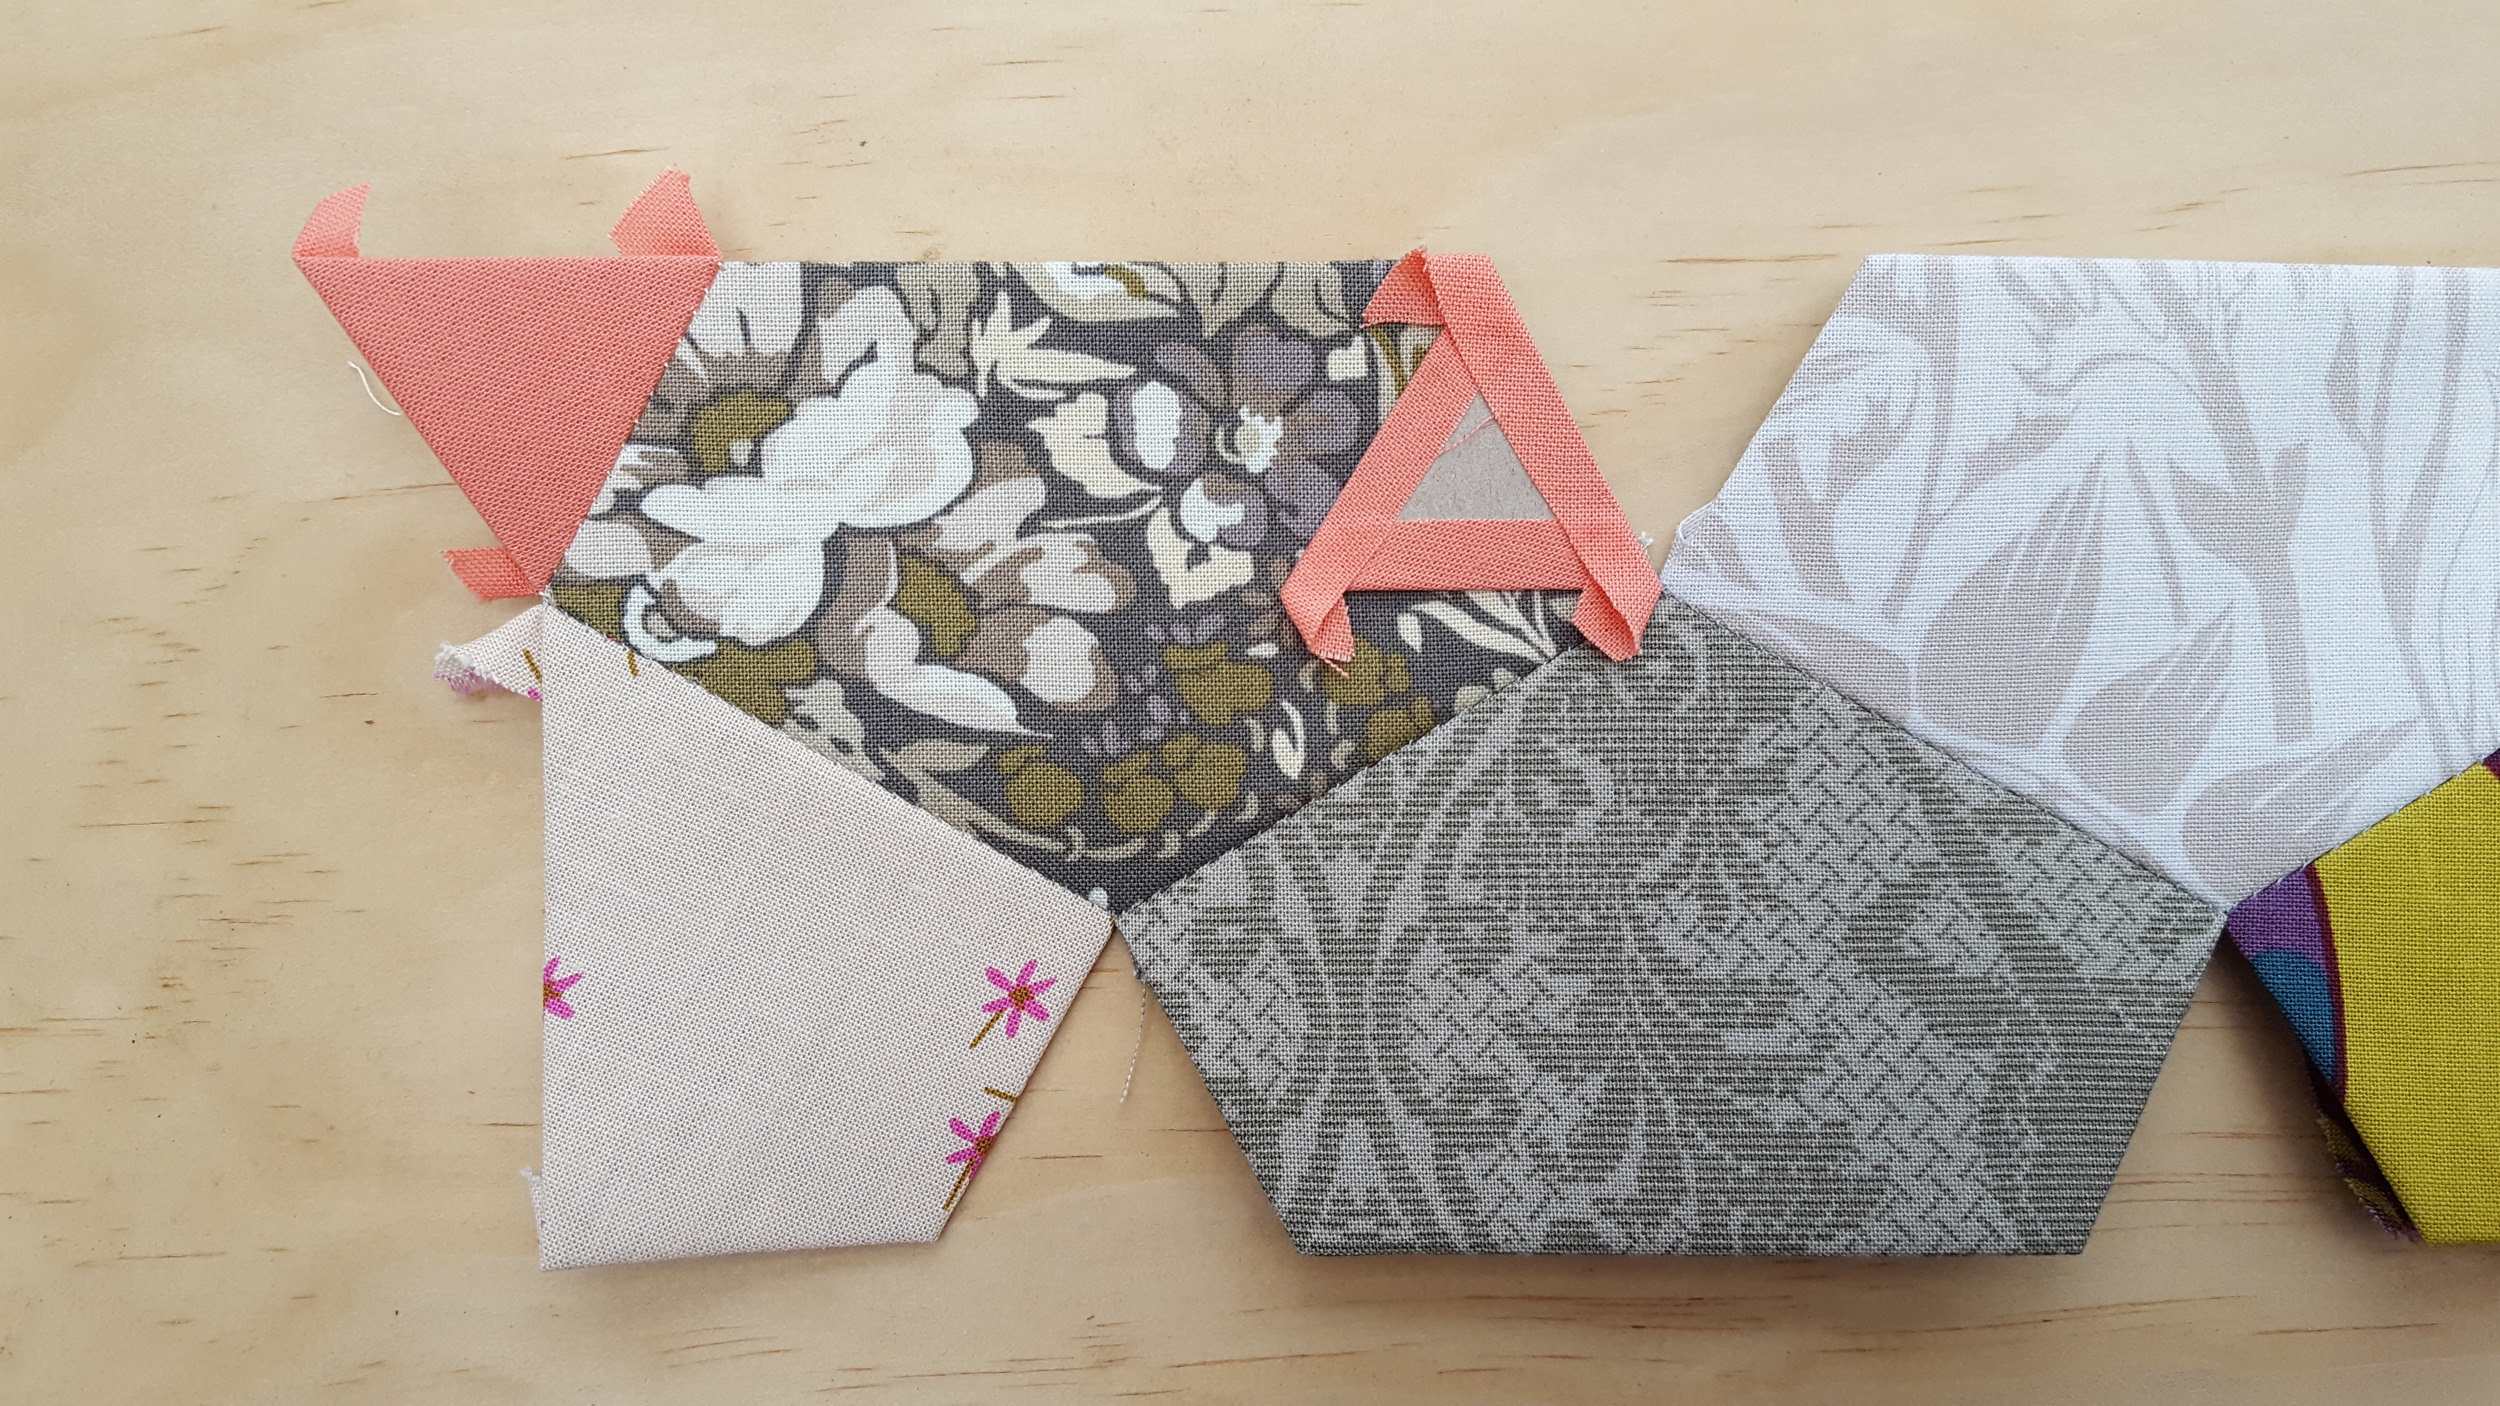
I've made 12 rows of 17 third hexies, with a kite at each end, and then I've added coral diamonds in the gaps under each row. If you want to make this quilt bigger, I recommend sticking to an even amount of rows, with an odd number of shapes in each row. It will make the top and bottom, and each side of the quilt symmetrical. Also, last night I snapped a photo and put it on Instagram of this quilt sideways and liked it even more! I'm not going to change mine, but I'd love to see yours if you make it that way. Just hashtag it #talesofclothEPP so I can check it out!
I mentioned in my post on basting and tools that I used Aurifil Thread 50wt, and Bohin Milliners Needles in size 9. My small scissors are Gingher brand and I take them with me everywhere. Snipping your thread with scissors rather than you teeth (which is definitely my go-to!) makes a clean edge, which is much easier to thread through the tiny needle eye. I cut a length of thread around 15-18 inches each time.
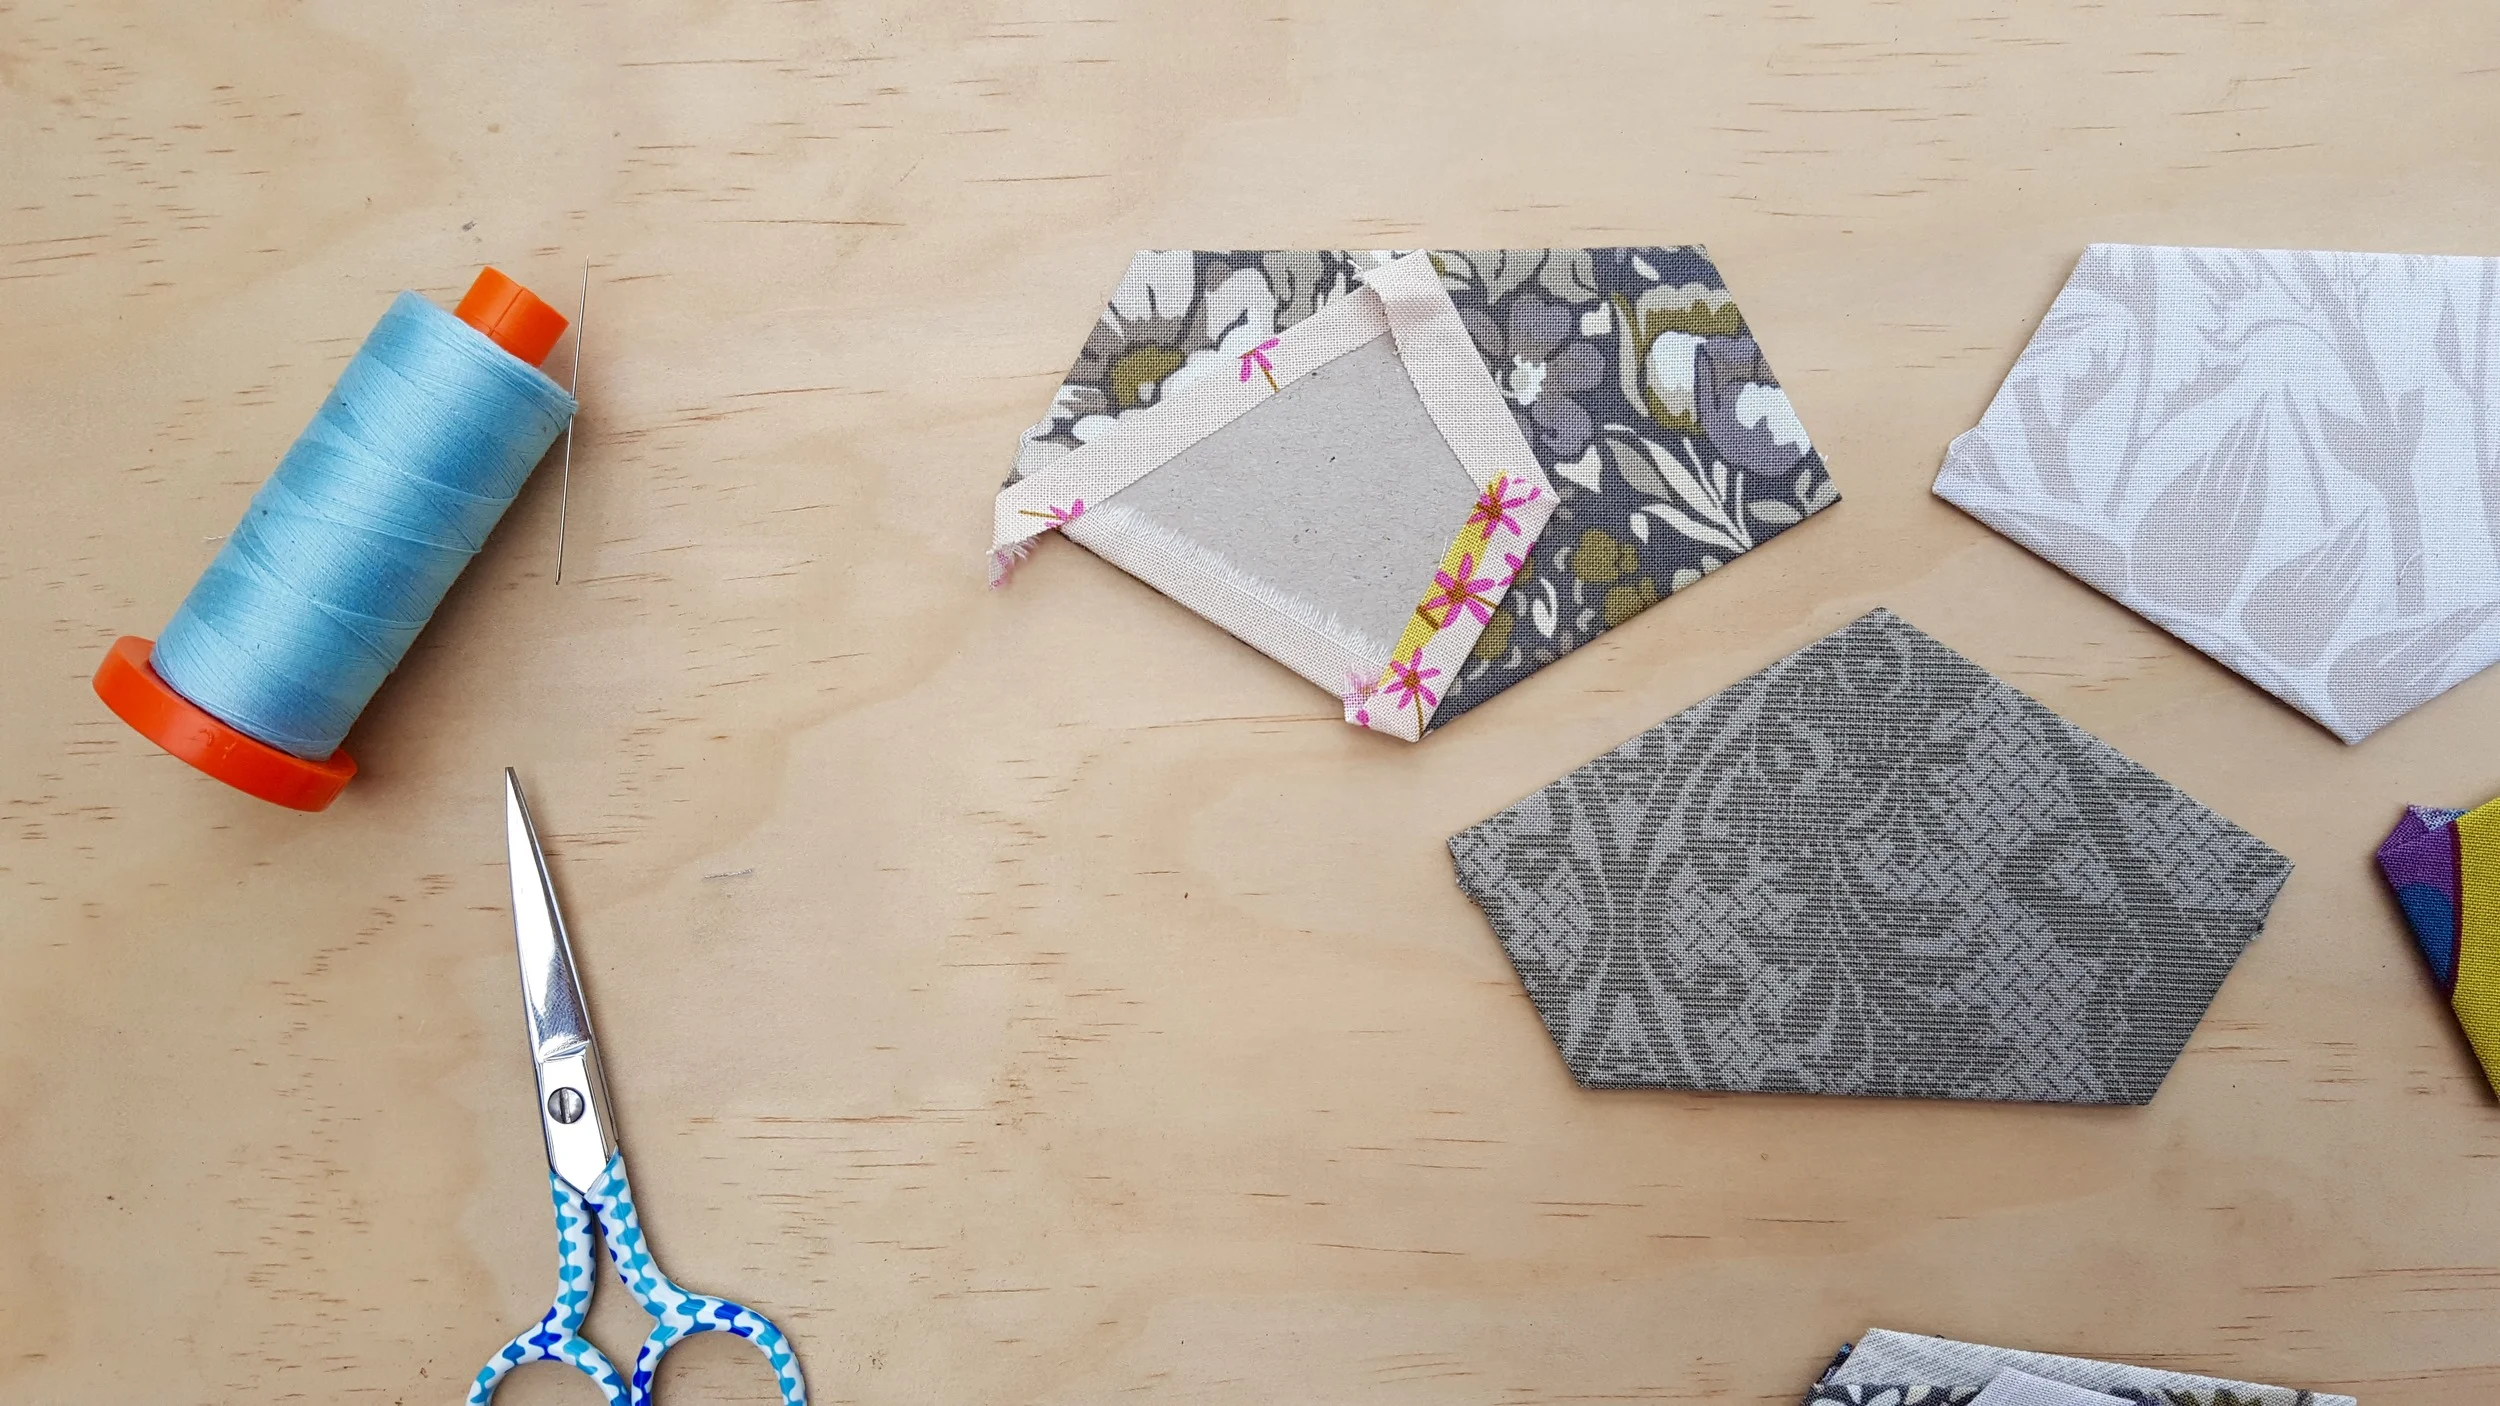
I always stitch with my pieces held right sides together. If you're EPPing curves, you'll need to hold your pieces out flat and stitch along the middle of the two, but with straight edges, I always hold the pieces together and whip stitch along the edge.

Poke your needle through the fabric folds in the corner. There's enough fabric there to not hit the papers. I stitch over this same place a couple of times, and then in the final round as the loop is closing, I thread the needle through the loop to make a knot.
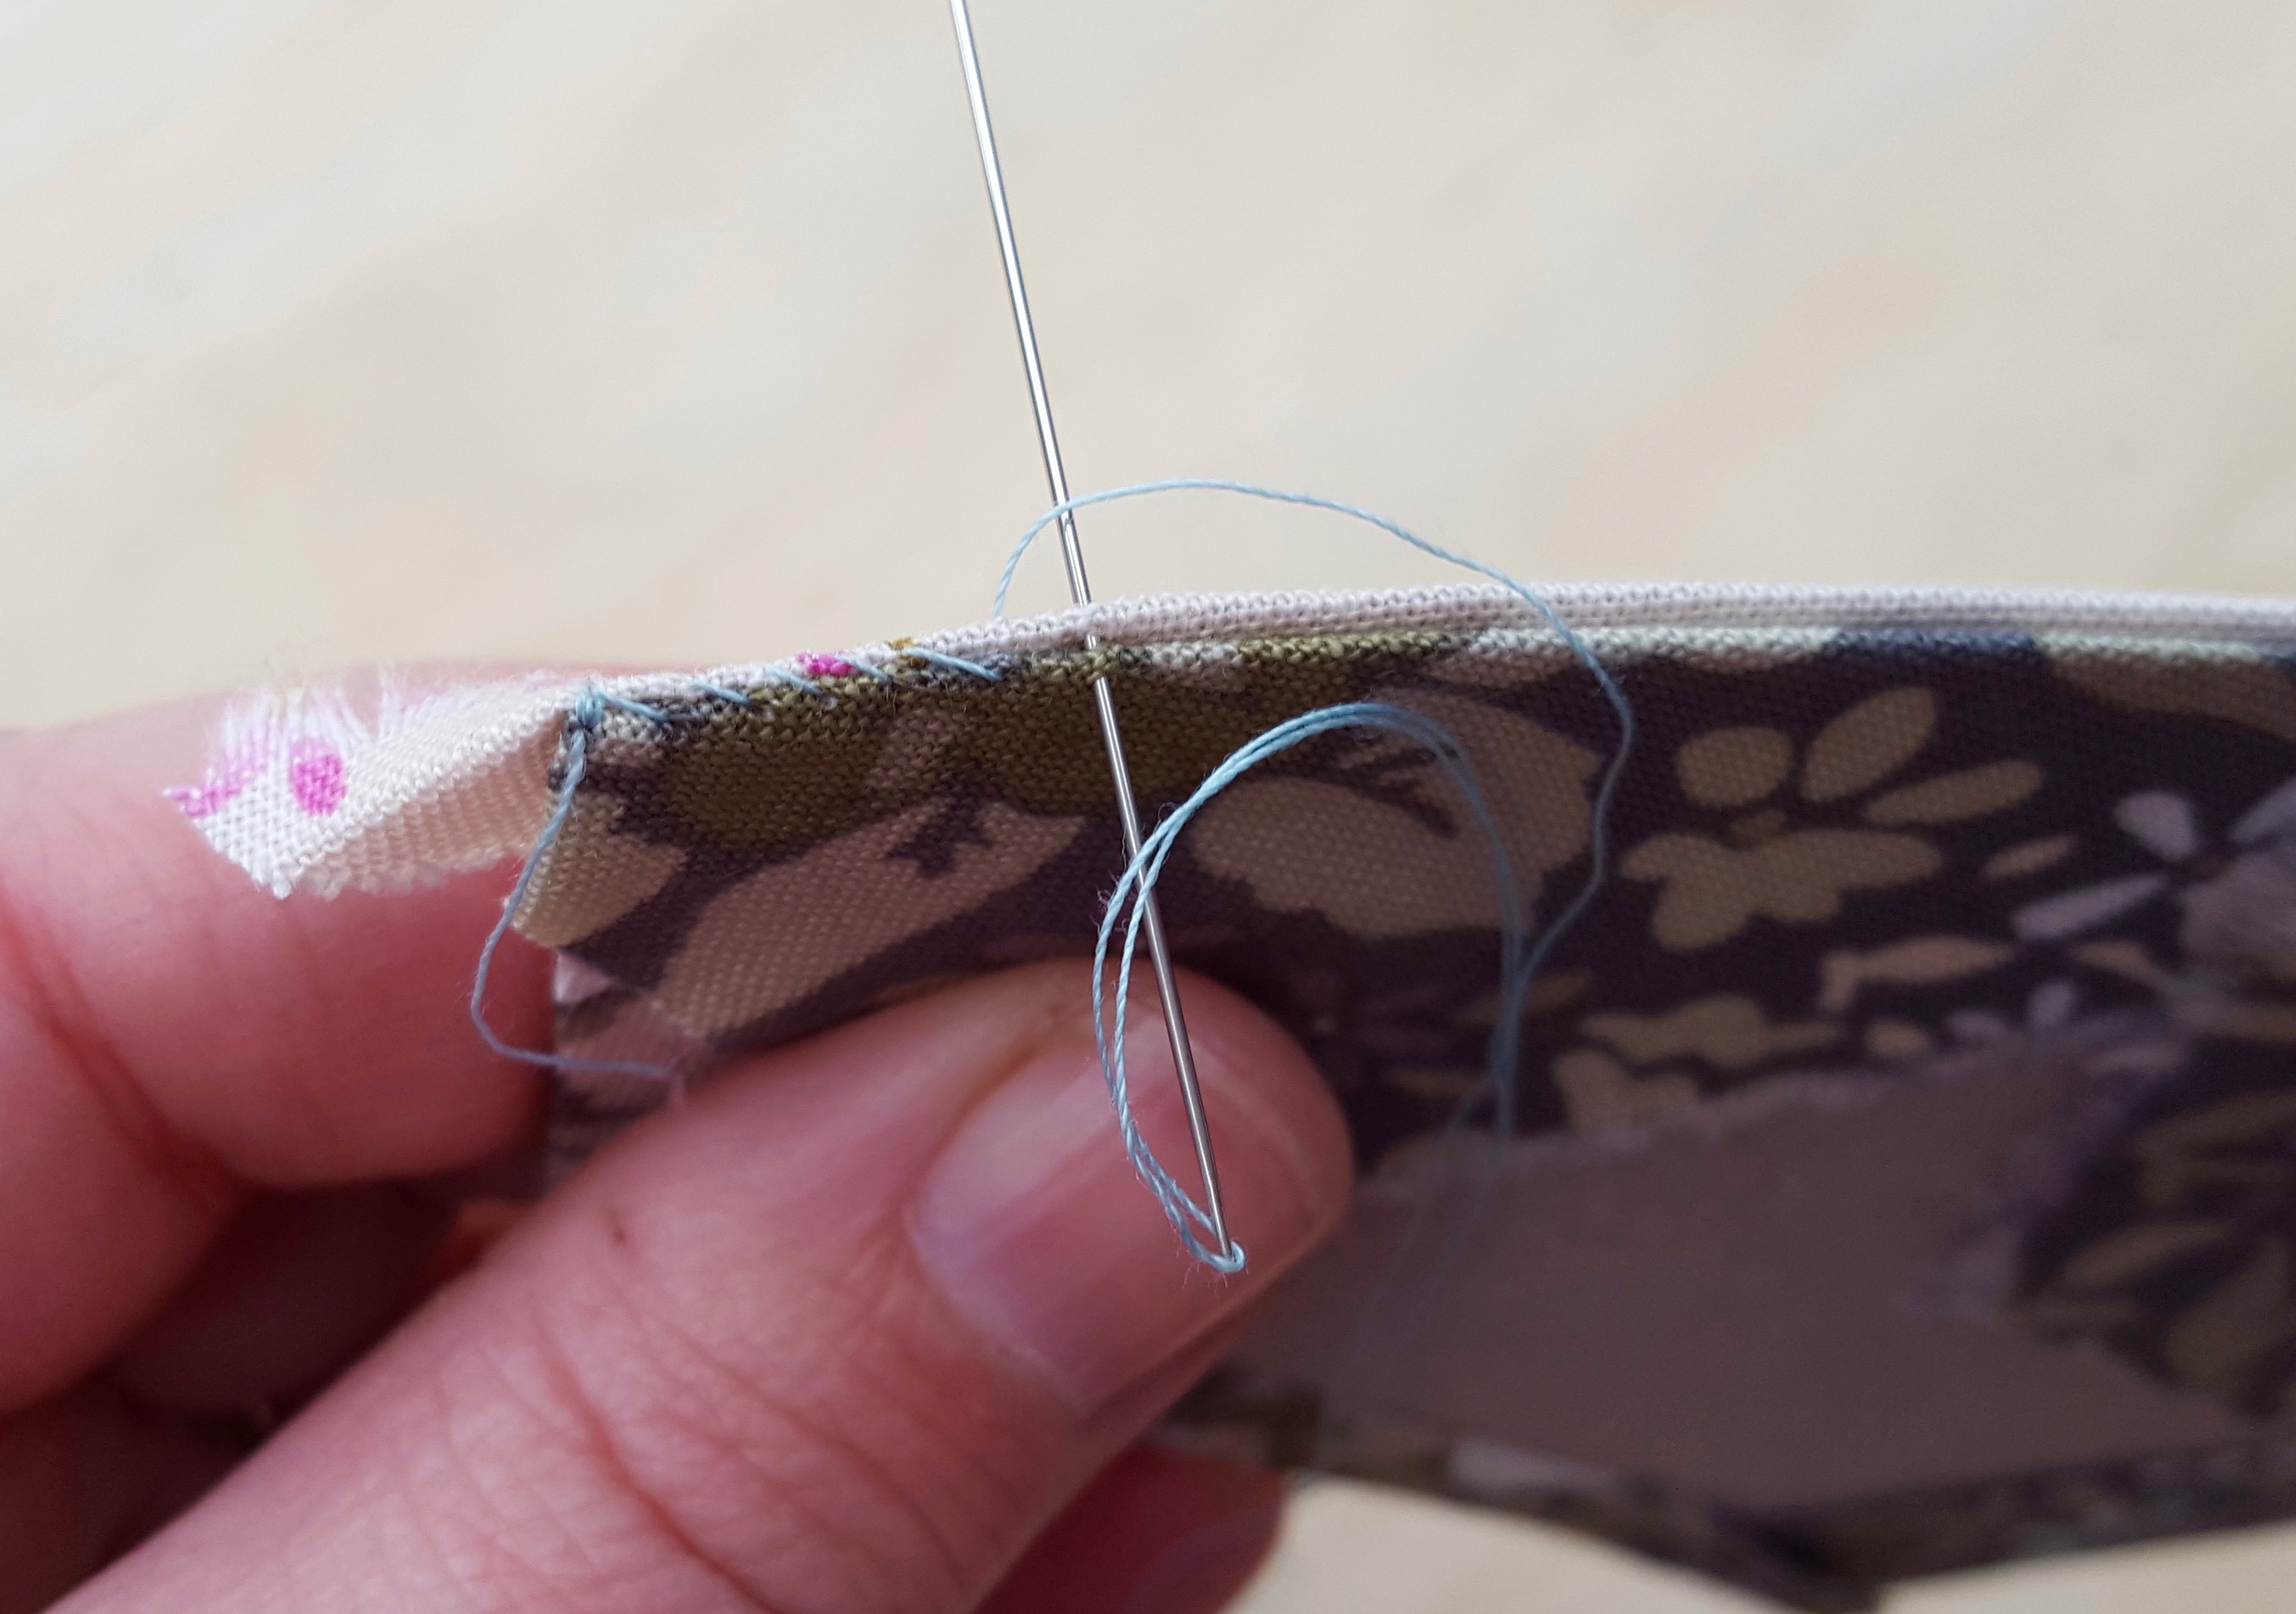
I then poke the needle in the side closest to me, perpendicular to the papers, around 1/16" - 1/8" (or a couple of millimetres) apart. Repeat this over and over until you get to the end of the seam.

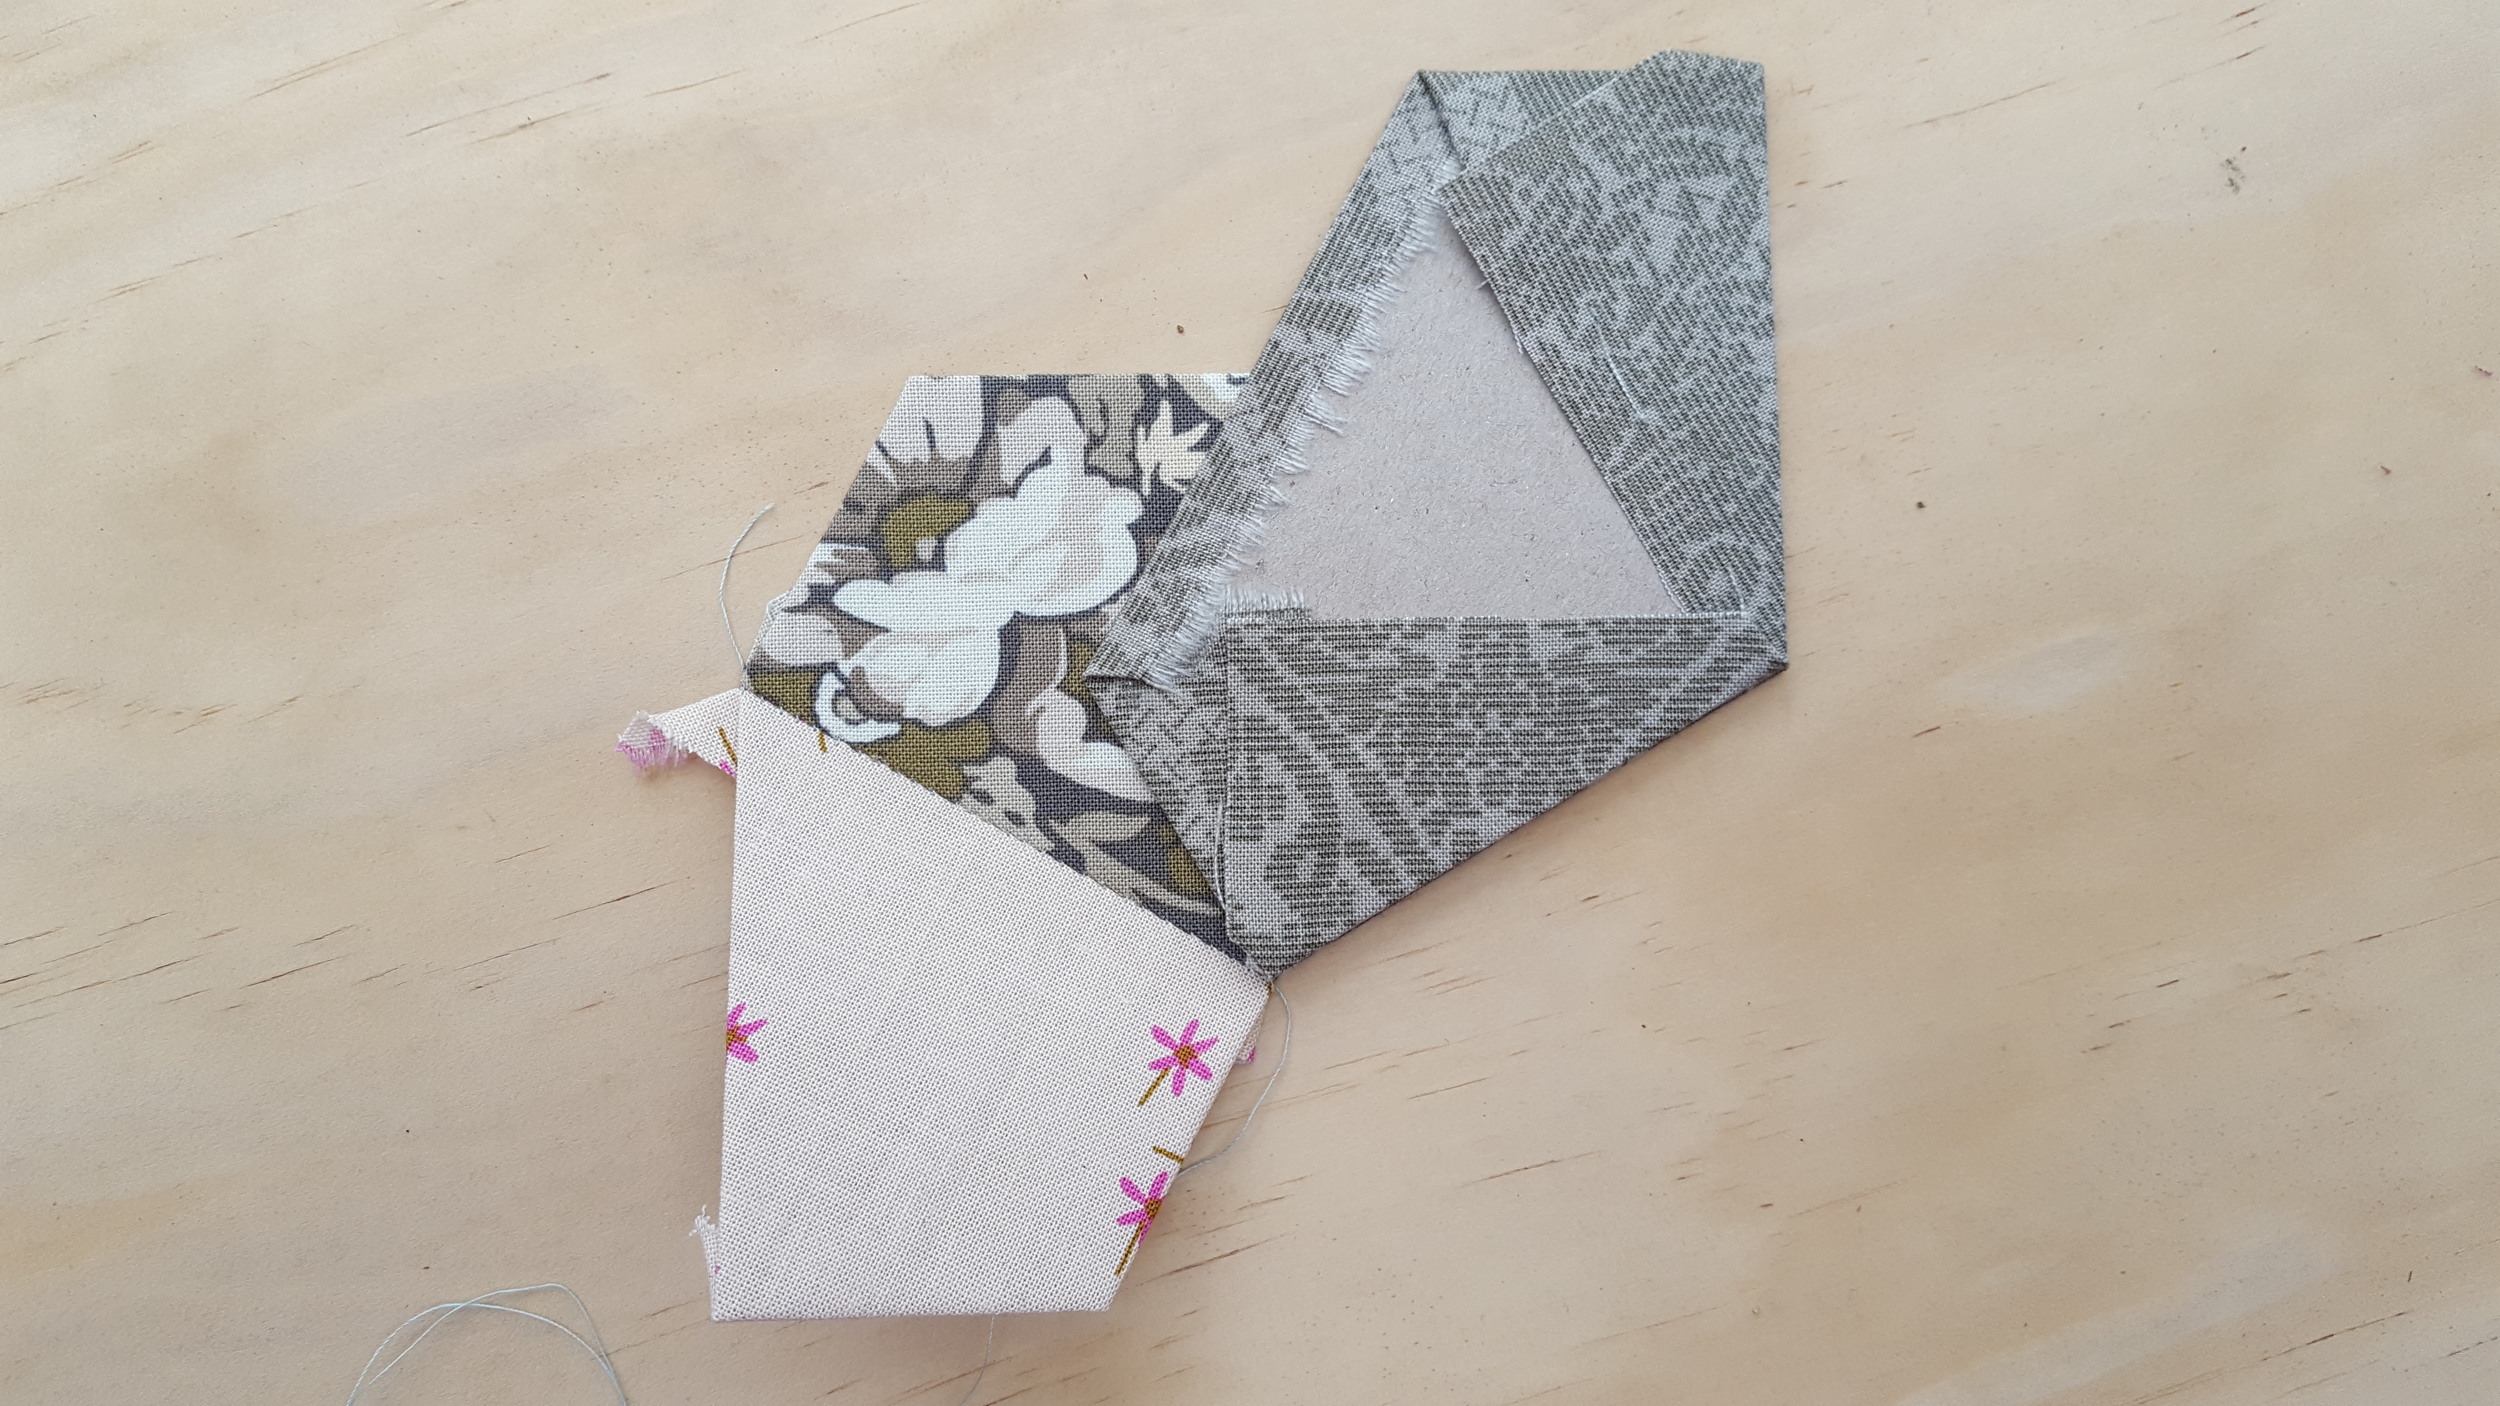
When you get to the corner, stitch a couple of times in the same place before moving on to the next piece. Place your next shape over the unit you're working on. I find this easiest by laying it beside first to check you're stitching it the right way. It's easy to stitch down the wrong seam! Continue along this next edge as before.
Once you've stitched to the end of your row, add another kite in the last spot. Finish the seam (and each time you end a thread) with a couple of stitches and a knot.

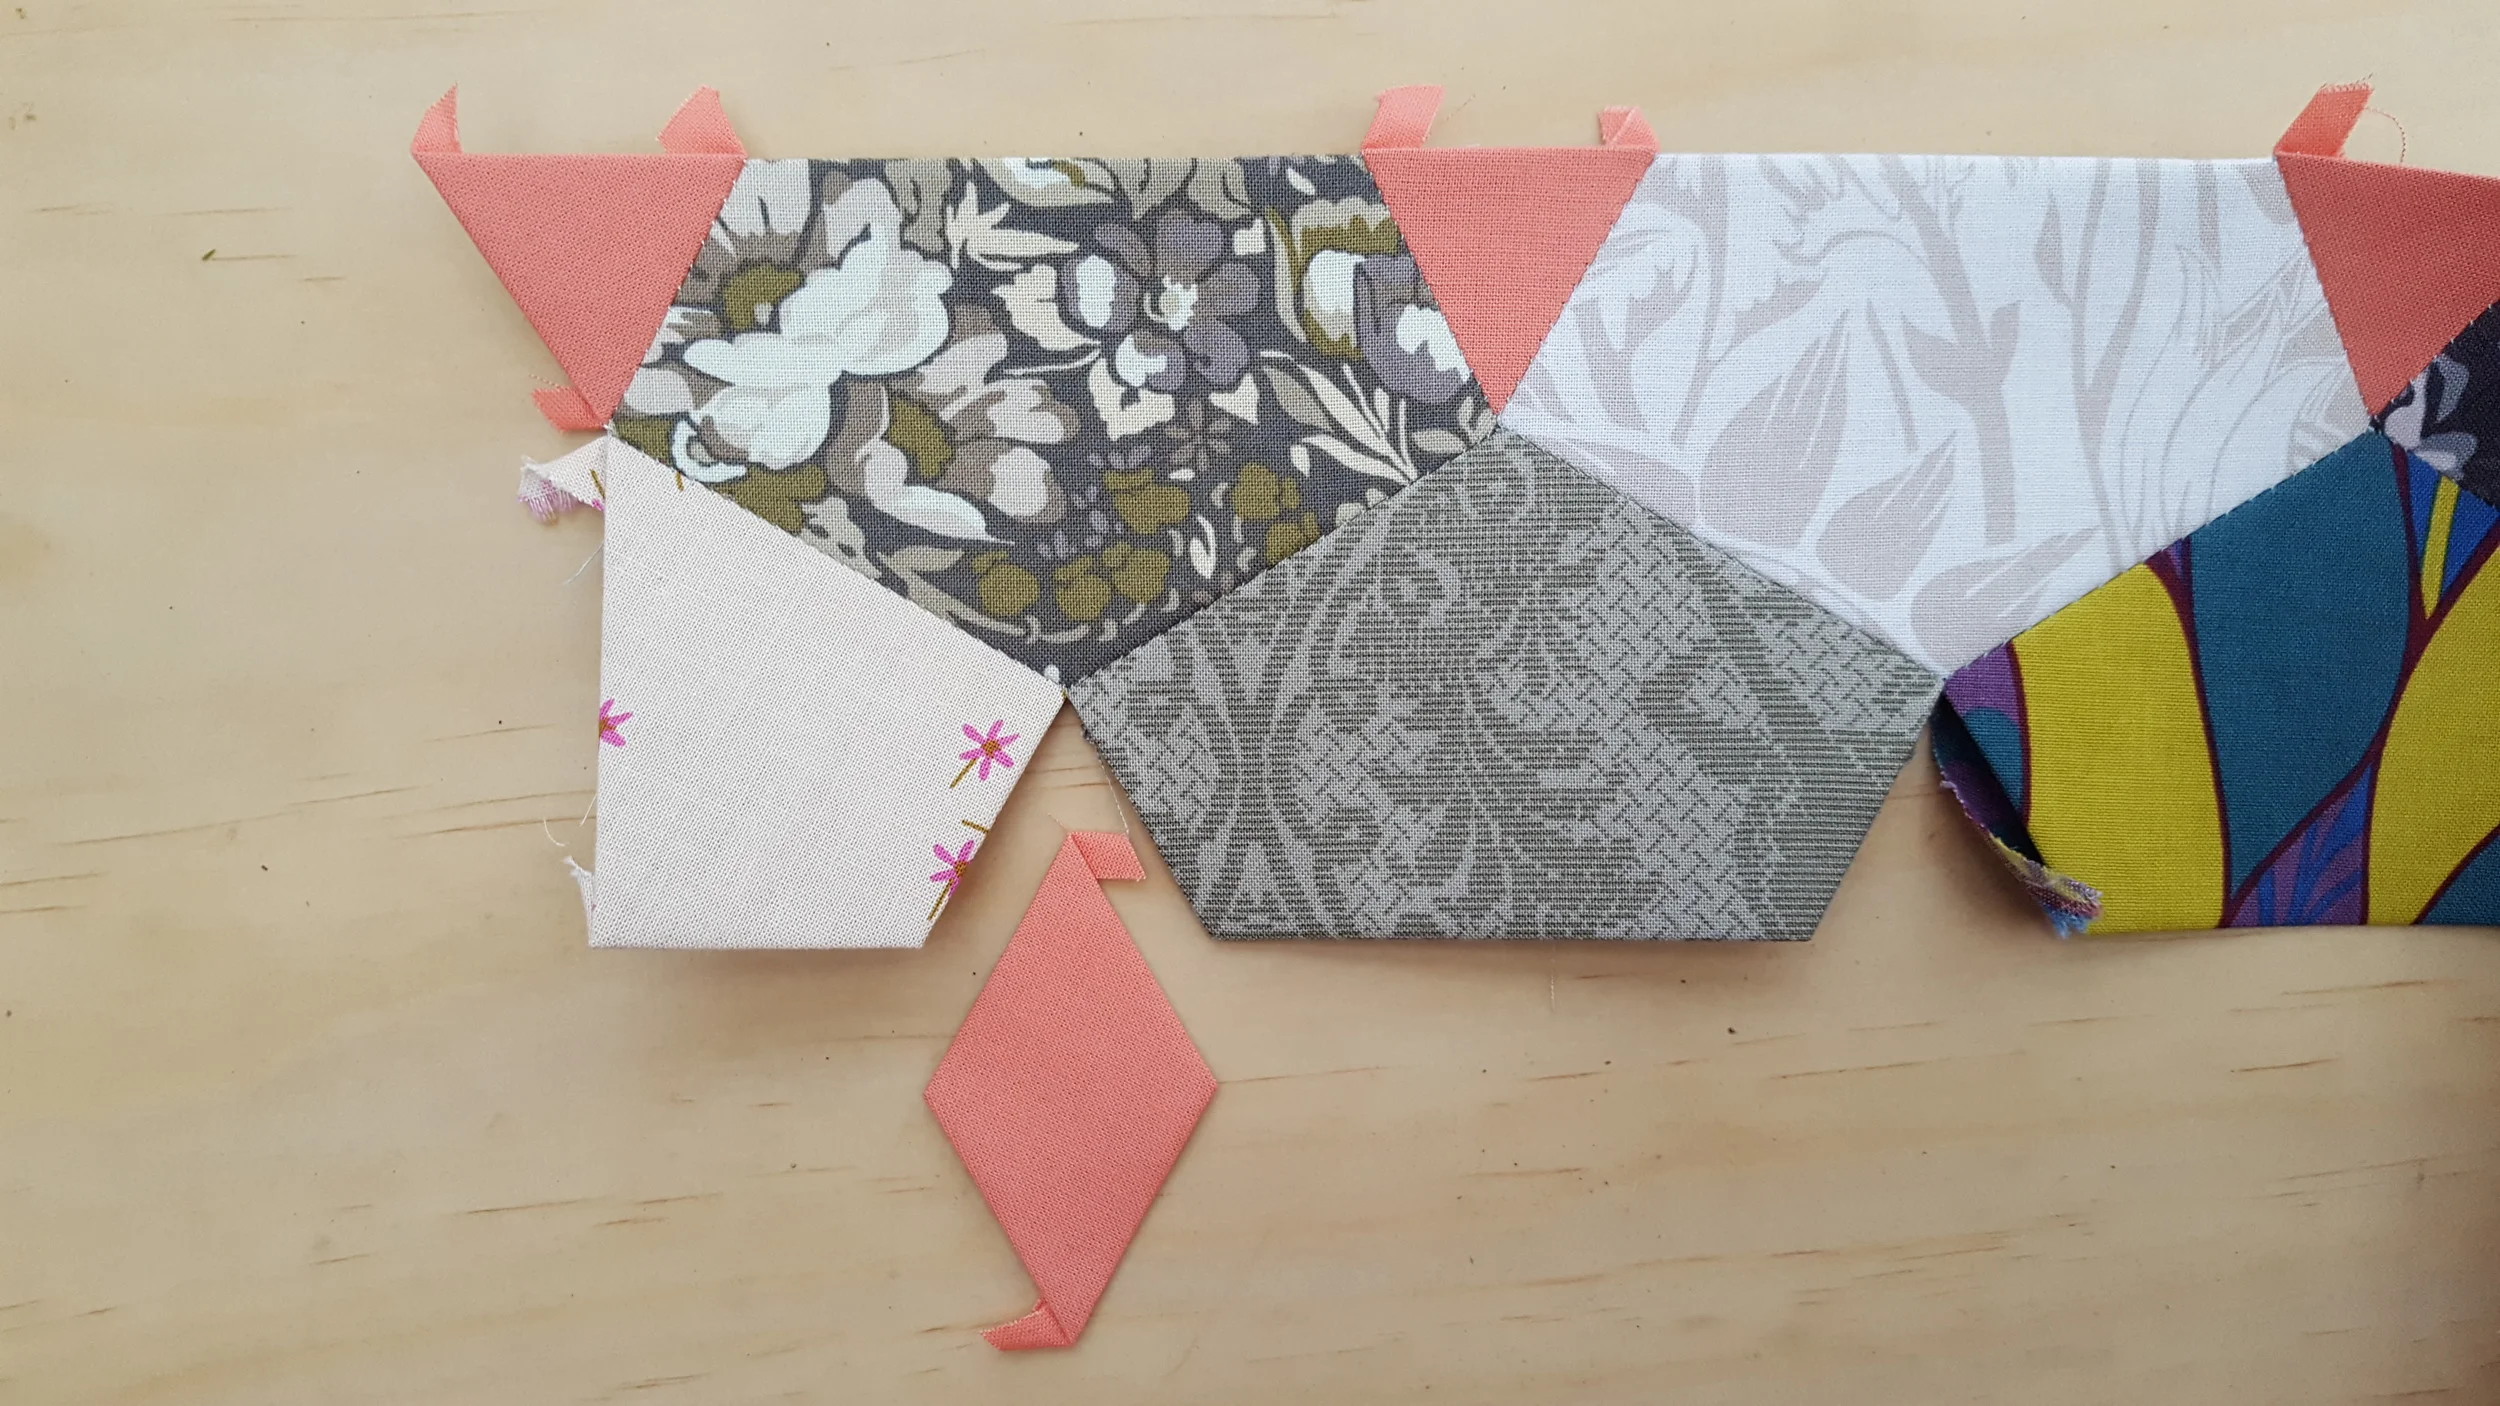
Because this is my top row, I'm stitching triangles along the top to make a flat edge, and then my diamonds in below. My side edges won't be completely flat, but I don't mind. I wanted to keep to a minimum all the different shapes I was using, and I'll just trim them at the end. I'll show you how I do it in my next tutorial!
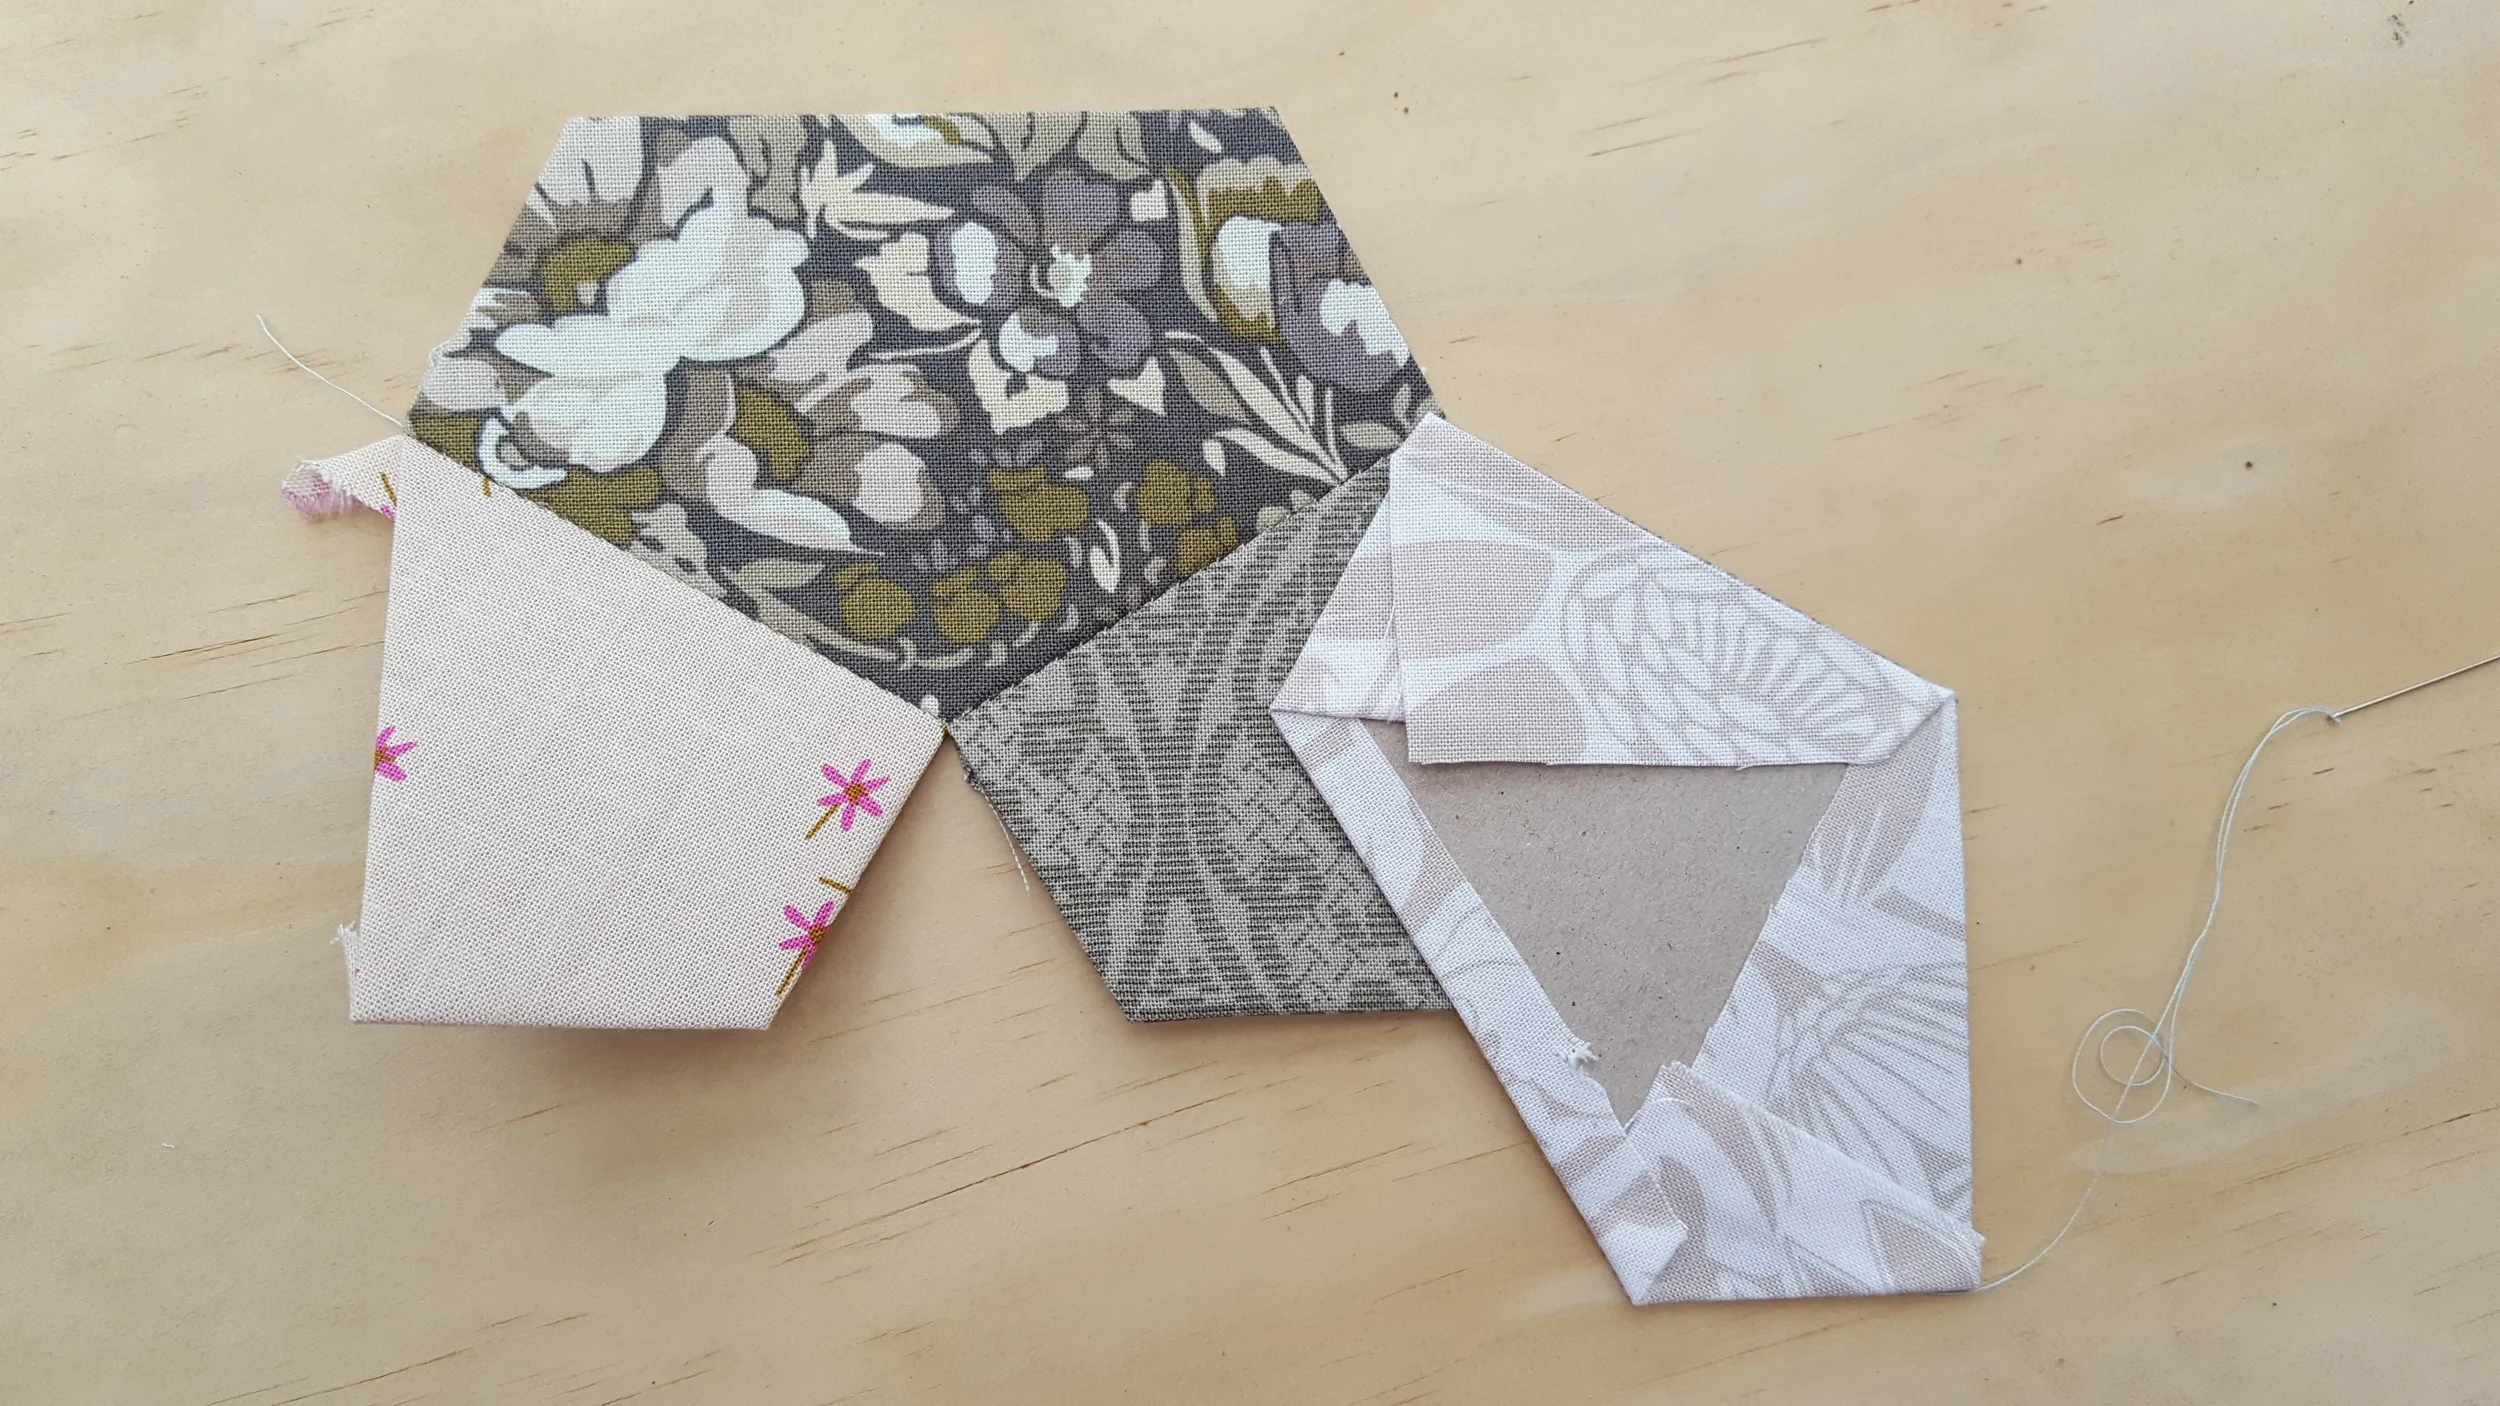
In your row that you've stitched so far there was no shape bending, tricky Y seams, or narrow points, but in this next section there are. And the first place you'll come across them is in this second triangle above.
Stitch down the first seam until you get into the corner. Make a couple of extra stitches.
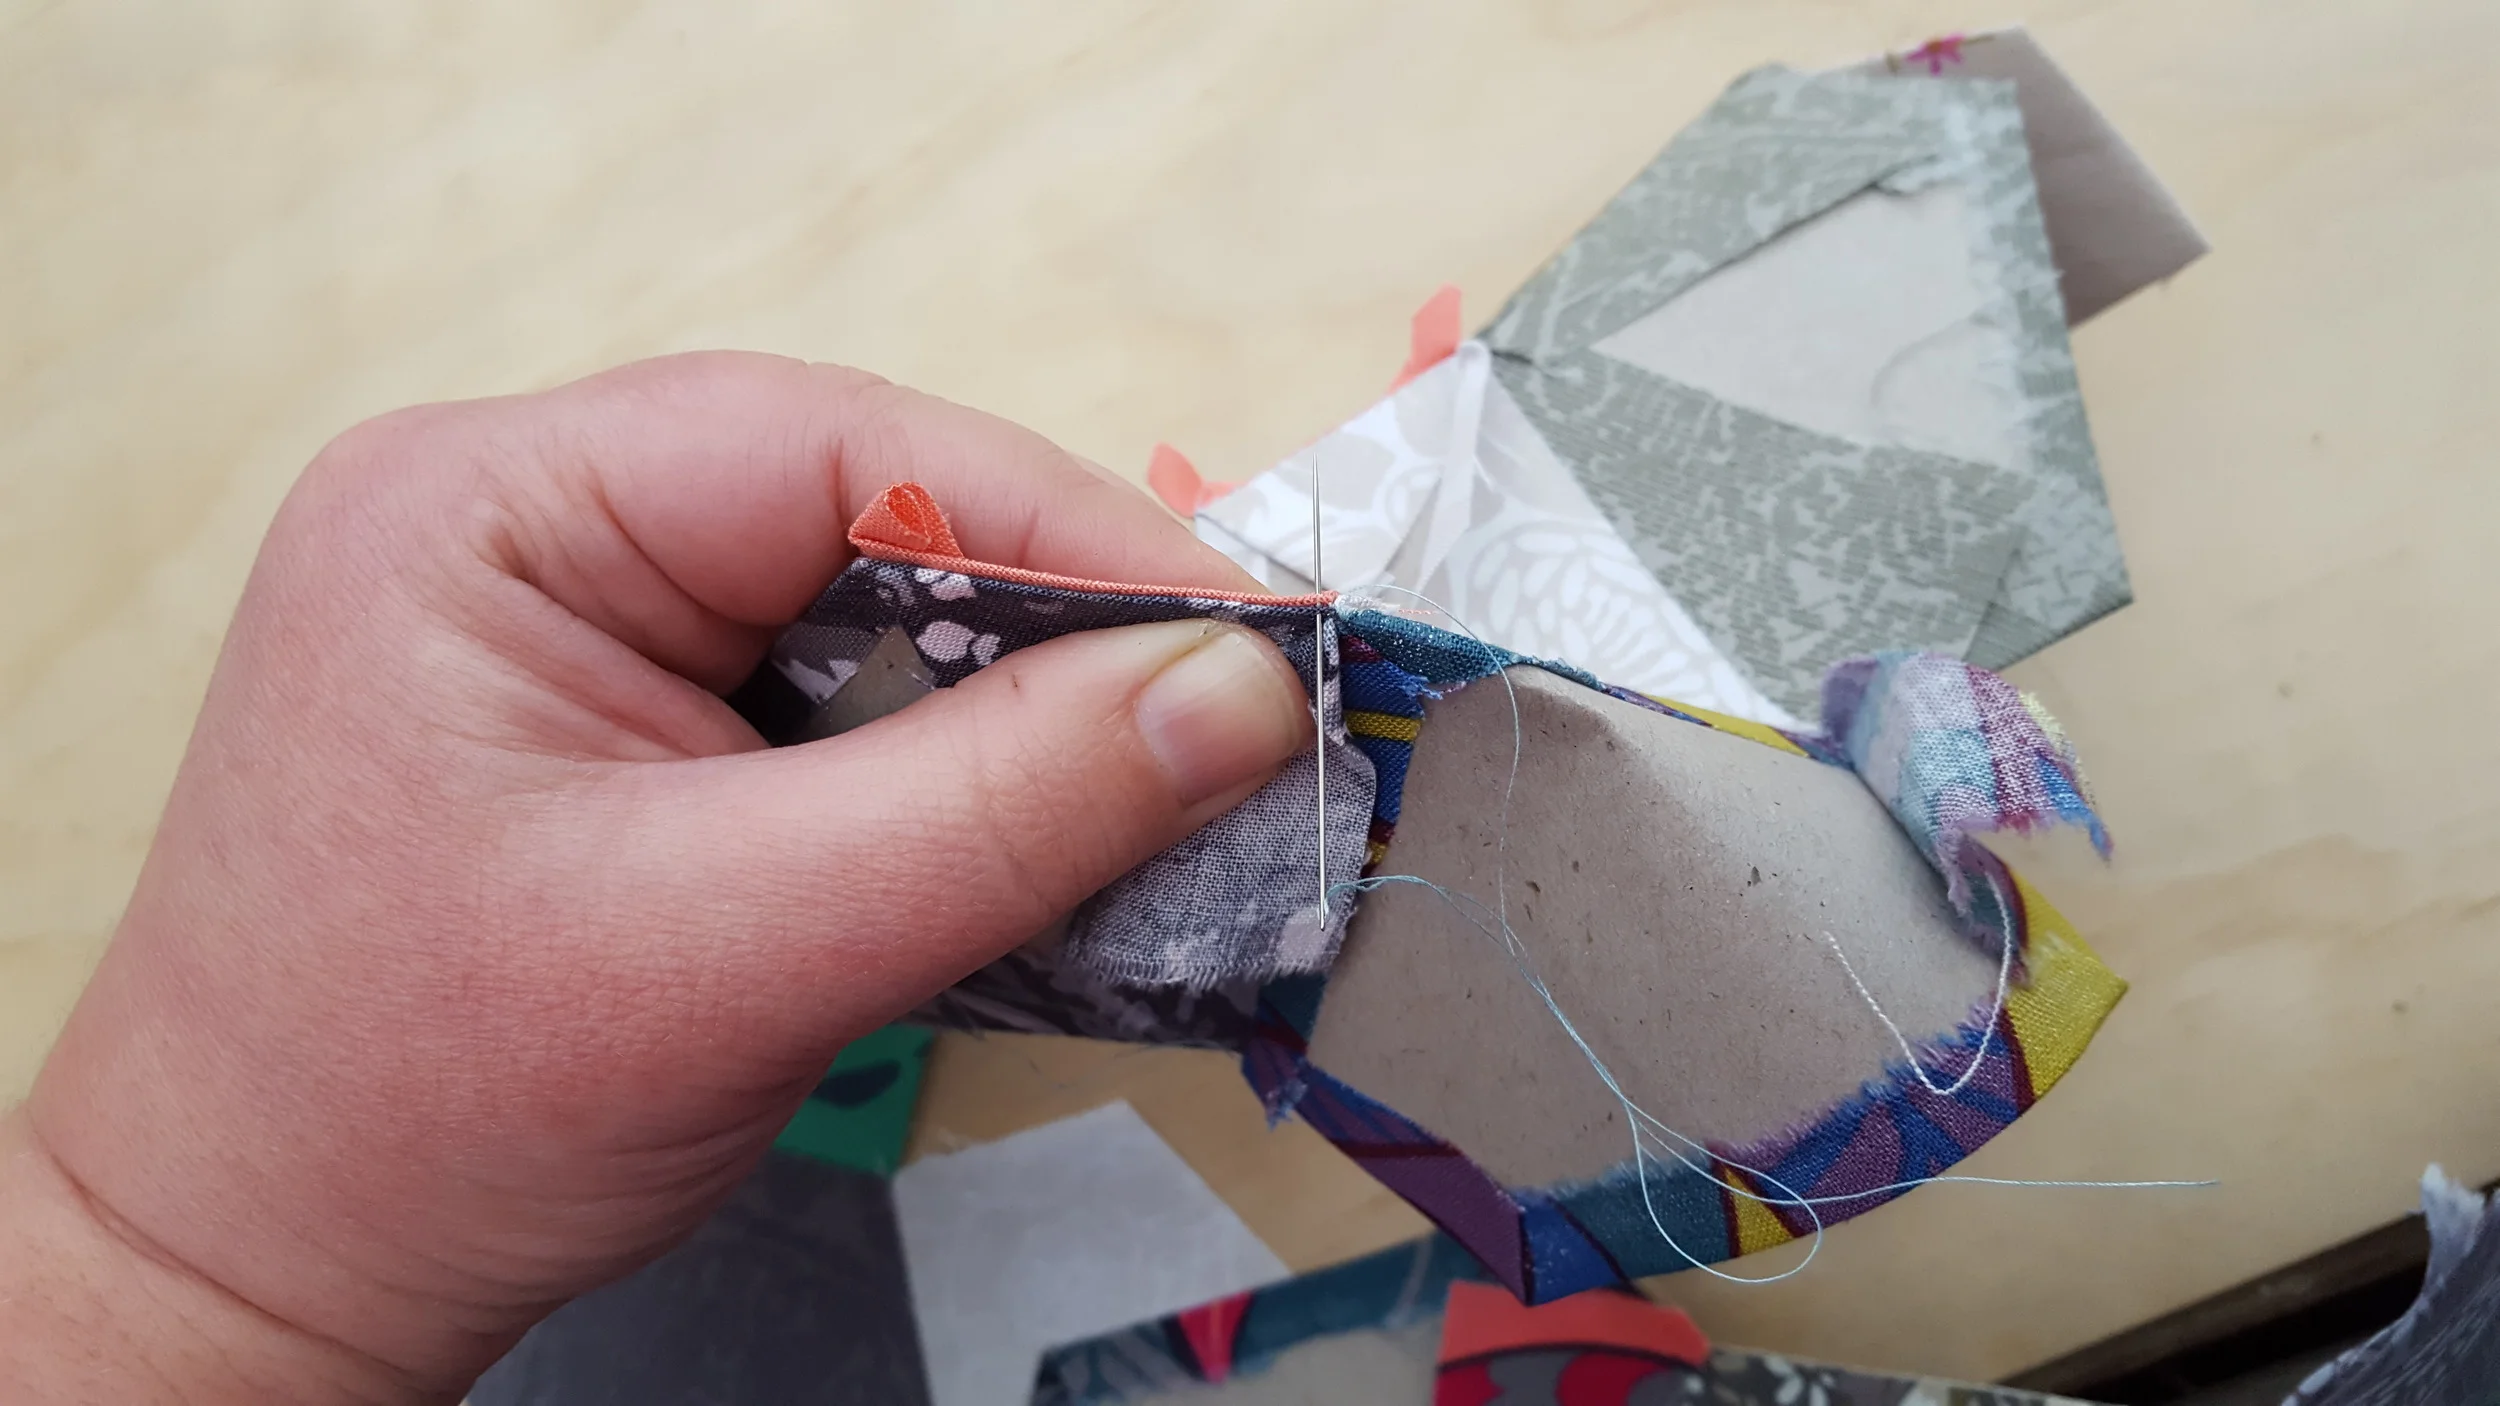
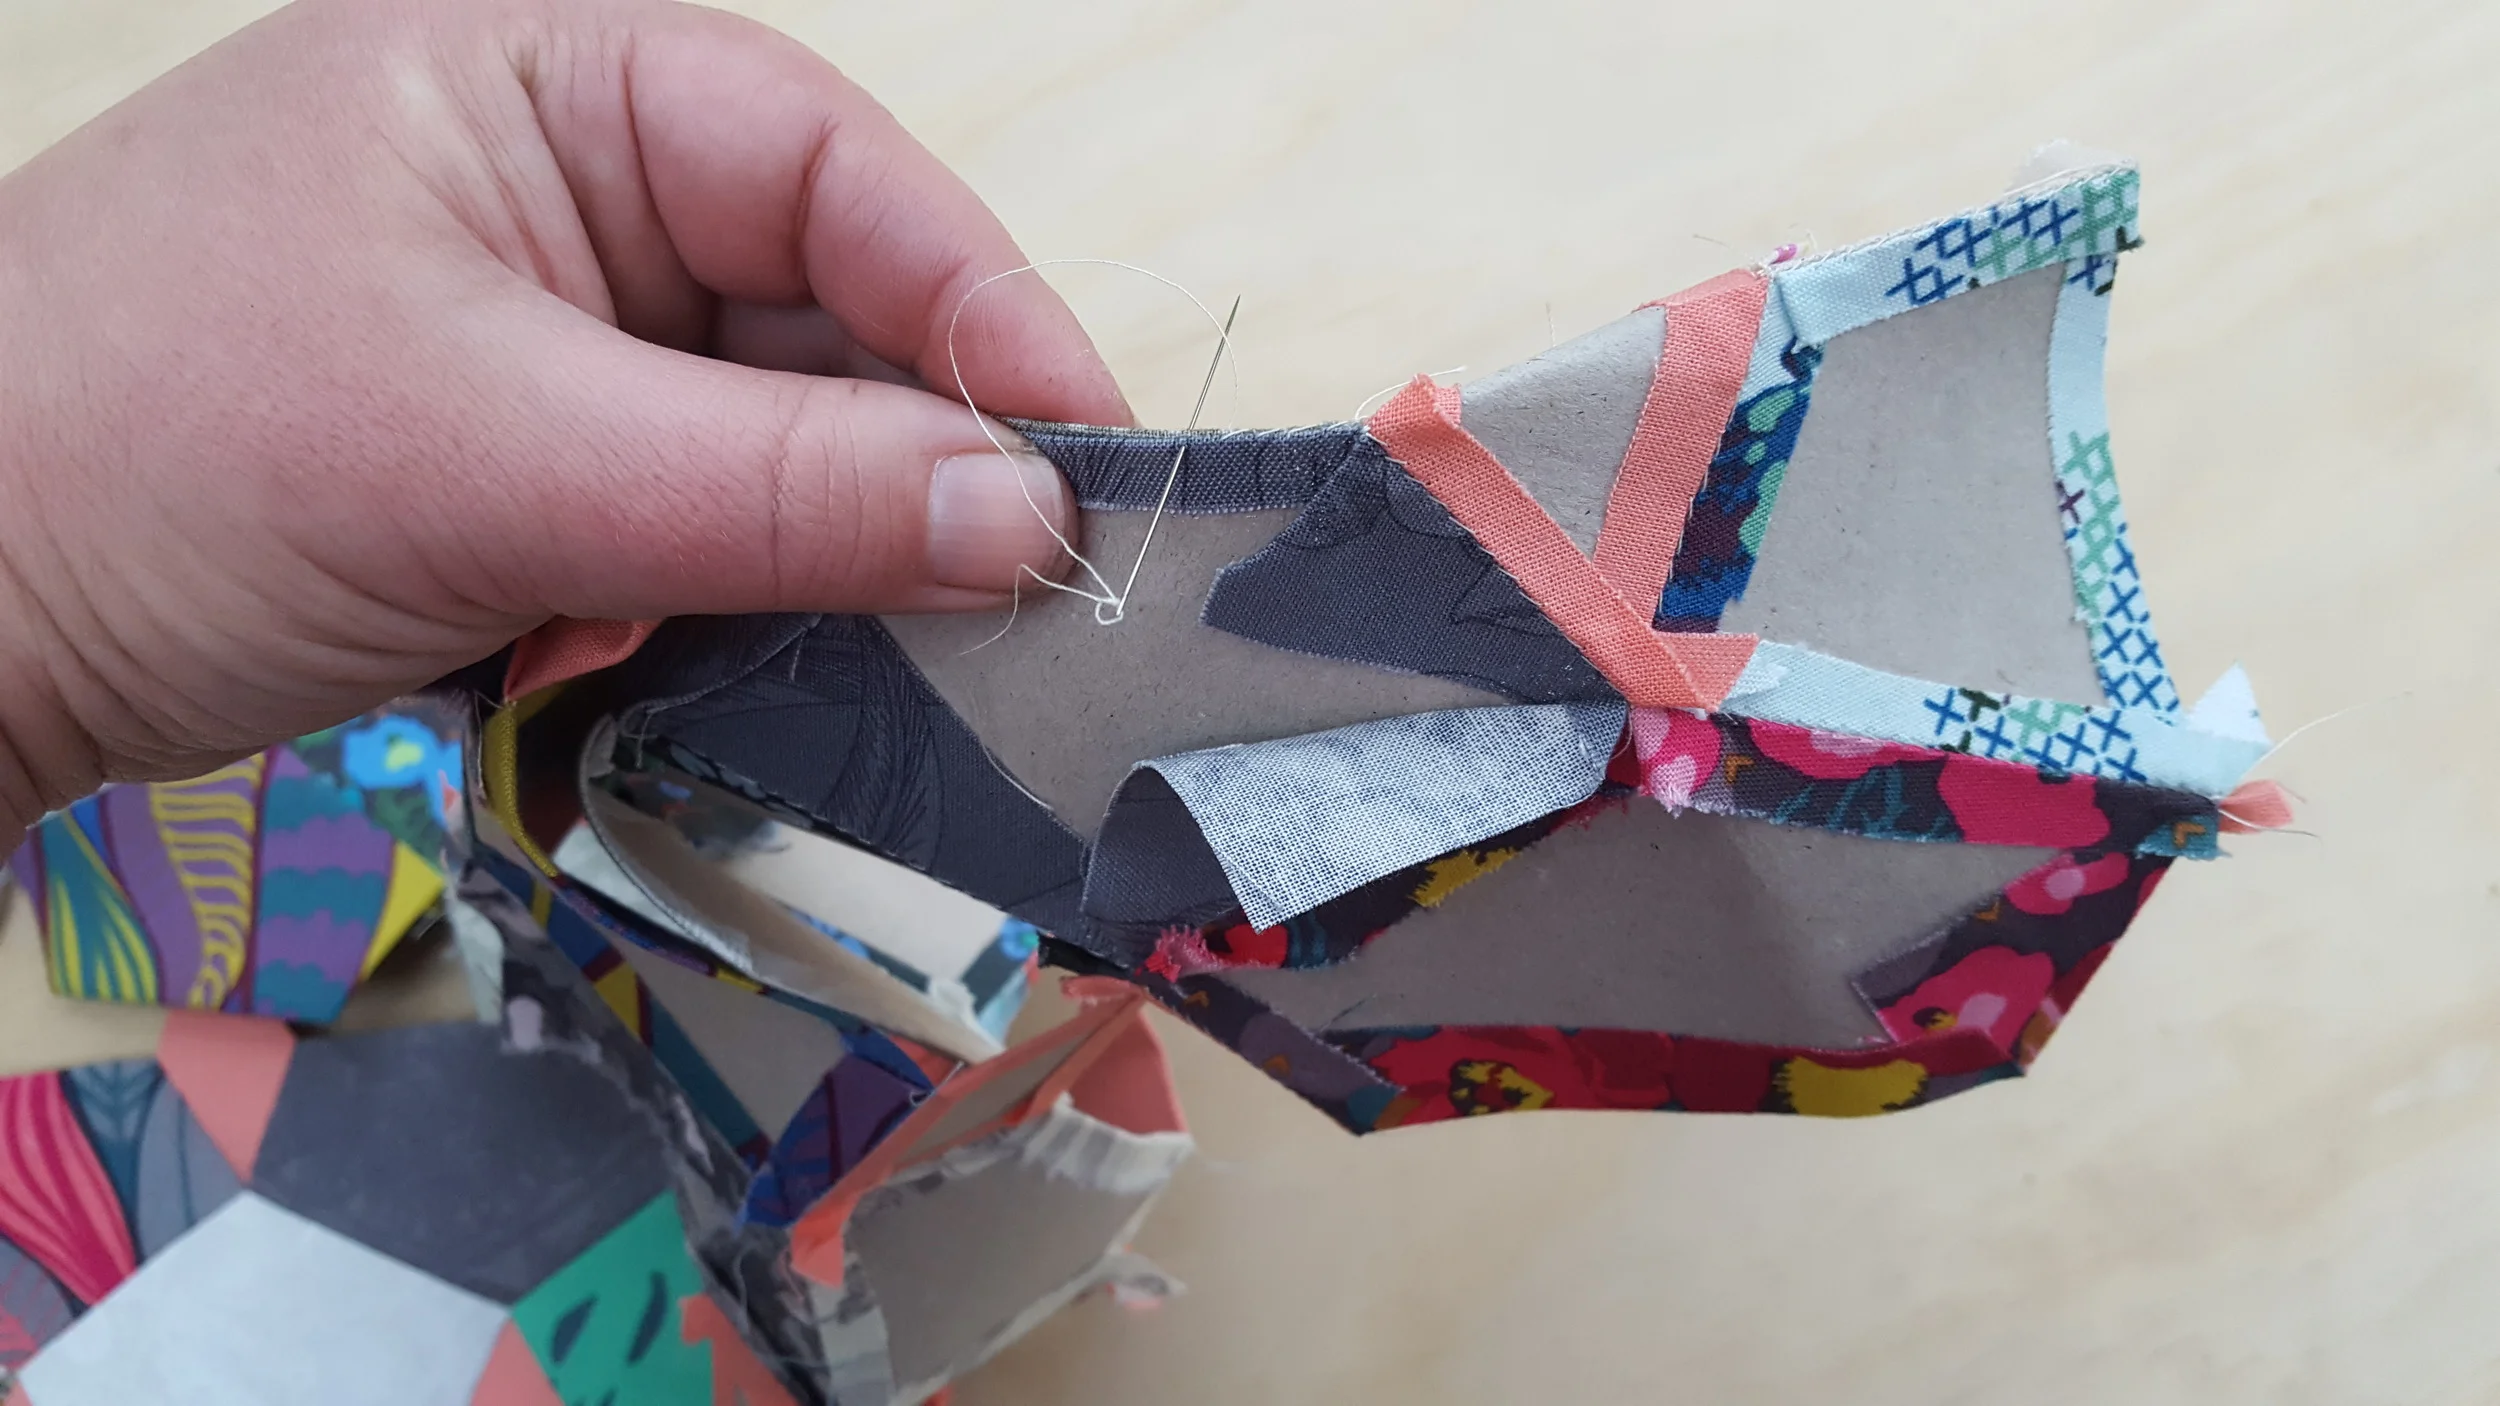
Next, twist your row around, so that your next seam has right sides together, and can be stitched along as above. You'll need to fold the paper below it (or take it out if it's been completely surrounded). I find this part tricky with thick paper because the thick paper can make it hard to get the fold in the right place, which is why I like mine! My paper templates are 105gsm, curve easily and don't crease too much so you can reuse them. But you can also lay it out flat and stitch across the seam if you prefer. You can see how Jessie Fincham does it here.
Now you'll need to do the same with the diamonds! This is the part I find most tedious because of all the stopping and starting, so after I stitched a few rows, I started sewing them together.
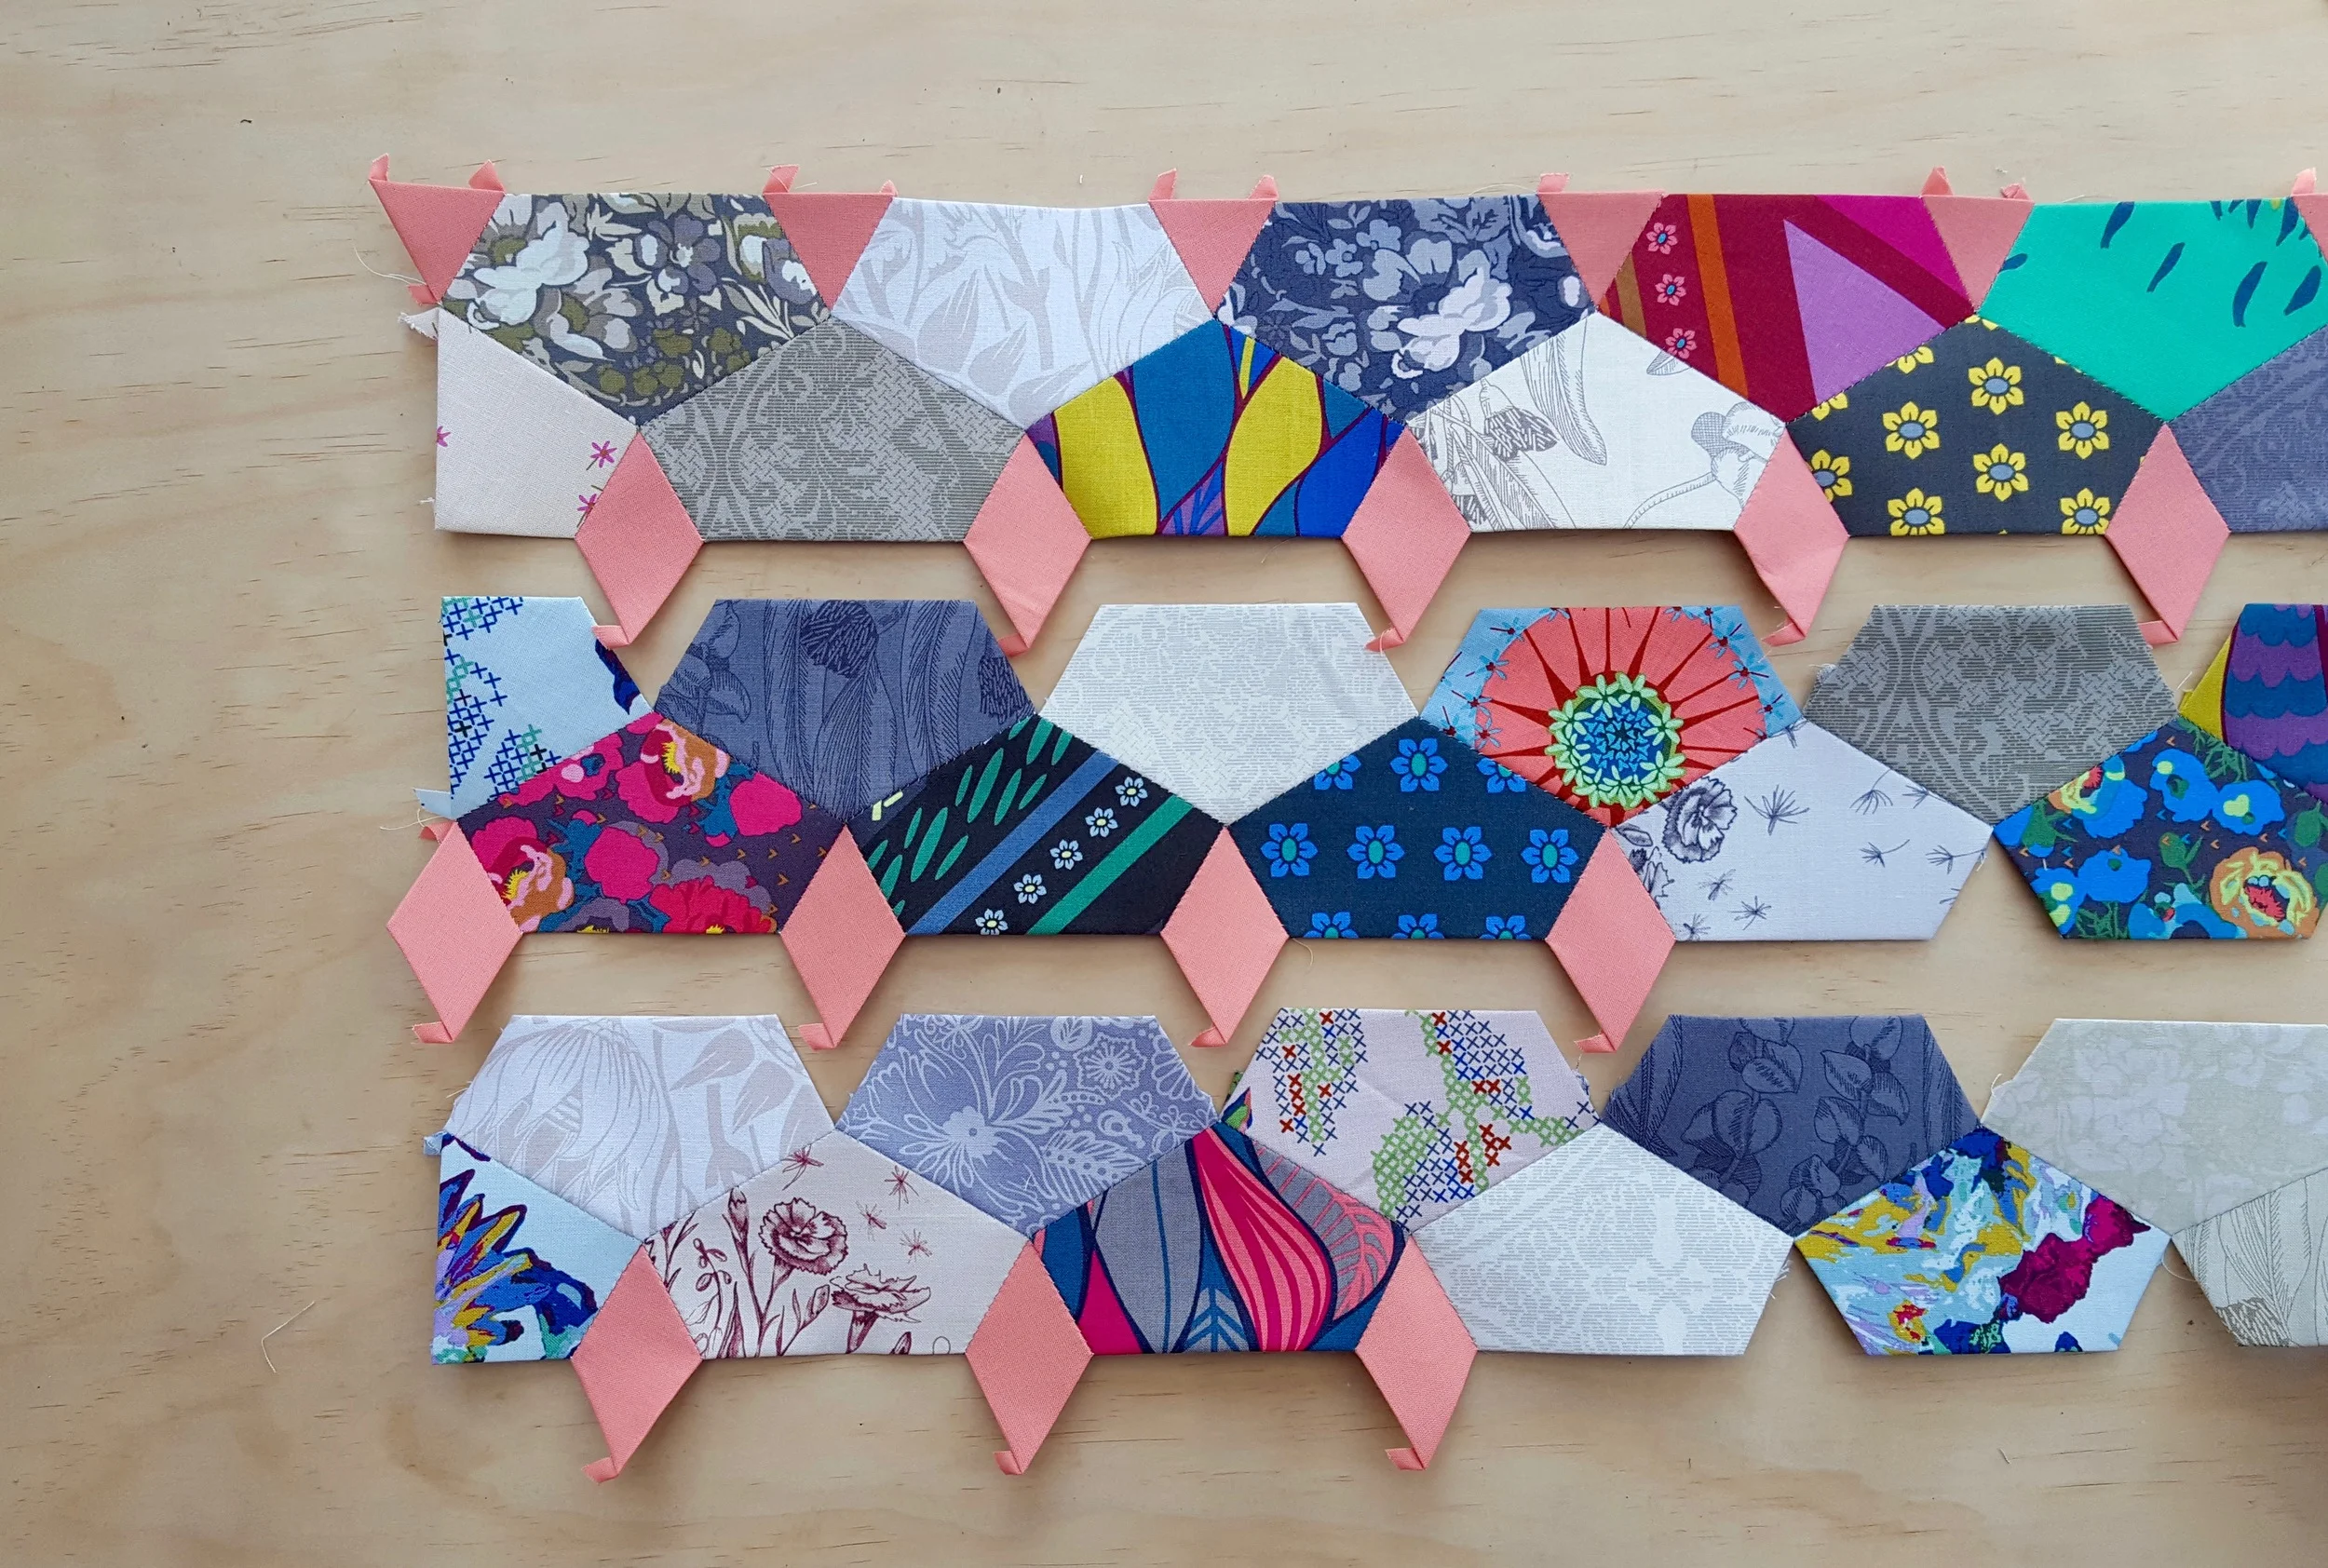
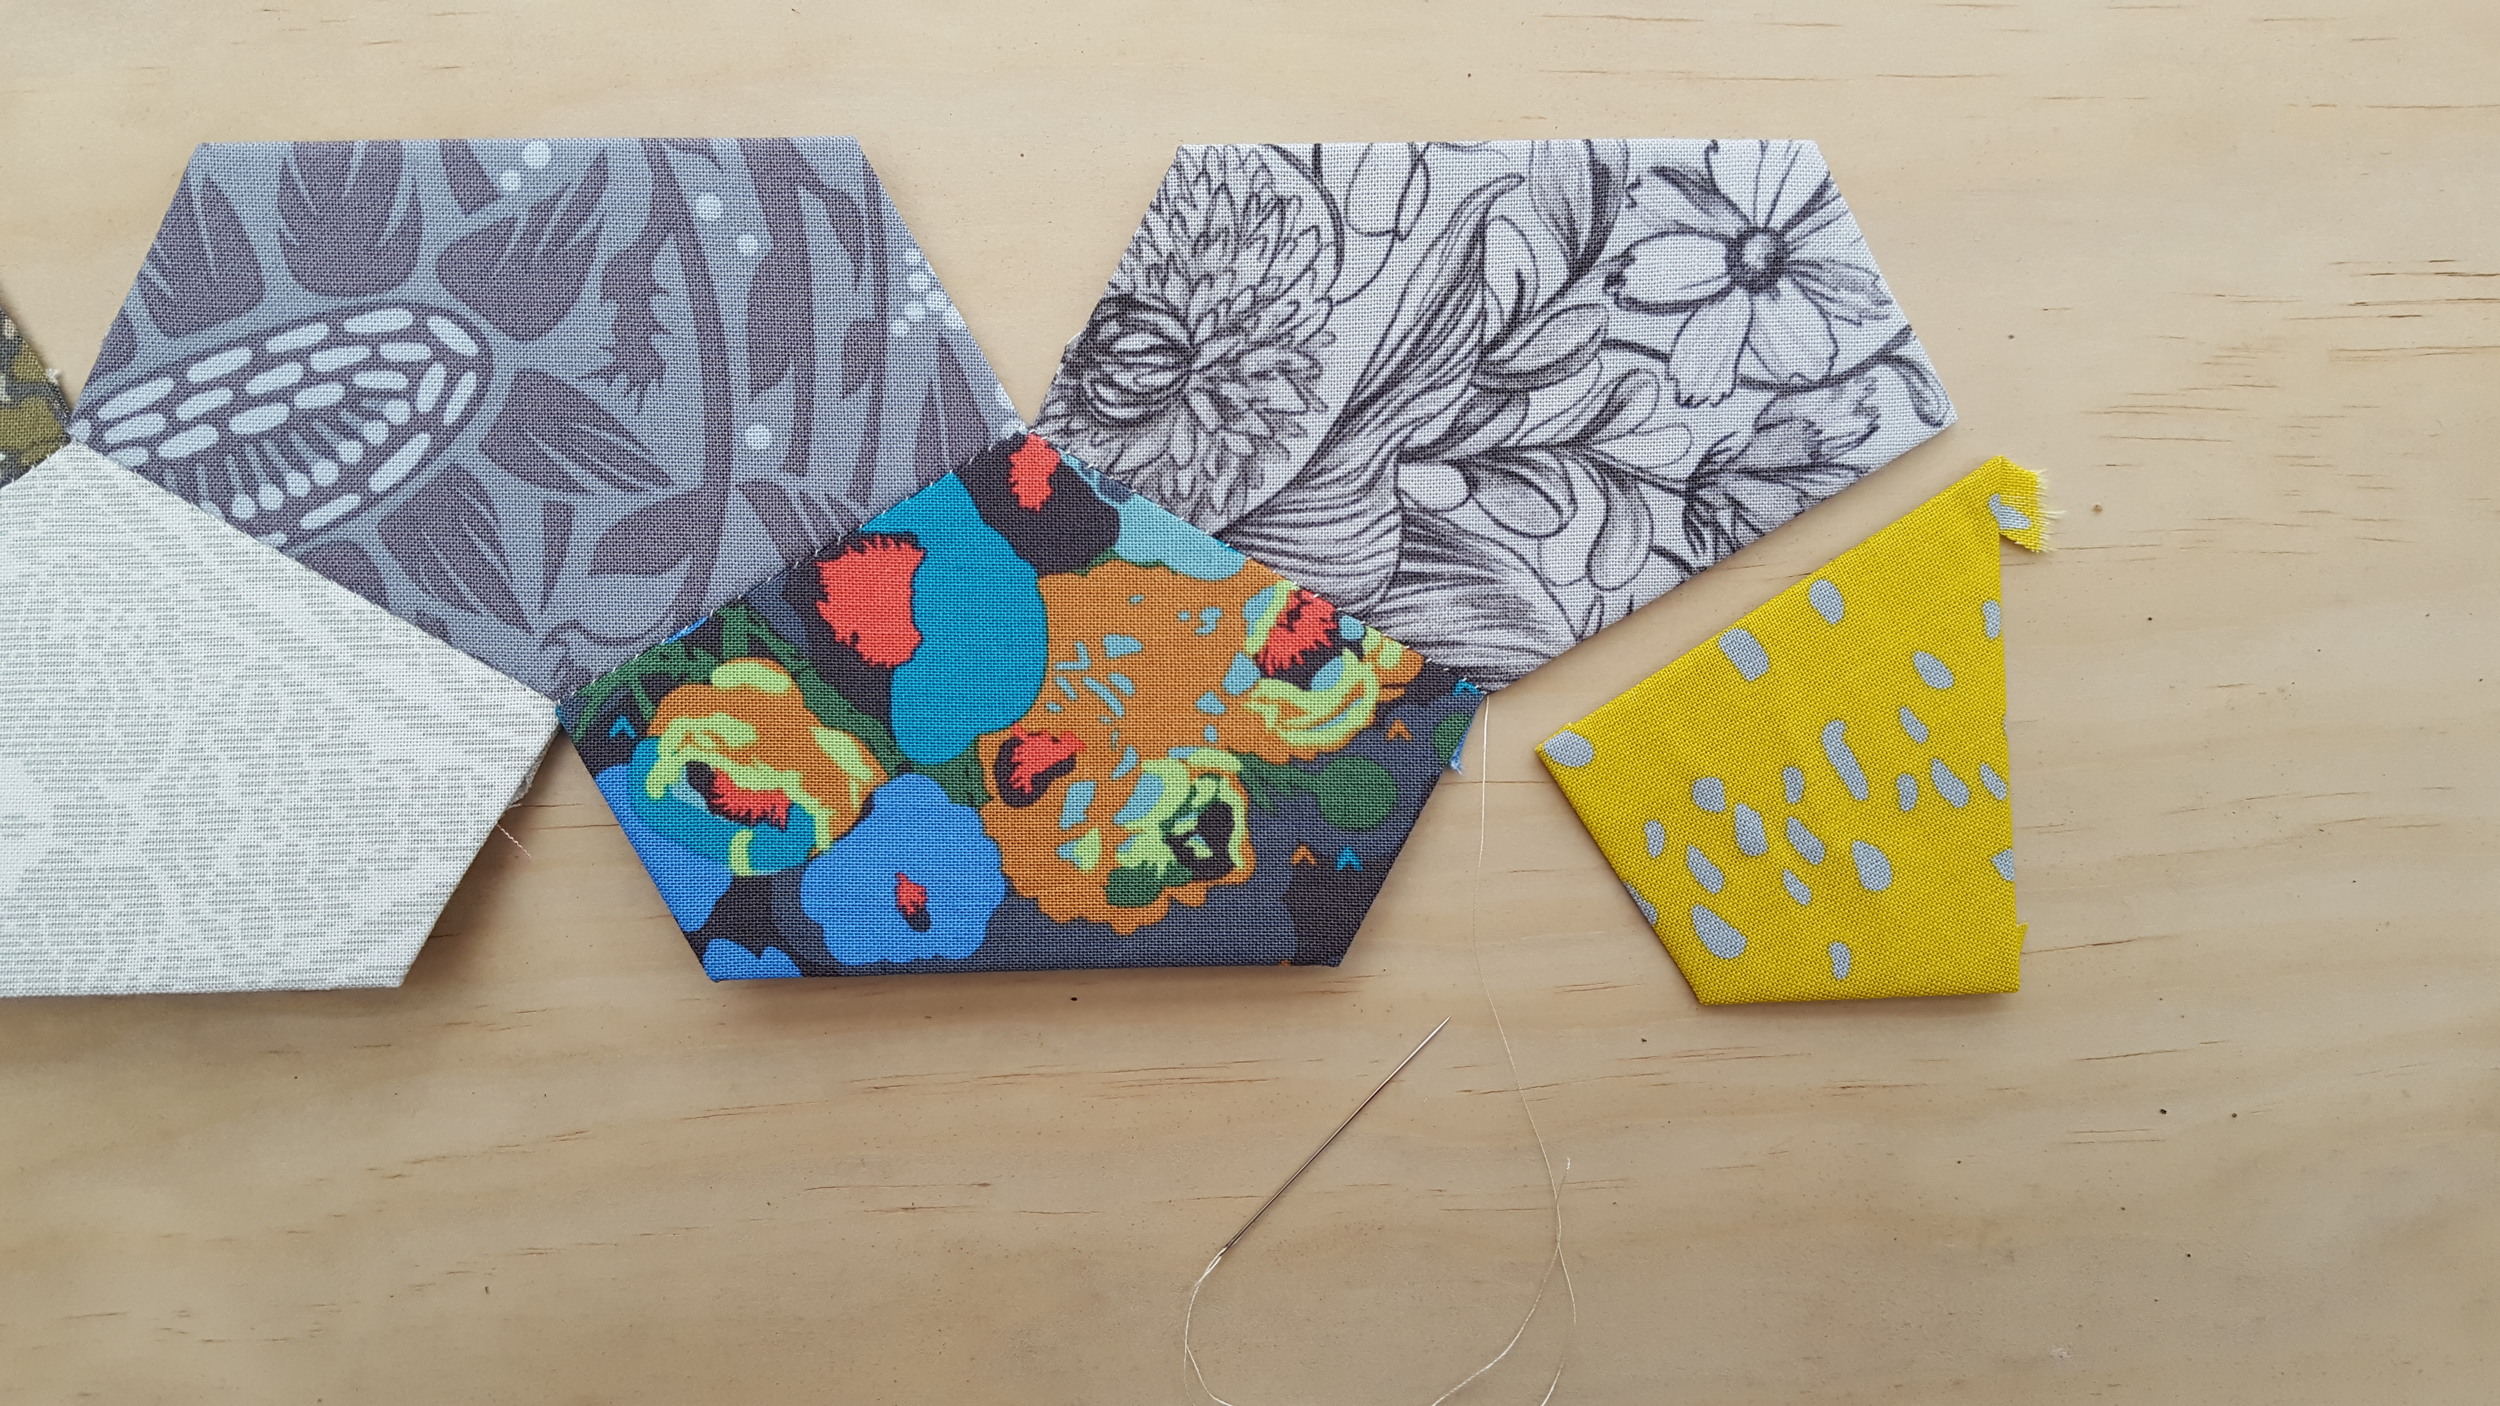
To stitch the rows together, flip the second row up and over the first to get the beginning of that seam meeting up. Stitch along the row, matching up each seam as you go. After I stitched these two rows together, I decided to take the papers out that I didn't need any more. The bigger your quilt gets, the tougher it can be to handle. Taking the papers out makes it lighter and much more flexible.
For that next row, see how you have to start on an angle? I decided to start stitching after the diamond so that I could start on the straight edge, where the rows sat together. Then afterwards, I came back and finished off that little bit. It was much easier to maneuver that way!
After you get past your first diamond, you'll need fold it in half to stitch the next seam. I never press this fold, just bend it lightly, and it'll mostly flatten back into shape.
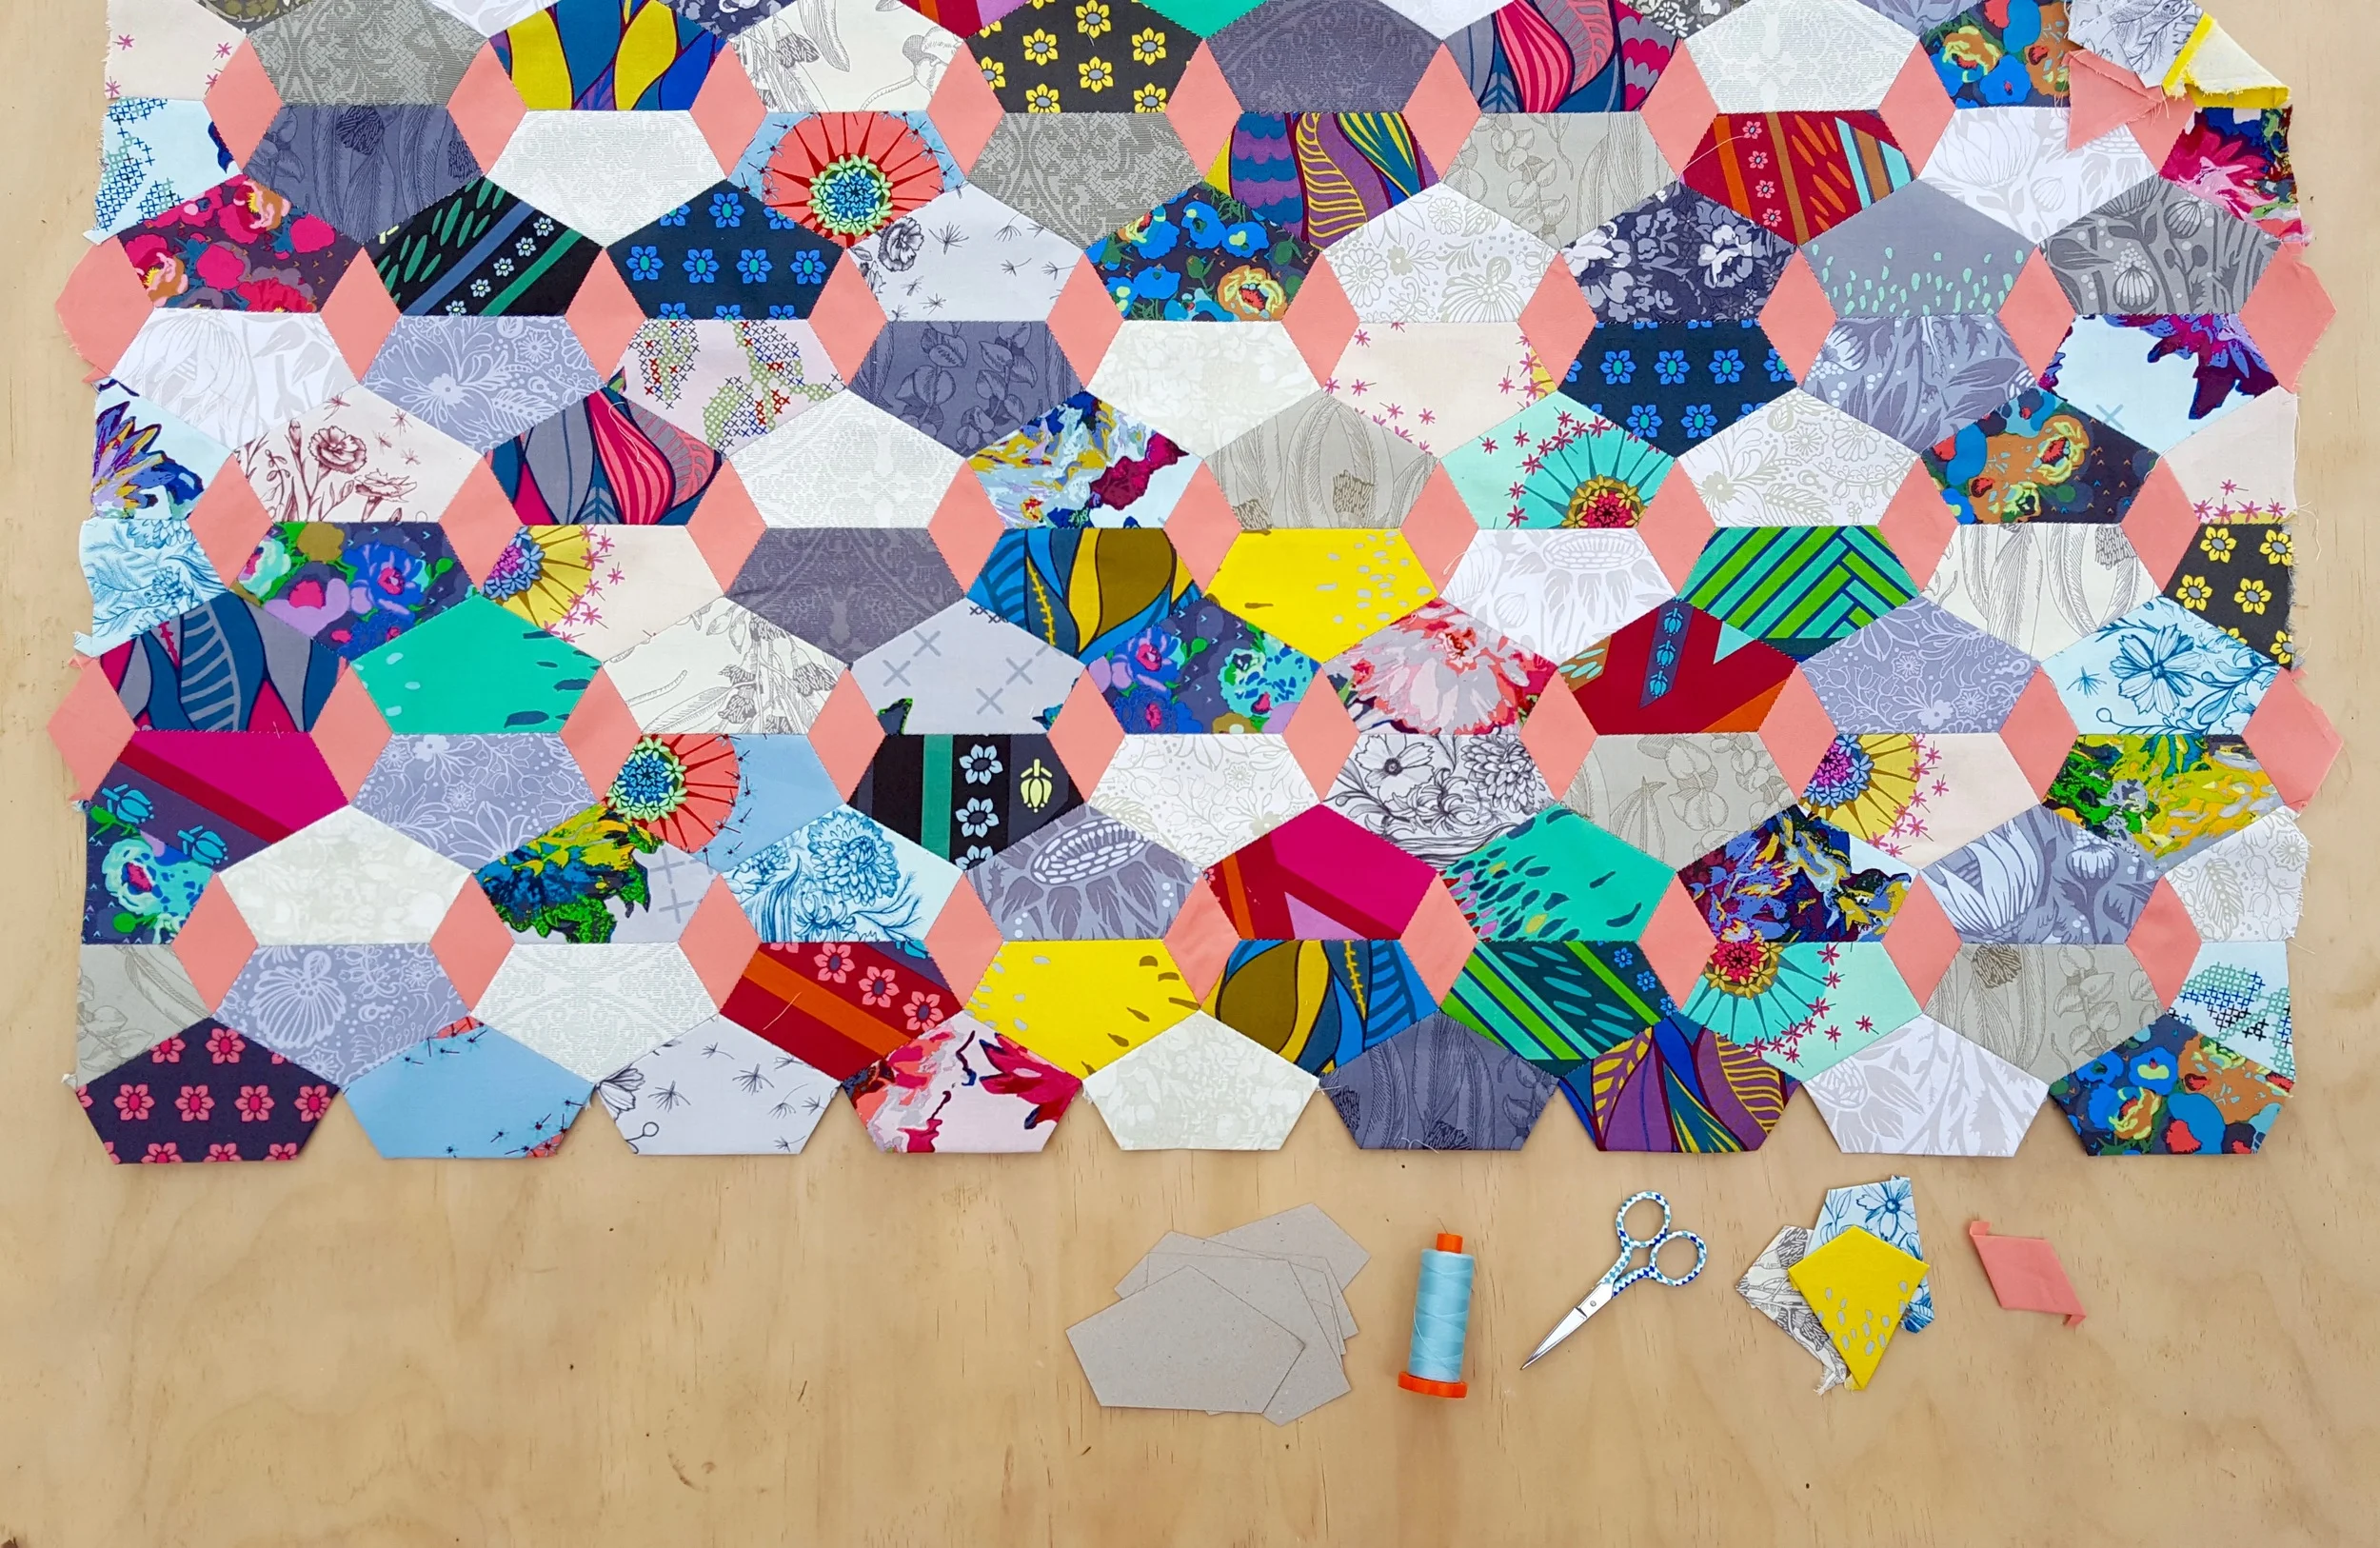
Here's the first half of my quilt top complete! When I finish the second half, I'll return with a tutorial for pressing and trimming. In the meantime, you can get your paper pieces here!